Cartech - All About Auto

Textual description of firstImageUrl

How to Test an Alternator with A Multimeter

Auto Repair Image

How to test an alternator with a multimeter can be easy if you just know the proper way to do it. Just follow the simple procedure mentioned.


An automobile has many electrical devices, such as the starting system, lights, radio, etc. These devices are operated by the electric current supplied from the battery and alternator. The amount of power generated depends on the alternator specification and engine speed. Power generation is automatically controlled according to the battery condition and the car’s electrical consumption (load) at a specific time. Generally, when the engine runs at idle the battery discharges, and as the engine speed increases the battery is charged by the alternator.

Parts of a car alternator and function

Auto Repair Image

• Rotor.The rotor is the one that rotates (that’s why it is called rotor), it is simply a rotating magnetic field. The rotor generates magnetism as the current flows through it. When the rotor turns, electricity is generated in the stator. The voltage for the rotor is supplied by the voltage regulator through the brushes and the slip rings.

• Stator (armature coil).The stator is called “stator” because it is stationary, the stator is attached to the body with three separate windings connected to the external circuit through the rectifier bridges consist of six diodes. As the rotor turns, the magnetic force passing through the stator changes, and this change causes an electric current to flow through the stator coil.

• Diode assembly. The diodes are used to rectify the alternating current (AC) generated in the stator to obtain direct current (DC).

• Brush and slip ring. Electricity is supplied to the rotating rotor through these parts.

• Fan. The diode has a comparatively low heat resistance and coil resistance decreases when cooled, so a fan is used to cool the diodes and coils in the alternator. The fan also cools the alternator with a built-in IC regulator.

• Pulley. The power from the engine is transmitted through the V-belt and the pulley to the rotor.

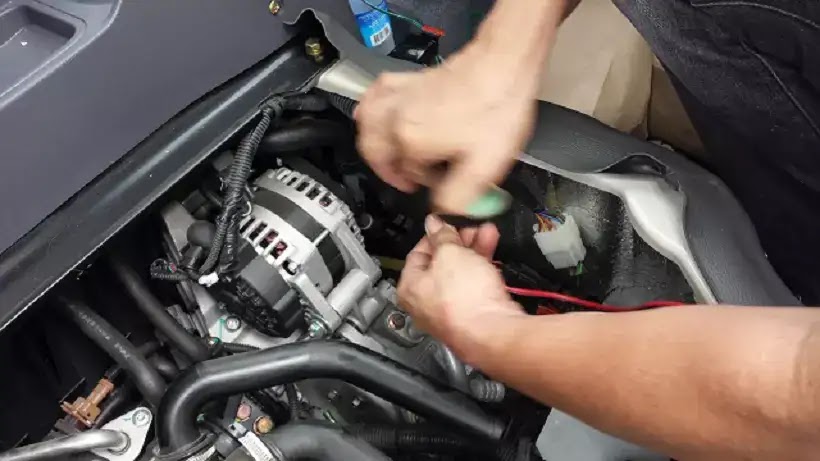
How to test car alternator

Before conducting to test car alternator, make sure that the battery is fully charged. A 30-volt voltmeter and suitable test probes are necessary for the test. The alternator can be checked easily by referring to the Inspection Table.

Check Alternator Belt and Terminal S Fuse

Check the alternator belt tension before starting the engine. Check the fuse of terminal S. When the ignition switch is ON, measure the voltage at terminal S with the terminal S connector disconnected. If it is 12V, the fuse and the wire from the fuse to terminal S are normal.

Auto Repair Image

Measure the voltage between the terminal L, S, and the ground. The condition of the car must be, the engine is stopped, the ignition switch shall be at ON position, the connector S shall be disconnected.

How to Test an Alternator with Multimeter

To test an alternator with a multimeter measure the output voltage at alternator terminal B. Test an alternator 0utput voltage, measure the output voltage at alternator terminal B. The battery voltage is usually about 12V. To charge the battery, a higher voltage (about 13V to 15V) is required. If the alternator output voltage is 13V or less, the battery continues discharging, thus the battery runs down.

Auto Repair Image

If the voltage is 13V or less, the alternator output is NG. As it is OK when the alternator output is 13V to 15V, measure the voltage at the positive terminal of the battery. If the battery voltage is 13V or less, there is a malfunction at terminal B or the wire harness. Check the connection status. Vehicles with the “Variable voltage generation system” have different voltage values.

How to Test an Alternator by Disconnecting Battery

How to test if your alternator is bad by simply disconnecting the battery? To test an alternator by disconnecting the battery, follow this simple step.

(1) Park the car on level ground, away from traffic, and engage the parking brake. Do not turn off the engine, just let the engine running.

(2) Now open the hood of the car, disconnect the battery, and observed if the engine will remain running. If the engine remains running then the alternator is fine. However, if the engine stopped after disconnecting the battery, then there is a problem with the alternator.

Inspection and disassembly of the alternator

Disassemble the alternator and inspect the internal part. Check each part for any problem.

(1) Remove the front cover through bolts.
Auto Repair Image

(2) Before removing the front cover, warm the rear cover with a soldering iron as shown in the illustration. The bearing at the rear end of the rotor can be easily removed from the rear cover. Excessive heating may damage the IC regulator or the diode. Do not use a dryer.

Auto Repair Image

(3) By tapping the flange of the front cover with a plastic hammer, the front cover and the rotor can be removed as an assembly from the stator and the rear cover.

Auto Repair Image

(4) Loosen the screw behind the rear cover, the screw of the IC regulator, and the nut of terminal B. Remove the stator assembly from the rear cover and check the following items.

Auto Repair Image

4.1 Brush
Inspect the brush condition of the alternator shown by the arrow. Check if the brush moves smoothly. If it doesn't, clean the brush. Is the brush worn? If it is worn, replace it. Remove the brush from the holder on the IC regulator assembly with a soldering iron as shown in the illustration.

Auto Repair Image

In the illustration, the upper brush has been worn after being used for 130,000 km. The lower brush is a new one, and the arrow shows the wear limit line.

Auto Repair Image

4.2 Test the alternator rotor
Test the alternator rotor using a digital voltmeter. Measure the resistance of the rotor at the slip rings. If it is not within the specified value, replace the rotor.

4.3 Insulation Test
Check the insulation resistance. Measure the resistance between the coil (slip ring) and the rotor body. Replace the rotor if continuity exists.

4.4 Slip Ring
Check the wear of the slip ring. If it is not within the specified value, replace the rotor.

4.5 Stator
Remove the diode assembly and check the following items.

Continuity test
No continuity: Replace the stator.
Assemble alternator and diagnose alternator output
1. Install the stator coil assembly on the rear cover and push away the brush with a finger until it is not visible as shown in the photo.

2. While pushing away the brush with a finger, insert a pin of appropriate thickness into the pinhole near the bearing boss at the back of the rear cover, to hold the brushes.

3. The brushes are held by the pin so that the rotor can be easily installed. Do not forget to remove the pin after assembly. Be sure to check the bearing. If unusual noise is heard. After assembly, make sure that the pulley turns smoothly and quietly.

How to Test Alternator Diode Rectifier

To diagnose the diode for the alternator, the diode can be diagnosed by measuring the output waveform as well. For measurement, the oscilloscope is used.

Measure the waveform with 0.1V/div and 2ms/div display mode. Since the alternator has 3-phase AC full-wave rectification, 6 peaks are displayed for one cycle of the alternator output.

If the diode(s) of the rectification circuit is (are) damaged, the waveform becomes unusual. If the output waveform is distorted, it becomes electric noise that affects the audio system and other electronic devices.

When diagnosing the alternator, measure the waveform. If an error is found, replace the diode. If the waveform is normal and the output voltage is excessively high, replace the IC regulator. If the output is low, check the brush, rotor, and stator.

Want more videos all about auto?
Subscribe to our YouTube channel! » Cartech Home

Textual description of firstImageUrl

What Makes an Alternator Go Bad?

All About Auto Image

The alternator is a crucial component in your car's electrical system. It keeps the battery charged and powers the electrical accessories when the engine is running. When the alternator fails, it can lead to a host of issues, including a dead battery, dimming lights, and even a stalled engine. In this article, we’ll explore what makes an alternator go bad, covering the common causes and signs of alternator failure. Understanding these factors can help you maintain your vehicle's health and avoid unexpected breakdowns.

What Is an Alternator and Why Is It Important?

Before diving into what makes an alternator go bad, it’s important to understand what the alternator does. The alternator converts mechanical energy from the engine into electrical energy. This electricity is used to power your car’s electrical systems, such as the headlights, radio, and air conditioning. It also recharges the car's battery, ensuring that it has enough power to start the engine.

When the alternator fails, these systems may lose power, and the battery can drain, leaving you stranded. Knowing the reasons behind alternator failure can help you take preventative measures and extend the life of this vital component.

Common Causes of Alternator Failure

There are several factors that can contribute to the deterioration of an alternator. Here’s a breakdown of what makes an alternator go bad:

1. Worn Out Bearings. One of the most common reasons an alternator goes bad is due to worn-out bearings. The alternator has moving parts, and these parts rely on bearings to function smoothly. Over time, the bearings can wear out due to friction and heat. When this happens, the alternator may make a grinding or whining noise. If the bearings are not replaced, the alternator can eventually seize up, leading to complete failure.

2. Damaged or Worn Belts. The alternator is driven by a belt connected to the engine. This belt, often referred to as the serpentine belt, can wear out or become damaged over time. A loose or broken belt will prevent the alternator from functioning properly. If the belt slips, it may not turn the alternator at the correct speed, leading to insufficient charging of the battery and eventual alternator failure.

3. Electrical Overload. An electrical overload occurs when the alternator is forced to work harder than it should. This can happen if there are too many electrical accessories running at once or if there’s a short circuit in the wiring. When the alternator is overloaded, it can overheat, causing damage to the internal components. Over time, this stress can lead to the alternator burning out.

4. Faulty Voltage Regulator. The voltage regulator is a component that controls the amount of electricity produced by the alternator. If the voltage regulator fails, it can cause the alternator to produce too much or too little electricity. An overcharging alternator can damage the battery and other electrical components, while an undercharging alternator will not adequately recharge the battery. Both scenarios can lead to alternator failure.

5. Contaminants. Dirt, oil, and other contaminants can also cause an alternator to go bad. These substances can get inside the alternator and cause corrosion or short circuits. For example, if oil leaks from the engine and makes its way into the alternator, it can damage the wiring and other components. Keeping your engine bay clean and free from leaks can help prevent this issue.

6. Age and Wear. Like all parts of your vehicle, the alternator has a limited lifespan. On average, an alternator can last between 80,000 to 150,000 miles. However, this can vary depending on driving conditions, the quality of the alternator, and how well the vehicle is maintained. Over time, the internal components of the alternator can wear out, leading to a decrease in performance and eventual failure.

7. Excessive Heat. Heat is the enemy of many car components, including the alternator. Excessive heat can cause the alternator's internal components to expand and contract, leading to wear and damage over time. If the alternator is located in a particularly hot area of the engine bay or if the engine frequently overheats, this can accelerate the alternator's decline.

Signs of a Failing Alternator

Recognizing the signs of a failing alternator can help you address the issue before it leads to a breakdown. Here are some common symptoms to watch out for:

1. Dim or Flickering Lights. If your headlights or interior lights dim or flicker, it could be a sign that the alternator is not providing enough power. This is often one of the first signs of alternator trouble.

2. Dead Battery. A dead battery is often the result of an alternator that is not charging properly. If you’ve had to jump-start your car multiple times, it’s worth having the alternator checked.

3. Warning Lights on the Dashboard. Most vehicles have a warning light on the dashboard that indicates alternator problems. This light may appear as a battery symbol or a "GEN" or "ALT" indicator. If this light comes on, it’s a clear sign that something is wrong with the charging system.


4. Strange Noises. Grinding, whining, or squealing noises coming from the engine bay can indicate alternator issues. These sounds may be caused by worn bearings or a slipping belt.

5. Electrical Failures. If your car’s electrical systems start to fail, such as the radio turning off unexpectedly or power windows not working, it could be due to a failing alternator.

6. Car Stalling or Difficulty Starting. If the alternator is not providing enough power to the engine, the car may stall or have difficulty starting. This is because the engine relies on electricity from the alternator to keep running.

How to Prevent Alternator Failure

Now that you know what makes an alternator go bad, you can take steps to prevent it. Here are some tips:

1. Regular Maintenance. Regularly inspect the alternator, belts, and wiring during routine maintenance. Replace worn belts and address any oil leaks or electrical issues promptly.

2. Avoid Electrical Overload. Be mindful of how many electrical accessories you use at once, especially when the car is idling. Turn off non-essential accessories to reduce the load on the alternator.

3. Keep the Engine Bay Clean. Regularly clean the engine bay to prevent dirt, oil, and other contaminants from damaging the alternator.

4. Monitor Warning Signs. Pay attention to any warning lights or unusual noises and address them as soon as possible.

5. Choose Quality Parts. If you need to replace your alternator, choose a high-quality replacement part to ensure longevity and reliability.

Final Thoughts

Understanding what makes an alternator go bad can help you take preventative measures and extend the life of this essential component. Worn bearings, damaged belts, electrical overload, and other factors can all contribute to alternator failure. By recognizing the signs of a failing alternator and taking steps to maintain your vehicle, you can avoid unexpected breakdowns and keep your car running smoothly. Regular maintenance, attention to warning signs, and choosing quality parts are key to ensuring your alternator stays in good working order.

Want more videos all about auto?
Subscribe to our YouTube channel! » Cartech Home

Textual description of firstImageUrl

Blue Smoke from Exhaust When Accelerating

All About Auto Image

Experiencing blue smoke from the exhaust when accelerating can be alarming for any car owner. This unusual occurrence often signals a deeper issue within your vehicle's engine, one that could lead to costly repairs if not addressed promptly. This article will explore the various reasons behind blue smoke from the exhaust when accelerating, its potential impacts on your vehicle, and the steps you can take to fix it. Whether you're a seasoned car enthusiast or a casual driver, understanding this issue is crucial for maintaining your car's health.

What Does Blue Smoke from the Exhaust Mean?

When you see blue smoke from the exhaust when accelerating, it typically indicates that your engine is burning oil. This happens when engine oil leaks into the combustion chamber and mixes with the fuel. The oil burns along with the fuel, producing a distinctive blue tint in the exhaust smoke. This problem can occur in various parts of the engine, and addressing it promptly can save you from more significant issues down the road.


Common Causes of Blue Smoke from Exhaust When Accelerating

1. Worn Piston Rings. One of the most common reasons for blue smoke from exhaust when accelerating is worn or damaged piston rings. Piston rings are crucial for maintaining the proper seal between the piston and the cylinder walls. When they wear out, oil can leak into the combustion chamber and burn, resulting in blue smoke. This issue is more pronounced during acceleration when the engine is under higher stress.

2. Valve Seal Problems. Valve seals are responsible for preventing oil from leaking into the engine's cylinders. Over time, these seals can wear out or crack, leading to oil seepage into the combustion chamber. This often results in blue smoke from the exhaust when accelerating. Valve seal problems are more common in older vehicles or those with high mileage.

3. Blown Head Gasket. A blown head gasket can cause a variety of issues, including blue smoke from exhaust when accelerating. The head gasket seals the engine block and cylinder head, preventing oil, coolant, and combustion gases from mixing. If the head gasket fails, oil can leak into the combustion chamber and burn, producing blue smoke. A blown head gasket is a severe issue that requires immediate attention to prevent further engine damage.

4. Turbocharger Problems. In vehicles equipped with a turbocharger, issues with the turbo can also lead to blue smoke from exhaust when accelerating. A worn or damaged turbocharger can allow oil to leak into the intake or exhaust system, leading to the burning of oil and the resulting blue smoke. Turbocharger problems often require specialized repairs or replacement of the unit.

5. PCV Valve Malfunction. The Positive Crankcase Ventilation (PCV) valve helps regulate the pressure in the engine by allowing gases to escape from the crankcase. If the PCV valve becomes clogged or malfunctions, it can cause oil to be pushed into the combustion chamber, leading to blue smoke from the exhaust when accelerating. Replacing the PCV valve is typically a simple and cost-effective solution.

6. Overfilled Oil Level. Overfilling your engine oil can also lead to blue smoke from the exhaust when accelerating. When there is too much oil in the engine, it can be forced into areas where it shouldn't be, such as the combustion chamber. Always ensure that your engine oil is at the correct level as specified by the manufacturer.

Effects of Blue Smoke from Exhaust When Accelerating

1. Increased Oil Consumption. When your engine burns oil, you'll notice that you need to top up the oil more frequently. This increased oil consumption is not only costly but also a clear sign that your engine is not operating correctly. Ignoring this issue can lead to more severe engine damage over time.

2. Reduced Engine Performance. Blue smoke from exhaust when accelerating often accompanies a drop in engine performance. The burning oil can foul spark plugs, reduce compression, and cause misfires, all of which contribute to a noticeable loss of power. Your vehicle may also struggle to accelerate smoothly, making driving less enjoyable and potentially dangerous.

3. Potential for Engine Damage. If left unaddressed, the causes of blue smoke from exhaust when accelerating can lead to significant engine damage. For example, worn piston rings or a blown head gasket can result in a loss of compression, overheating, and even complete engine failure. Repairing or replacing a damaged engine can be extremely expensive, so it's essential to address the issue as soon as possible.

Diagnosing Blue Smoke from Exhaust When Accelerating

1. Visual Inspection. Start by checking for any obvious signs of oil leaks around the engine. Look for oil stains or puddles under your vehicle, as these can indicate a problem. Also, inspect the exhaust pipe for any signs of oil residue, which can confirm that oil is being burned in the engine.

2. Compression Test. A compression test can help identify issues with the piston rings, head gasket, or cylinder walls. This test measures the pressure in each cylinder and can reveal whether there is a loss of compression due to oil leakage.

3. Check the PCV Valve. Inspect the PCV valve to ensure it is functioning correctly. A clogged or faulty PCV valve is a common cause of blue smoke from exhaust when accelerating and can be easily replaced if necessary.

4. Consult a Professional Mechanic. If you're unsure about the cause of the blue smoke from exhaust when accelerating, it's always a good idea to consult a professional mechanic. They can perform a more thorough diagnosis using specialized tools and equipment to pinpoint the exact cause of the issue.

Solutions to Blue Smoke from Exhaust When Accelerating

1. Replace Worn Piston Rings. If worn piston rings are the culprit, replacing them is the only permanent solution. This repair can be costly, as it involves significant labor to remove and disassemble the engine. However, it is necessary to restore your engine's performance and prevent further damage.

2. Repair or Replace Valve Seals. Replacing worn or damaged valve seals is a more straightforward and less expensive repair compared to piston rings. A mechanic can perform this repair relatively quickly, restoring proper engine function and eliminating blue smoke from the exhaust when accelerating.

3. Fix the Blown Head Gasket. A blown head gasket is a serious issue that requires immediate attention. The repair involves removing the cylinder head, replacing the gasket, and reassembling the engine. Although this repair can be expensive, it is essential to prevent catastrophic engine failure.

4. Turbocharger Repair or Replacement. If the turbocharger is causing the blue smoke from the exhaust when accelerating, it may need to be repaired or replaced. Turbocharger repairs can be complex and often require specialized knowledge, so it's best to leave this job to a professional mechanic.

5. Replace the PCV Valve. A malfunctioning PCV valve is one of the simplest and least expensive causes of blue smoke from exhaust when accelerating. Replacing the PCV valve is a quick fix that can resolve the issue and improve your engine's performance.

6. Correct the Oil Level. If overfilled oil is causing the blue smoke, the solution is as simple as draining the excess oil and ensuring the correct oil level. Always follow the manufacturer's guidelines for oil levels to avoid this issue.

💭 Final Thoughts

Blue smoke from exhaust when accelerating is a clear sign that your engine is burning oil, which can lead to a variety of problems if not addressed. By understanding the common causes, such as worn piston rings, valve seal problems, and blown head gaskets, you can take the necessary steps to diagnose and fix the issue. Regular maintenance and prompt repairs are essential to keep your vehicle running smoothly and to avoid costly repairs in the future. If you're experiencing blue smoke from your exhaust, don't ignore it—address the issue as soon as possible to protect your vehicle's engine and ensure a safe driving experience.

Want more videos all about auto?
Subscribe to our YouTube channel! » Cartech Home

Textual description of firstImageUrl

Is Blue Smoke from Your Exhaust Normal? Causes and Solutions

All About Auto Image

If you've noticed blue smoke billowing from your car's exhaust, you might be asking yourself, "Is blue smoke from your exhaust normal?" The short answer is no. Blue smoke is usually a sign of an underlying issue with your vehicle that requires immediate attention. In this article, we'll dive into what blue smoke from the exhaust means, what causes it, and how you can address the problem.

What Does Blue Smoke from the Exhaust Mean?

Blue smoke from your exhaust is a clear indicator that your engine is burning oil. While it might seem like a minor inconvenience, this is a serious issue that can lead to more significant problems if not addressed promptly. Engine oil is vital for lubricating engine components, reducing friction, and preventing wear and tear. When oil leaks into the combustion chamber and burns along with the fuel, it produces blue smoke that exits through the exhaust.

Is Blue Smoke from Your Exhaust Normal? Definitely not. It suggests that there's something wrong with your engine that needs fixing.

Common Causes of Blue Smoke from the Exhaust

Understanding the reasons behind blue smoke can help you determine the best course of action to take. Here are some of the most common causes:

1. Worn Piston Rings

• Piston rings seal the gap between the piston and the cylinder wall in the engine. Over time, these rings can wear out, allowing oil to leak into the combustion chamber. When this happens, the oil mixes with fuel and burns, resulting in blue smoke.

2. Valve Seal Problems

• The valve seals in your engine keep oil from leaking into the combustion chamber. If these seals wear out or become damaged, oil can seep into the cylinders and burn, causing blue smoke to appear from the exhaust.

3. Blown Head Gasket

• A blown head gasket is another common cause of blue smoke. The head gasket seals the engine block and cylinder head, preventing oil from leaking. If the gasket fails, oil can leak into the combustion chamber and cause blue smoke. This is a serious issue that requires immediate attention.

4. PCV Valve Malfunction

• The Positive Crankcase Ventilation (PCV) valve helps to prevent pressure buildup in the engine. If the PCV valve malfunctions, it can cause oil to enter the intake manifold, leading to oil burning and the appearance of blue smoke.

5. Turbocharger Issues

•For vehicles equipped with a turbocharger, blue smoke can indicate a problem with the turbo’s oil seals. If these seals wear out, oil can leak into the exhaust system and burn, causing blue smoke.

Is Blue Smoke from the Exhaust Dangerous?

Yes, blue smoke is a sign that something is wrong with your engine, and ignoring it can lead to severe damage. If left unchecked, the issues causing blue smoke can result in:

• Engine Damage. Continued oil burning can lead to a lack of lubrication, causing engine components to wear out faster.

• Reduced Performance. Oil leaking into the combustion chamber can reduce the efficiency of your engine, leading to a decrease in power and performance.

• Increased Emissions. Burning oil produces harmful emissions, which can cause your vehicle to fail an emissions test and contribute to environmental pollution.

What to Do If You Notice Blue Smoke from the Exhaust

If you notice blue smoke coming from your exhaust, it's crucial to take action immediately. Here's what you should do:

1. Check Your Oil Level
• The first step is to check your engine oil level. Low oil levels can indicate a leak, which might be the cause of the blue smoke. If the oil level is low, add the appropriate amount of oil and monitor the situation. However, adding oil is only a temporary fix—you’ll need to address the underlying cause.

2. Schedule a Diagnostic Check
• A professional mechanic can perform a diagnostic check to identify the exact cause of the blue smoke. Whether it’s worn piston rings, valve seals, or a blown head gasket, a mechanic will be able to pinpoint the issue and recommend the appropriate repairs.

3. Consider Engine Repairs or Rebuild
• Depending on the severity of the problem, you might need to consider more extensive repairs, such as replacing worn components or even rebuilding the engine. While this can be costly, addressing the issue promptly can save you from more significant expenses down the road.

4. Avoid Driving Until Repaired
• If possible, avoid driving your vehicle until the issue is resolved. Continuing to drive with blue smoke can lead to further engine damage and increase the risk of a complete engine failure.

Preventing Blue Smoke from the Exhaust

While it’s not always possible to prevent issues that cause blue smoke, regular maintenance can help reduce the risk. Here are some preventive measures:

• Regular Oil Changes. Changing your engine oil regularly ensures that it remains clean and effective at lubricating engine components. This can help prevent wear on piston rings and valve seals.

• Use High-Quality Oil. Using high-quality engine oil can provide better protection for your engine components and reduce the likelihood of leaks.

• Monitor Your Engine’s Performance. Pay attention to any changes in your vehicle’s performance. Unusual sounds, reduced power, or increased oil consumption can all be early signs of a problem.

Regular Inspections. Have your vehicle inspected by a professional mechanic regularly, especially if you notice any symptoms of a problem, such as blue smoke from the exhaust.

Final Thoughts : Is Blue Smoke from Your Exhaust Normal?

In summary, blue smoke from your exhaust is not normal and should not be ignored. It’s a sign that your engine is burning oil, which can lead to serious damage if left unaddressed. Common causes include worn piston rings, valve seal problems, a blown head gasket, and issues with the PCV valve or turbocharger.

If you notice blue smoke from your exhaust, it’s essential to take action immediately by checking your oil level, scheduling a diagnostic check, and avoiding driving until the issue is resolved. Regular maintenance and using high-quality oil can help prevent the problems that lead to blue smoke.

Remember, addressing blue smoke promptly can save you from costly repairs and keep your vehicle running smoothly. If you're ever in doubt, consult a professional mechanic to ensure your engine remains in good condition.

If you ever see blue smoke coming from your exhaust, don’t hesitate to consult a professional mechanic to diagnose and repair the issue. Remember, keeping your engine healthy is key to enjoying a reliable, efficient, and environmentally friendly vehicle.

Want more videos all about auto?
Subscribe to our YouTube channel! » Cartech Home

Textual description of firstImageUrl

Factors Affecting Fuel Economy of a Car

Fuel economy, the distance a vehicle can travel on a given amount of fuel, is a crucial consideration for both car manufacturers and consumers. Achieving optimal fuel economy not only saves money but also reduces environmental impact by lowering greenhouse gas emissions. Various factors influence a car's fuel economy, ranging from the vehicle's design and maintenance to driving habits and external conditions. This article explores these factors in detail.


1. Vehicle Design and Technology


• Engine Efficiency.The heart of any vehicle, the engine, significantly impacts fuel economy. Modern engines are designed to be more efficient through advanced technologies like direct fuel injection, turbocharging, and variable valve timing. These technologies allow for better control over the combustion process, improving fuel efficiency. For instance, direct fuel injection systems spray fuel directly into the combustion chamber, enhancing fuel-air mixing and reducing wastage.

• Transmission System.The type of transmission in a car affects its fuel consumption. Automatic transmissions with more gears can keep the engine running at optimal speeds, enhancing fuel efficiency. Continuously Variable Transmissions (CVTs) are particularly effective as they provide an infinite range of gear ratios, ensuring the engine operates efficiently regardless of speed.

• Aerodynamics.The design of a vehicle’s body impacts its aerodynamic efficiency. Vehicles with a lower drag coefficient face less air resistance, requiring less energy to maintain speeds. Features such as streamlined shapes, underbody panels, and active grille shutters reduce drag, contributing to better fuel economy.

• Weight Reduction.The heavier a vehicle, the more fuel it requires to move. Car manufacturers use lightweight materials such as aluminum, high-strength steel, and carbon fiber to reduce vehicle weight without compromising safety. This reduction in weight can lead to significant improvements in fuel efficiency.

2. Maintenance and Condition.


• Tire Pressure.Properly inflated tires reduce rolling resistance, making it easier for the vehicle to move. Underinflated tires increase resistance, causing the engine to work harder and consume more fuel. Regularly checking and maintaining tire pressure can improve fuel economy.

• Engine Maintenance. Regular engine maintenance, including timely oil changes, spark plug replacements, and air filter cleaning, ensures that the engine operates efficiently. A well-maintained engine performs better, consumes less fuel, and emits fewer pollutants.

• Alignment and Balance.Proper wheel alignment and balance ensure that the vehicle moves smoothly without unnecessary drag. Misaligned or unbalanced wheels can cause uneven tire wear and increase fuel consumption as the engine works harder to overcome resistance.

3. Driving Habits


• Speed. Driving at high speeds increases air resistance, which in turn raises fuel consumption. Most vehicles achieve optimal fuel efficiency at moderate speeds, typically between 50 and 60 miles per hour. Driving consistently within this range can improve fuel economy.

• Acceleration and Braking. Frequent rapid acceleration and hard braking waste fuel. Smooth and gradual acceleration and braking allow the vehicle to maintain momentum, reducing the energy required to accelerate from a stop. Anticipating traffic flow and maintaining a steady speed can significantly enhance fuel efficiency.

• Idling. Idling consumes fuel without moving the vehicle. Turning off the engine during prolonged stops can save fuel. Modern vehicles often come equipped with start-stop systems that automatically shut down the engine when the car is stationary and restart it when the accelerator is pressed.

4. External Conditions

• Terrain. Driving on hilly or mountainous terrain requires more fuel compared to flat roads due to the increased effort needed to climb inclines. On the other hand, downhill driving can enhance fuel economy as the vehicle can coast with minimal fuel consumption.

• Weather Conditions. Cold weather can reduce fuel economy as engines take longer to reach their optimal operating temperature, and the increased use of heaters and defrosters adds to fuel consumption. Conversely, using air conditioning in hot weather increases the load on the engine, reducing fuel efficiency.

• Road Conditions. Smooth, well-maintained roads allow for more efficient driving compared to rough, uneven, or congested roads. Poor road conditions can increase rolling resistance and cause frequent stops and starts, leading to higher fuel consumption.

5. Technological Advancements

• Hybrid and Electric Vehicles. Hybrid vehicles, which combine an internal combustion engine with an electric motor, offer improved fuel economy by utilizing electric power at lower speeds and during idling. Plug-in hybrids and fully electric vehicles further reduce or eliminate fuel consumption, depending on the extent of electric driving.


• Advanced Driver-Assistance Systems (ADAS). ADAS technologies, such as adaptive cruise control and eco-driving modes, help drivers maintain efficient driving habits. These systems adjust speed and acceleration to optimize fuel economy, reduce unnecessary braking, and promote smoother driving patterns.

6. Fuel Quality

The quality of fuel used can also affect a vehicle’s fuel economy. Higher-octane fuels can improve engine performance and efficiency, particularly in engines designed for such fuels. Additives in high-quality fuels can also keep the engine cleaner, enhancing overall fuel efficiency.

Final Thoughs

Fuel economy is influenced by a multitude of factors, each playing a significant role in determining how efficiently a vehicle uses fuel. Understanding these factors can help drivers and manufacturers take steps to optimize fuel consumption. From the initial design and technology incorporated into the vehicle, through regular maintenance and driving habits, to external conditions and technological advancements, every aspect can contribute to improved fuel economy. As the automotive industry continues to innovate, the future promises even greater advancements in fuel-efficient technologies, leading to cost savings for consumers and a reduced environmental footprint.

Want more videos all about auto?
Subscribe to our YouTube channel! » Cartech Home

Textual description of firstImageUrl

How to Activate Child Lock in a Car Guide for Parents

All About Auto Image

Ensuring the safety of your children while driving is a top priority for every parent. One critical safety feature that many vehicles offer is the child lock. This simple mechanism prevents children from accidentally opening car doors from the inside, giving parents peace of mind while on the road. In this guide, we'll walk you through the steps on how to activate child lock in a car so you can ensure your little ones stay safe during every trip.

What is a Child Lock?

Before we dive into the steps on how to activate child lock in a car, it's essential to understand what a child lock is and why it's necessary. A child lock is a safety feature installed in most modern cars that allows the rear doors to be locked, preventing them from being opened from the inside. This feature is crucial when traveling with young children who might accidentally or intentionally try to open the doors while the car is moving.

All About Auto Image

Why You Need to Activate the Child Lock

Accidents can happen in the blink of an eye, especially when young children are involved. Activating the child lock is a simple yet effective way to prevent such accidents. Here are a few reasons why you should activate the child lock in your car:

1. Prevent Accidental Door Openings. Children are naturally curious and may play with door handles out of curiosity. Activating the child lock ensures they won't accidentally open the door while the car is in motion.

2. Peace of Mind for Parents. Knowing that the doors are securely locked from the inside allows parents to focus on driving without constantly worrying about their children's safety.

3. Comply with Safety Regulations. In some regions, it’s legally required to use child locks when traveling with young children, adding an extra layer of safety and compliance.

How to Activate Child Lock in a Car

Now that you understand the importance of the child lock, let's get into the steps on how to activate child lock in a car. The process may vary slightly depending on your vehicle's make and model, but the general procedure is similar across most cars.


Step 1. Locate the Child Lock Mechanism

The first step in how to activate child lock in a car is to locate the child lock mechanism. In most vehicles, the child lock is located on the edge of the rear doors, near the latch. It’s usually a small switch or lever that can be moved to lock or unlock the doors from the inside.

• Consult the Owner's Manual. If you're having trouble locating the child lock, refer to your car's owner’s manual. The manual will provide detailed instructions and diagrams specific to your vehicle model.

Step 2. Activate the Child Lock

Once you've located the child lock mechanism, the next step in how to activate child lock in a car is to engage it. The process is usually straightforward:

1. Open the Rear Door. To access the child lock switch, open the rear door fully.
2. Flip the Switch or Lever. Depending on your car, the child lock mechanism will either be a small switch or lever. Flip the switch or move the lever to the “lock” position. This position is often labeled with a padlock symbol or the word "LOCK."

3. Test the Lock. After activating the child lock, close the door and attempt to open it from the inside. The door should not open if the child lock is correctly activated. However, it should still open from the outside.

Step 3. Repeat for All Rear Doors

For maximum safety, ensure that the child lock is activated on both rear doors. Repeat the steps above for the other rear door to ensure that both doors are securely locked from the inside.

Deactivating the Child Lock

Knowing how to deactivate the child lock is just as important as knowing how to activate child lock in a car. There may be times when you need to allow rear passengers to exit the car independently, such as when transporting older children or adults.

To deactivate the child lock:


1. Locate the Child Lock Mechanism. Open the rear door and locate the child lock switch or lever.

2. Flip the Switch or Lever. Move the switch or lever back to the “unlock” position, usually indicated by an open padlock symbol or the word "UNLOCK."

3. Test the Door. Close the door and attempt to open it from the inside. The door should open if the child lock has been successfully deactivated.

Common Questions About Activating Child Lock


1. Can I Activate the Child Lock While the Car is in Motion?
No, you should not attempt to activate the child lock while the car is in motion. For safety reasons, always activate or deactivate the child lock when the vehicle is stationary.

2. Does Activating the Child Lock Affect the Power Windows?
No, activating the child lock does not affect the operation of power windows. However, some vehicles have a separate window lock feature that you can activate to prevent children from operating the windows.

3. What if I Can’t Find the Child Lock Switch?
If you're unable to locate the child lock switch, consult your vehicle's owner’s manual or contact your car manufacturer for assistance. Some older car models might not have a child lock feature.

4. Is the Child Lock Available on All Vehicles?
While the child lock is a common feature in most modern vehicles, it might not be available on older models or specific car types. Always check your vehicle’s specifications to ensure it includes this safety feature.

Final Thoughts

Understanding how to activate child lock in a car is essential for every parent or caregiver who transports young children. This simple safety feature can prevent accidental door openings, ensuring that your children are secure during every journey. By following the steps outlined in this guide, you can easily activate and deactivate the child lock as needed, giving you peace of mind and keeping your little ones safe.

Remember, the safety of your passengers, especially children, is paramount. Take a moment to activate the child lock in your car today and enjoy a safer driving experience.

By following these simple steps on how to activate child lock in a car, you’ll be well on your way to ensuring a secure and stress-free ride for you and your family.

Want more videos all about auto?
Subscribe to our YouTube channel! » Cartech Home

Textual description of firstImageUrl

How Do You Bargain with a Car Salesman?

All About Auto Image

Buying a car is a significant investment, and negotiating the best deal can be a daunting task. Car salesmen are skilled negotiators, but with the right strategies, you can walk away with a deal that suits your budget and needs. This article will guide you through the process of how to bargain with a car salesman effectively.

1. Do Your Research

Before stepping into a dealership, arm yourself with knowledge. Understanding the market value of the car you’re interested in is crucial. Use online resources like Kelley Blue Book, Edmunds, or TrueCar to get an idea of the fair price for the make and model you want. Additionally, research any ongoing promotions, incentives, or rebates offered by the manufacturer. Knowing the car's invoice price, which is what the dealer pays the manufacturer, can also give you a strong negotiating position.

2. Know Your Budget

Set a firm budget before you begin negotiations. Determine the maximum amount you are willing to spend, including taxes, fees, and any add-ons you might want. It’s easy to get caught up in the excitement of buying a new car, but sticking to your budget is essential. Remember, car salesmen may try to upsell you on features or services you don’t need. Be clear about what you want and what you can afford.

3. Get Pre-Approved for a Loan

One of the best ways to strengthen your bargaining position is by securing pre-approval for a car loan from a bank or credit union before visiting the dealership. This gives you a clear idea of what you can afford and shows the dealer that you are a serious buyer. Additionally, it allows you to compare the dealership's financing options with those from your lender, giving you leverage to negotiate better terms.

4. Visit Multiple Dealerships

Don’t settle for the first dealership you visit. Shopping around gives you the opportunity to compare prices and offers from different dealers. It also puts you in a stronger position to negotiate, as you can use quotes from one dealership as leverage at another. Let each dealer know that you are considering offers from multiple places; this may motivate them to give you a better deal.

5. Time Your Purchase

Timing can significantly impact the deal you get. Car dealerships often have monthly, quarterly, and annual sales targets. The end of these periods, especially the end of the month or year, can be a great time to negotiate, as salesmen may be more willing to lower prices to meet their quotas. Additionally, consider shopping for a car during the holiday season or when a new model is about to be released, as dealerships may offer discounts on outgoing models.

6. Start with a Low Offer

When you’re ready to start negotiating, begin with an offer that’s lower than what you’re actually willing to pay. This gives you room to negotiate upwards. The car salesman will likely counter your offer, and from there, you can gradually work toward a mutually agreeable price. Be prepared for some back-and-forth, and don’t be afraid to stand firm on your offer. Remember, the salesman’s initial counteroffer is often just a starting point.

7. Negotiate the Price, Not the Monthly Payment

Car salesmen often focus on monthly payments, as this can make a car seem more affordable than it actually is. However, it’s essential to negotiate the total price of the car first. Once you’ve agreed on a price, then you can discuss financing options and monthly payments. Focusing on the overall price ensures that you’re not paying more than you should over the life of the loan.

8. Be Prepared to Walk Away

One of the most powerful tools in your negotiation arsenal is the willingness to walk away. If the dealer isn’t meeting your price or is pressuring you into a deal you’re not comfortable with, don’t be afraid to leave. There are plenty of dealerships, and you don’t have to settle for a deal that doesn’t work for you. Often, walking away can lead the salesman to reconsider their offer and come back with a better deal.

9. Watch Out for Add-Ons

After you’ve agreed on a price, the dealership may try to sell you additional features or services, such as extended warranties, paint protection, or gap insurance. While some of these may be worthwhile, others can be overpriced or unnecessary. Before agreeing to any add-ons, do your research to determine if they’re worth the cost. If you’re not interested, politely decline and stick to the agreed-upon price.

10. Review All Paperwork Carefully

Once you’ve finalized the deal, it’s time to review the paperwork. This step is crucial, as mistakes or hidden fees can cost you money. Carefully read through the contract, making sure that all the terms are as you agreed upon. Check for any additional charges that weren’t discussed during negotiations, and don’t hesitate to ask for clarification if something doesn’t seem right. Only sign the paperwork once you’re satisfied that everything is in order.

11. Consider Certified Pre-Owned or Used Cars

If you're open to it, consider looking at certified pre-owned (CPO) or used cars. These vehicles can offer significant savings compared to new cars while still being in excellent condition. CPO vehicles, in particular, often come with warranties and have undergone rigorous inspections. The principles of negotiation still apply, and you may have even more room to bargain since used cars have more flexible pricing.

12. Understand Trade-In Value

If you’re trading in your old car, understand its value before you negotiate. Websites like Kelley Blue Book or Edmunds can give you a good estimate of your trade-in’s worth. It’s usually better to negotiate the price of the new car first before discussing the trade-in. This prevents the dealer from manipulating the numbers to give you less for your trade-in while appearing to offer a better deal on the new car.

Final Thoughts

Bargaining with a car salesman can be intimidating, but with the right preparation and mindset, you can secure a deal that’s favorable to you. Remember to do your research, know your budget, and be prepared to walk away if necessary. By following these steps, you’ll be in a strong position to negotiate and drive away in the car of your dreams without breaking the bank.

Want more videos all about auto?
Subscribe to our YouTube channel! » Cartech Home

Textual description of firstImageUrl

Mesothelioma the Asbestos Exposure Risk in Brakes

All About Auto Image

Mesothelioma is a rare but aggressive form of cancer primarily affecting the lining of the lungs (pleura), abdomen (peritoneum), and in some cases, the heart (pericardium). This deadly disease is almost exclusively caused by exposure to asbestos, a group of naturally occurring minerals that were widely used in various industries for their fire-resistant properties. One of the lesser-known sources of asbestos exposure is automotive brakes, a risk factor that has significant implications for mechanics, automotive workers, and even car owners. This article will explore how asbestos in brakes can lead to mesothelioma, shedding light on the exposure risks and how to mitigate them.

What is Mesothelioma?

Mesothelioma is a form of cancer that develops in the mesothelium, a thin layer of tissue that covers most of our internal organs. The most common form is pleural mesothelioma, which affects the lining of the lungs. This disease is notoriously difficult to treat, often diagnosed at an advanced stage due to its long latency period, sometimes taking 20-50 years after exposure to asbestos for symptoms to appear. These symptoms may include shortness of breath, chest pain, and fluid buildup around the lungs, making early detection challenging.

Asbestos and its Link to Mesothelioma

The connection between asbestos and mesothelioma is well-documented. When asbestos fibers are inhaled or ingested, they can become lodged in the mesothelium, causing inflammation and scarring. Over time, these fibers can trigger genetic changes in the cells of the mesothelium, leading to uncontrolled cell growth and the development of tumors. Despite being heavily regulated today, asbestos was once widely used in construction materials, insulation, and automotive parts, including brake linings and pads.

Asbestos in Automotive Brakes

During the 20th century, asbestos was a common component in automotive brakes due to its durability and resistance to heat. The friction generated during braking produces high temperatures, and asbestos was ideal for absorbing and dissipating this heat without degrading. However, this use of asbestos in brake components posed significant health risks, especially to those regularly exposed to brake dust.

When brakes are applied, the friction between the brake pads and rotors generates dust, which can contain asbestos fibers if the brakes were made with asbestos-containing materials. Mechanics and automotive workers who service brakes, especially in older vehicles, are at risk of inhaling these asbestos fibers. Even car owners who perform their brake maintenance or regularly drive older vehicles might be unknowingly exposing themselves to these dangerous fibers.

The Risk of Mesothelioma from Brake Exposure

The risk of developing mesothelioma from asbestos in brakes is a serious concern, particularly for individuals with prolonged or repeated exposure. Mechanics and automotive professionals who regularly work on vehicles, especially those manufactured before the 1980s, are at the highest risk. During brake repair or replacement, asbestos fibers can be released into the air, where they can be easily inhaled.

Although the concentration of asbestos in brake dust is generally lower than in other industrial applications, repeated exposure over time can still lead to significant health risks. Studies have shown that even low-level exposure to asbestos can cause mesothelioma. This is why it’s crucial for those in the automotive industry to take appropriate safety precautions when working with brakes and other vehicle components that may contain asbestos.

By the time a patient is referred to a mesothelioma doctor for treatment, it is usually too late for cancer to be treated effectively. Occupational asbestos exposure has led to many auto mechanics and other workers filing lawsuits for mesothelioma compensation.

Regulations and the Decline of Asbestos Use in Brakes

Due to the well-established link between asbestos and mesothelioma, regulatory bodies in many countries have implemented strict regulations on the use of asbestos. In the United States, the Environmental Protection Agency (EPA) and the Occupational Safety and Health Administration (OSHA) have established guidelines and regulations to limit asbestos exposure in the workplace. The use of asbestos in automotive brakes has significantly declined since the 1980s, with many manufacturers switching to safer alternatives.

However, asbestos-containing brakes are still present in older vehicles, particularly in classic cars or imported vehicles from countries where asbestos regulations are less stringent. This means that the risk of exposure is not entirely eliminated, and proper precautions are still necessary.

Protecting Yourself from Asbestos Exposure in Brakes

For those working in the automotive industry or even car enthusiasts who work on their vehicles, understanding the risks of asbestos exposure from brakes is crucial. Here are some steps to protect yourself:

Wear Protective Gear: Always wear protective clothing, gloves, and a high-efficiency particulate air (HEPA) filter mask when working on brakes, especially when dealing with older vehicles.

Use Wet Methods. Wetting the brake components before working on them can help reduce the amount of asbestos dust that becomes airborne. Using brake cleaners specifically designed to encapsulate asbestos fibers can also be effective.

Work in Well-Ventilated Areas. Ensure that the workspace is well-ventilated to minimize the concentration of asbestos fibers in the air. Using local exhaust ventilation (LEV) systems can help capture airborne fibers at the source.

Proper Disposal of Waste. Asbestos-containing waste, such as used brake pads and dust, should be disposed of following local regulations. Improper disposal can lead to further contamination and exposure.

Regular Health Screenings. For those with a history of prolonged asbestos exposure, regular health screenings for respiratory conditions, including mesothelioma, are important. Early detection can improve treatment outcomes.

Final Thoughts

Mesothelioma is a devastating disease, and its primary cause—exposure to asbestos—makes it largely preventable. While the use of asbestos in automotive brakes has declined significantly, the risk of exposure still exists, particularly for those working with older vehicles. By understanding the link between mesothelioma and asbestos in brakes, taking appropriate safety measures, and staying informed about the risks, individuals can protect themselves and reduce the likelihood of developing this deadly cancer.

The fight against mesothelioma continues, and awareness is a crucial weapon in that battle. For those in the automotive industry or anyone who regularly works on vehicles, understanding the risks associated with asbestos exposure in brakes is essential. By taking the necessary precautions, you can safeguard your health and reduce the risk of mesothelioma, ensuring that your work or hobby does not come at the cost of your well-being.

Want more videos all about auto?
Subscribe to our YouTube channel! » Cartech Home