Cartech - All About Auto

Textual description of firstImageUrl

Power Steering Stiff When Turning: Causes, Symptoms, Fixes

Cartech image

Driving a vehicle should be a smooth experience, especially when it comes to steering. But what happens when the power steering becomes stiff while turning? This issue can be alarming and uncomfortable, affecting your ability to control the vehicle properly. In this article, we will explore why your power steering might feel stiff when turning, common causes, symptoms to watch for, and how you can fix the problem.

👉What is Power Steering?

Power steering is a system designed to make it easier for drivers to steer the vehicle, especially at lower speeds. It reduces the physical effort required to turn the steering wheel, allowing smoother and more controlled maneuvering. Modern vehicles are equipped with either hydraulic power steering (HPS) or electric power steering (EPS), each using different mechanisms to assist with steering.

In hydraulic power steering, fluid is used to generate the pressure needed to assist with steering. Meanwhile, electric power steering relies on electric motors and sensors to provide assistance. When everything is working properly, the power steering should make turning your vehicle a breeze. But if something goes wrong, you may notice that the steering becomes stiff, especially when making turns.

👉Common Symptoms of Power Steering Stiffness

If your power steering is stiff when turning, it's important to understand the symptoms associated with this problem. Here are some signs that you might notice:

1. Increased Effort Required to Turn the Wheel: One of the most obvious signs is that the steering wheel feels harder to turn, especially at low speeds or while parking.

2. Whining or Squealing Noise: If you hear unusual noises when turning the steering wheel, it could indicate a problem with the power steering system. These noises may suggest a lack of power steering fluid or a failing pump.

3. Steering Wheel Jerking or Pulsating: If the steering wheel feels jerky or pulsates as you turn, it may be a sign of an underlying issue within the power steering system.

4. Uneven Steering: You may notice that the steering wheel feels stiff in one direction but not the other. This can be caused by a mechanical problem in the steering rack or a hydraulic issue.

5. Steering Fluid Leaks: Fluid under your vehicle could be a sign of a leak in the power steering system, which can result in stiff steering.

👉Why is Power Steering Stiff When Turning?

If your power steering is stiff when turning, there are several potential causes. Here are the most common reasons for this issue:

1. Low or Contaminated Power Steering Fluid

Power steering fluid is essential for hydraulic power steering systems. This fluid transmits the necessary pressure to make steering easier. When the fluid level is low, it causes increased friction within the system, making the steering wheel hard to turn. Additionally, if the fluid becomes contaminated with dirt or debris, it can thicken and lose its effectiveness.

Solution: Regularly check your power steering fluid level and top it off if necessary. If the fluid is dirty, flush the system and replace it with clean fluid as per your vehicle manufacturer’s recommendations.

2. Power Steering Pump Failure

The power steering pump is responsible for generating the hydraulic pressure that assists with steering. If the pump is damaged or worn out, it can fail to provide adequate pressure, resulting in stiff steering. A failing pump may also make whining or groaning noises, indicating it's struggling to function properly.

Solution: If the power steering pump is failing, it may need to be replaced. A professional mechanic can diagnose the issue and recommend the appropriate repair.

3. Belt Problems

In vehicles with hydraulic power steering, the power steering pump is driven by a belt. If the belt is loose, worn, or damaged, it may slip, reducing the pump’s ability to generate hydraulic pressure. As a result, the steering can become stiff and unresponsive.

Solution: Inspect the serpentine or drive belt for signs of wear, cracks, or looseness. Replace or tighten the belt as needed to restore proper steering functionality.

4. Steering Rack Issues

The steering rack is a key component that connects the steering wheel to the wheels of the vehicle. Over time, the rack can wear out or become damaged, leading to stiffness when turning the wheel. This problem is more noticeable when turning at low speeds.

Solution: If the steering rack is worn or damaged, it may need to be repaired or replaced. This is typically a more involved repair, requiring the expertise of a mechanic.
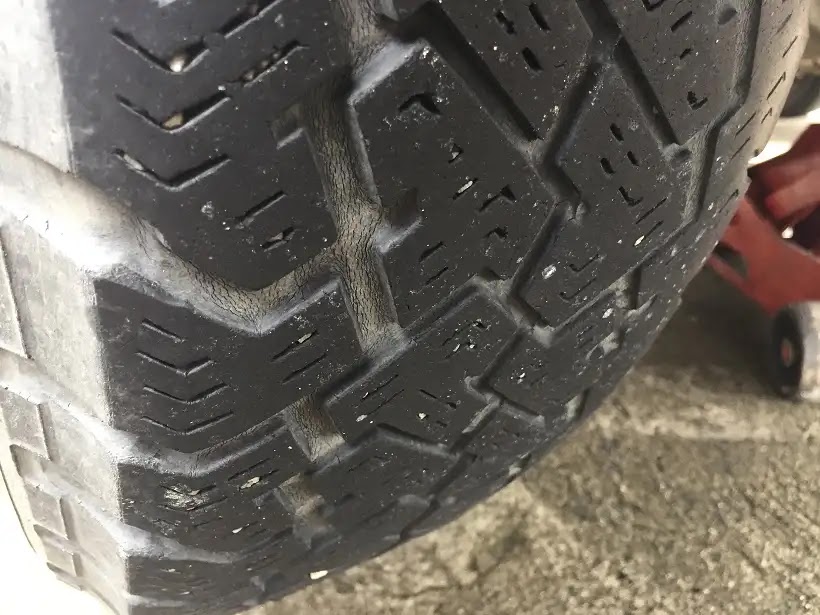
5. Tire Pressure Imbalance

Though it may seem unrelated, tire pressure can affect the ease of steering. Low or uneven tire pressure can increase the resistance when turning, making the steering wheel feel stiffer than usual.

Solution: Regularly check your tire pressure to ensure it is at the recommended level for your vehicle. Inflate your tires as needed to ensure smooth steering performance.

6. Wheel Alignment Problems

Improper wheel alignment can create resistance when turning the steering wheel. Misalignment can occur due to hitting potholes, curbs, or as a result of normal wear and tear. In addition to stiff steering, you may notice uneven tire wear and the vehicle pulling to one side.

Solution: Get your wheel alignment checked by a professional and have it adjusted if necessary. Proper alignment not only improves steering but also extends the life of your tires.

7. Faulty Steering Column

The steering column houses various mechanical components that connect the steering wheel to the steering rack. If any of these components become worn or damaged, it can make steering more difficult and stiff.

Solution: A faulty steering column may need to be repaired or replaced, depending on the extent of the damage.

8. Electric Power Steering (EPS) Problems

For vehicles with electric power steering, a failure in the electrical components—such as the EPS motor, sensors, or wiring—can lead to stiff steering. EPS systems rely on electronic signals to provide steering assistance, so any disruption in this system can make the steering wheel hard to turn.

Solution: A diagnostic check using specialized equipment may be needed to identify the problem. Repairs may include replacing the EPS motor or addressing issues with sensors or wiring.

👉Diagnosing Power Steering Problems

If you're experiencing power steering stiffness when turning, it's important to diagnose the issue properly before attempting repairs. Here's a step-by-step guide for identifying the root cause:

Step 1: Check Power Steering Fluid

Start by checking the power steering fluid level and condition. If the fluid is low, top it up and monitor the level over time to check for leaks. If the fluid looks dark or dirty, it may need to be flushed and replaced.

Step 2: Inspect the Power Steering Pump

Listen for any unusual noises coming from the power steering pump, such as whining or groaning. These sounds may indicate that the pump is failing. You can also check the power steering belt for signs of wear or looseness.

Step 3: Look for Leaks

Examine the power steering hoses, lines, and seals for signs of leaks. Fluid leaks can reduce the effectiveness of the system and lead to stiff steering.

Step 4: Check the Tires and Alignment

Inspect your tire pressure and ensure it is at the correct level. Additionally, have your wheel alignment checked, especially if you've recently hit a curb or pothole.

Step 5: Assess the Steering Rack and Column

If you suspect a problem with the steering rack or column, have a professional mechanic inspect these components. They can determine if they are worn or damaged and recommend the appropriate repair.

Step 6: Diagnostic Check for EPS Systems

If your vehicle has electric power steering and the steering is stiff, a diagnostic scan may be necessary to identify electrical issues. A mechanic can check for error codes related to the EPS

👉Preventing Power Steering Problems

To avoid future problems with stiff steering, regular maintenance is key. Here are some preventive measures you can take:

• Regular Fluid Checks: Keep an eye on your power steering fluid levels and replace the fluid at the intervals recommended by your vehicle’s manufacturer.

• Routine Belt Inspections: Check the condition of the power steering belt and replace it if it shows signs of wear or damage.

• Tire Maintenance: Ensure your tires are inflated to the correct pressure and have your wheel alignment checked periodically.

• Professional Inspections: Have your power steering system inspected by a mechanic during routine maintenance to catch any potential issues early.

💬Final Thoughts

Experiencing power steering stiffness when turning can be frustrating and unsafe, but it is a problem that can usually be resolved with proper diagnosis and repairs. Whether it's a low fluid level, a failing power steering pump, or an issue with the electric steering system, addressing the issue promptly will restore smooth and responsive steering to your vehicle.

By following the steps outlined in this article and staying proactive with your vehicle's maintenance, you can prevent power steering problems from affecting your driving experience.

💬Final Thoughts

Too much car engine idle vibration can be both annoying and a sign of more serious underlying issues. Understanding the causes, such as worn engine mounts, faulty spark plugs, or vacuum leaks, can help you address the problem promptly. Regular maintenance and attention to

< br />

Want more videos all about auto?
Subscribe to our YouTube channel👉Cartech Home

Textual description of firstImageUrl

What Causes White Smoke from Exhaust: A Comprehensive Guide

Cartech image

White smoke coming from your car’s exhaust is often a sign of an underlying issue that needs immediate attention. While it may seem harmless, white smoke can indicate anything from condensation to more severe problems, such as a blown head gasket or a malfunctioning turbocharger. In this article, we will explore what causes white smoke from exhaust, the significance of white smoke in the morning, and why it might occur when revving your engine.

👉Understanding Exhaust Smoke: What’s Normal and What’s Not

Before diving into the causes of white smoke from exhaust, it’s essential to understand that not all exhaust smoke is abnormal. Car exhaust can produce different colors of smoke, each indicating specific issues:

• Black Smoke: Often a sign of an overly rich fuel mixture, where too much fuel is being burned.

Blue Smoke: Typically indicates oil burning within the engine, often due to worn-out piston rings or valve seals.

• White Smoke: Can indicate either condensation (harmless) or serious issues like coolant leaks, depending on the duration and thickness of the smoke.

While a small puff of white smoke may not be a concern, continuous white smoke signals something is wrong with your engine’s internal components.

👉What Causes White Smoke from Exhaust?

There are several reasons why white smoke might come from your car’s exhaust. Here are the most common causes:

1. Coolant Leak into the Engine (Blown Head Gasket)

One of the primary causes of white smoke from the exhaust is coolant leaking into the combustion chamber, which typically results from a blown head gasket. The head gasket serves as a seal between the engine block and the cylinder head, preventing the mixing of coolant, oil, and fuel.

Cartech image

When the head gasket fails, coolant can seep into the combustion chamber and burn alongside fuel. This combustion produces thick white smoke, often with a sweet smell, as the coolant evaporates through the exhaust system.

Symptoms of a blown head gasket:
• Constant white smoke from the exhaust
• Engine overheating
• Loss of coolant without visible leaks
• Milky oil on the dipstick (oil mixed with coolant)

If left unresolved, a blown head gasket can lead to severe engine damage, requiring costly repairs or even an engine replacement.

2. Cracked Engine Block or Cylinder Head

A crack in the engine block or cylinder head can also lead to coolant leaking into the combustion chamber. Like a blown head gasket, this results in white smoke from the exhaust. Cracks can form due to overheating, which causes metal components to expand and warp.

Symptoms of a cracked engine block or cylinder head:
• White smoke from the exhaust, especially during startup
• Engine misfires
• Loss of engine performance
• Coolant loss without visible leaks

In this case, professional repair or engine replacement is often necessary, as cracks in these components can compromise engine integrity.

3. Faulty Fuel Injector

Fuel injectors spray fuel into the combustion chamber, where it mixes with air for ignition. If a fuel injector is stuck open or malfunctioning, it can cause excess fuel to be burned, leading to white smoke from the exhaust.

Cartech image
Symptoms of a faulty fuel injector:
• White smoke from the exhaust, especially when revving
• Poor fuel efficiency
• Engine misfires
• Rough idling

Replacing or cleaning the faulty injector can resolve this issue, improving performance and fuel efficiency.

4. Damaged Turbocharger

If your car is equipped with a turbocharger, white smoke from the exhaust could be a sign of turbo failure. A damaged or worn turbocharger can allow oil or coolant to enter the exhaust system, leading to the production of white smoke.

Cartech image
Symptoms of turbocharger failure:
• White smoke when revving the engine
• Loss of power or acceleration
• High-pitched whine from the turbo
• Check engine light

Turbocharger repairs can be expensive, so catching the issue early is crucial to avoid further damage.

5. Condensation (Normal White Smoke)

It’s essential to distinguish between harmless white smoke and problematic smoke. In cold weather, you might notice thin white smoke from the exhaust, especially in the morning. This is usually condensation burning off and is entirely normal.

Condensation forms in the exhaust system when water vapor produced during combustion cools and condenses in the exhaust pipes overnight. Upon starting the car in the morning, the heat of the engine burns off this water vapor, resulting in a brief puff of white smoke.

Normal condensation smoke characteristics:
• Occurs only in cold weather
• Lasts for a few minutes after engine startup
• Disappears as the engine warms up

If the white smoke continues after the engine has warmed up, it could indicate a more severe issue, such as a coolant leak.

👉White Smoke from Exhaust in the Morning

As mentioned earlier, white smoke from the exhaust in the morning is often due to condensation burning off. However, persistent white smoke after the engine has warmed up could point to underlying problems. Here are potential causes:

1. Coolant Leak

A slow coolant leak might result in white smoke primarily during startup. When the engine is cold, the coolant could seep into the combustion chamber, producing white smoke upon ignition. As the engine heats up, the leak may diminish, reducing the amount of white smoke visible later in the day.

2. Oil Leak into the Combustion Chamber

Another cause of white smoke in the morning could be oil leaking into the combustion chamber. Overnight, oil may drip past worn seals or piston rings and burn off when the engine starts, causing white smoke. This issue typically worsens over time and can lead to significant engine problems if left unresolved.

👉White Smoke from Exhaust When Revving

If you notice white smoke from the exhaust when revving the engine, this could signal a more serious mechanical issue. Here are common causes:

1. Turbocharger Issues

As discussed earlier, a failing turbocharger can allow oil or coolant to enter the exhaust, especially when revving the engine. When you increase engine RPMs, the turbo works harder, which can exacerbate the issue and lead to white smoke.

2. Blown Head Gasket

A blown head gasket can cause white smoke when revving, as coolant leaks into the combustion chamber at higher engine pressures. The increase in pressure from revving forces more coolant through the faulty gasket, leading to more visible white smoke.

3. Transmission Fluid Leak (Automatic Cars)

In rare cases, white smoke could be caused by transmission fluid leaking into the engine. This is more common in cars with automatic transmissions that have a vacuum modulator valve. If the modulator fails, transmission fluid can be sucked into the intake manifold and burned in the engine, producing white smoke when revving.

Symptoms of a transmission fluid leak:
• White smoke from the exhaust when revving
• Difficulty shifting gears (in automatic cars)
• Low transmission fluid levels

If this issue occurs, the vacuum modulator valve will likely need to be replaced.

👉Diagnosing White Smoke from Exhaust

Identifying the root cause of white smoke requires a step-by-step diagnosis:

1. Check for Coolant Leaks

Check your coolant levels and look for any visible leaks around the engine. If your coolant level is low and you notice white smoke, this could indicate a head gasket issue or a cracked engine component.

2. Inspect the Engine Oil

Look at the engine oil on the dipstick. If it appears milky or frothy, this indicates that coolant has mixed with the oil, signaling a blown head gasket.

3. Monitor the Turbocharger (If Applicable)

If your car has a turbocharger, listen for unusual sounds (such as a high-pitched whine) and observe the amount of smoke when revving the engine. Excessive smoke when revving could point to a turbo failure.

4. Check for Fuel Injector Issues

If your car emits white smoke primarily when revving, inspect the fuel injectors for any malfunctions. A stuck or faulty injector can cause excess fuel to burn, resulting in white smoke.

👉Preventive Maintenance to Avoid White Smoke from Exhaust

Regular car maintenance is crucial in preventing white smoke from the exhaust and other engine problems. Here are some key preventive steps:

• Regularly Check Coolant Levels: Keeping an eye on your coolant levels can help you spot leaks early.

• Monitor Oil Levels and Quality: Ensure your oil is changed regularly and inspect it for signs of contamination.

• Schedule Turbocharger Maintenance (If Applicable): Turbochargers require proper maintenance to function efficiently. Ensure that oil lines to the turbo are clean and free of debris.

• Address Engine Overheating Issues Promptly: Overheating can lead to cracked engine blocks, head gasket failure, and other significant problems. If your car is overheating, stop driving and have it inspected immediately.

💬Final Thoughs

White smoke from exhaust can range from a minor issue, such as condensation burning off in the morning, to severe engine problems like a blown head gasket or turbocharger failure. Understanding the causes of white smoke and recognizing the warning signs can help you address potential problems before they become costly repairs. If you experience persistent white smoke, especially when revving the engine or in the morning, it’s essential to have your vehicle inspected by a professional mechanic to prevent further damage. Proper maintenance and timely repairs can keep your car running smoothly and ensure that white smoke from the exhaust is nothing more than a harmless puff of condensation.


Want more videos Cartech?
Subscribe to our YouTube channel👉All About Auto
Textual description of firstImageUrl

What Causes a Car to Overheat?

cartech image

A car overheating is a common issue that can cause significant damage if not addressed quickly. When your engine's temperature exceeds normal operating levels, it can result in severe mechanical failure, leaving you stranded. Understanding the causes behind overheating is essential for preventing costly repairs and ensuring your vehicle remains in optimal condition. In this article, we will delve into the various factors that lead to engine overheating, how to prevent it, and the steps to take when you encounter this problem.

👉Understanding the Cooling System

Before diving into the causes of car overheating, it is important to understand how a vehicle's cooling system works. The cooling system plays a crucial role in regulating engine temperature by circulating coolant (a mixture of water and antifreeze) through the engine block and radiator. The system includes the following key components:

Cartech image

1. Radiator: The radiator transfers heat from the coolant to the outside air. It is equipped with a fan to improve airflow and cooling efficiency.

2. Water Pump: This pump circulates the coolant through the engine and the radiator to maintain a steady flow of coolant.

3. Thermostat: The thermostat controls the flow of coolant to the radiator by opening and closing based on the engine temperature.

4. Cooling Fans: These fans blow air over the radiator to help cool the coolant when the vehicle is stationary or moving slowly.

5. Hoses: These carry coolant between the engine and the radiator.

When any of these components malfunction or fail, it can lead to the engine overheating.

👉Common Causes of Car Overheating

Overheating occurs for several reasons, most of which stem from the failure of the cooling system components mentioned above. Let’s explore some of the most common causes of a car overheating.

1. Low Coolant Levels

One of the leading causes of car overheating is low coolant levels. Coolant plays a vital role in absorbing heat from the engine and dissipating it through the radiator. When the coolant level is too low, the system cannot effectively remove heat from the engine, causing it to overheat.

Common reasons for low coolant levels:
• Coolant leaks in the hoses, radiator, or water pump
• A loose radiator cap, which can cause coolant to evaporate
• Faulty radiator hoses that crack or burst
• Cracks in the engine block or cylinder head

2. Malfunctioning Thermostat

The thermostat is a small yet essential part of the cooling system. It regulates the flow of coolant by opening when the engine reaches a certain temperature and allowing the coolant to pass through to the radiator. If the thermostat is stuck in the closed position, the coolant cannot circulate properly, leading to rapid engine overheating.

3. Failed Water Pump

The water pump is responsible for circulating the coolant throughout the cooling system. A failed or malfunctioning water pump will disrupt this circulation, causing the engine to overheat quickly. Water pump failure can be due to worn bearings, broken impellers, or a faulty pulley. If you hear a grinding noise from the engine or notice coolant leaks near the front of the vehicle, it may be a sign that the water pump is failing.

4. Clogged Radiator

Over time, dirt, debris, and rust can build up inside the radiator, reducing its ability to efficiently transfer heat from the coolant to the outside air. A clogged radiator will not cool the engine as effectively, causing the engine temperature to rise. Regular radiator flushes can help prevent this issue, but if it’s severely clogged, it may need to be replaced.

5. Broken Radiator Fan

Radiator fans are designed to pull air through the radiator to cool the coolant when the car is stationary or moving at slow speeds. If the radiator fan fails or the fan motor malfunctions, the coolant will not cool down properly, resulting in overheating, particularly when idling or driving in heavy traffic.

6. Leaking Radiator

A leaking radiator can cause the coolant to escape, leading to low coolant levels and, ultimately, engine overheating. Common causes of radiator leaks include corrosion, cracked hoses, or damage to the radiator itself. Regular inspections can help identify leaks before they lead to major issues.

7. Coolant Hose Failure

Coolant hoses are responsible for carrying coolant between the radiator, engine, and other components. Over time, these hoses can become worn, brittle, or cracked, leading to leaks. When a hose fails, the cooling system cannot function properly, and the engine may overheat. It’s essential to inspect coolant hoses regularly and replace them if they show signs of wear.

8. Faulty Radiator Cap

The radiator cap plays an important role in maintaining the pressure inside the cooling system. If the cap is faulty or does not seal properly, it can cause coolant to boil or leak, reducing the system's efficiency and causing the engine to overheat. A damaged or worn-out radiator cap should be replaced to prevent this issue.

9. Blocked Coolant Passages

Over time, sediment, rust, and mineral deposits can build up in the coolant passages inside the engine. These blockages reduce the coolant's ability to flow efficiently through the system, leading to hot spots in the engine and eventual overheating. Flushing the cooling system regularly helps prevent the formation of these deposits.

10. Blown Head Gasket

The head gasket seals the cylinder head to the engine block, ensuring that coolant and oil remain separated. If the head gasket blows, coolant can mix with oil or leak into the combustion chambers, causing the engine to overheat. A blown head gasket is a serious issue and often results in costly repairs, as it can lead to engine damage if not addressed promptly.

11. Low Engine Oil

Engine oil plays a crucial role in lubricating the engine’s moving parts and helping to dissipate heat. If your engine oil is low or the oil has become degraded, it cannot perform this function effectively, causing the engine to run hotter than usual. Always check your engine oil levels regularly and ensure you’re using the recommended oil grade for your vehicle.

12. Driving in Extreme Conditions

Driving in extremely hot weather or towing heavy loads can cause additional strain on your vehicle’s engine and cooling system. In these conditions, the engine works harder, producing more heat. If the cooling system is not functioning at peak efficiency, the engine may overheat. It’s essential to ensure your vehicle’s cooling system is in good condition when driving in extreme conditions.

👉Signs Your Car is Overheating

Recognizing the signs of an overheating engine is critical to preventing further damage. Here are some common symptoms that indicate your car may be overheating:

• Temperature Gauge in the Red: Most vehicles have a temperature gauge on the dashboard. If the needle moves into the red zone, it’s a clear indication that your engine is running too hot.

• Steam or Smoke from the Engine: Seeing steam or smoke coming from under the hood is a strong sign that your engine is overheating. This often occurs when the coolant boils or leaks onto hot engine parts.

• Strange Smells: Overheating can cause various smells, such as a sweet smell from boiling coolant or a burning smell from oil or other engine components.

• Loss of Power: An overheating engine may lose power or enter "limp mode" to prevent further damage. If you notice a sudden drop in performance, it could be due to high engine temperatures.

• Warning Lights: Modern vehicles are equipped with warning lights for engine temperature. If the temperature warning light comes on, it’s a sign that the engine is overheating.

👉What to Do When Your Car Overheats

If you notice any signs of your engine overheating, it’s essential to take action immediately to avoid damaging your vehicle. Here’s what you should do if your car starts to overheat:

1. Turn Off the Air Conditioning: Running the air conditioning can add extra strain to your engine. Turning it off will reduce the load on the engine and help lower the temperature.

2. Turn On the Heater: This may sound counterintuitive, but turning on the heater can help draw heat away from the engine and into the cabin.

3. Pull Over Safely: If the temperature continues to rise, pull over to a safe location and turn off the engine. Allow the engine to cool for at least 30 minutes before opening the hood.

4. Check Coolant Levels: Once the engine has cooled, check the coolant level. If it’s low, you may be able to add more coolant to get back on the road, but this is a temporary solution. Never open the radiator cap when the engine is hot, as the pressurized coolant can cause serious burns.

5. Call for Assistance: If the problem persists, it’s best to call for roadside assistance or have your vehicle towed to a mechanic for further inspection.

👉How to Prevent Your Car from Overheating

Preventing your car from overheating involves regular maintenance and vigilance. Here are some tips to help you avoid this common issue:

• Check Coolant Levels: Regularly check the coolant level in the reservoir and top it off if needed. Make sure to use the correct coolant type for your vehicle.

• Inspect the Cooling System: Periodically inspect the radiator, water pump, thermostat, hoses, and radiator cap for any signs of wear, leaks, or damage.

• Perform Routine Radiator Flushes: Flushing the radiator every 30,000 to 50,000 miles helps remove dirt, debris, and rust that can clog the system.

• Monitor Engine Oil: Ensure that your engine oil is always at the proper level and change it according to the manufacturer’s recommendations.

• Drive Smart: Avoid pushing your engine too hard in extreme conditions, such as towing heavy loads or driving in very hot weather.

💬Final Thoughts

Overheating is a serious issue that can lead to expensive repairs and even engine failure if not addressed promptly. By understanding the causes of overheating, recognizing the signs early, and taking preventive measures, you can keep your vehicle running smoothly and avoid the inconvenience of an overheated engine. Regular maintenance of your car's cooling system is key to preventing overheating, ensuring your engine remains at a safe temperature, and extending the life of your vehicle.


Want more videos Cartech?
Subscribe to our YouTube channel👉All About Auto
Textual description of firstImageUrl

Tire Wear on the Inside Edge: Causes, Prevention, and Solutions

All About Auto Image

Tire wear on the inside edge is a common issue faced by many drivers, but it often goes unnoticed until it's too late. This type of uneven wear can reduce the lifespan of your tires, lead to poor vehicle performance, and even pose a safety risk. Understanding what causes tires to wear on the inside and knowing how to prevent it can save you money and ensure your vehicle operates smoothly.

In this comprehensive guide, we will explore everything you need to know about tire wear on the inside edge, including its causes, prevention methods, and solutions. By the end of this article, you'll have a solid understanding of the factors behind inside tire wear and how to address it effectively.

👉What is Tire Wear on the Inside Edge?

Tire wear on the inside edge refers to the situation where the inner portion of a tire’s tread experiences more wear and tear compared to the outer part. This results in the tire wearing out unevenly, which compromises its performance and lifespan. Drivers often notice this type of wear during routine inspections, wheel alignment services, or after feeling a noticeable decline in driving comfort and control.

While inside tire wear might seem like a minor issue at first, neglecting it can lead to more severe problems, such as:

• Reduced fuel efficiency
• Decreased traction, especially on wet or slippery surfaces
• Increased risk of tire blowouts
• Shortened tire lifespan

Now, let's dive deeper into what causes tires to wear on the inside edge.

👉What Causes Tires to Wear on the Inside?

Several factors can contribute to tires wearing on the inside edge, and these causes can vary depending on your vehicle, driving habits, and maintenance routine. Below are the most common reasons why tires wear on the inside:

1. Incorrect Wheel Alignment

One of the leading causes of inside tire wear is incorrect wheel alignment. Wheel alignment refers to the angle at which your tires make contact with the road, and it’s critical for even tire wear. There are three primary alignment angles to consider:

• Camber: The tilt of the tire when viewed from the front of the vehicle. Negative camber (when the top of the tire tilts inward) is often responsible for tire wear on the inside edge.

• Toe: The angle at which the tires point inward or outward when viewed from above. Incorrect toe settings can cause uneven wear.

• Caster: The steering axis tilt when viewed from the side, which can indirectly affect tire wear.

If your vehicle has excessive negative camber, it means the tire is tilted inward, causing the inner edge to bear more load than the outer edge. Over time, this results in premature wear on the inside edge.

2. Worn Suspension Components

Another common cause of tire wear on the inside edge is worn or damaged suspension components. The suspension system is responsible for maintaining your vehicle's stability and ensuring that the tires remain in proper contact with the road.

Some key suspension components that may contribute to inside tire wear include:

• Ball joints
• Control arms
• Bushings
• Shocks and struts

When these components wear out, they can cause excessive movement in the wheel, leading to uneven tire contact with the road. This can result in more pressure being applied to the inside edge of the tire, leading to uneven wear.

3. Improper Tire Inflation

Under-inflated or over-inflated tires can also lead to inside edge tire wear. When tires are under-inflated, they tend to sag, causing the edges (both inside and outside) to come into more contact with the road. Conversely, over-inflation can cause the center of the tire to wear more quickly.

However, a specific case of under-inflation combined with poor alignment can accelerate wear on the inside edge. Keeping your tires properly inflated ensures even distribution of weight across the tread, which prevents unnecessary wear on any specific area.

4. Lowered Suspension or Aftermarket Modifications

Lowering a vehicle's suspension or adding aftermarket modifications can alter the suspension geometry, which can lead to negative camber and cause tires to wear on the inside edge. Many car enthusiasts lower their vehicles to improve aesthetics or handling, but this often affects tire alignment.

If you’ve made changes to your vehicle's suspension, it’s essential to have a professional alignment check to ensure the camber, toe, and caster angles are within the recommended specifications. Failing to do so may result in inside tire wear.

5. Uneven Weight Distribution

An unevenly loaded vehicle can also contribute to inside tire wear. When one side of the vehicle carries more weight than the other, it can cause the tires on that side to bear more load, leading to faster wear on the inside edge.

This is particularly common in vehicles that carry heavy loads regularly, such as trucks or SUVs. Ensuring proper weight distribution and regularly rotating your tires can help prevent this type of wear.

6. Driving Habits and Road Conditions

Aggressive driving habits, such as taking corners at high speeds or frequently driving on uneven or rough terrain, can also accelerate inside edge tire wear. When a vehicle makes sharp turns or encounters uneven road surfaces, the tires are put under increased stress, which can cause uneven wear patterns.

Additionally, if you frequently drive on roads with potholes, bumps, or poor maintenance, your vehicle's alignment and suspension can be negatively affected, further contributing to inside tire wear.

👉Signs of Tire Wear on the Inside Edge

Recognizing the signs of inside edge tire wear is crucial for addressing the issue before it becomes a serious problem. Here are some key indicators that your tires may be wearing unevenly:

• Visual Inspection: If you notice that the inside edge of your tires appears more worn down than the rest of the tread, this is a clear sign of uneven wear.

• Vehicle Pulling to One Side: If your vehicle pulls to one side while driving, it could be due to misalignment, which can lead to inside edge wear.

• Steering Wheel Vibration: Uneven tire wear can cause the steering wheel to vibrate, especially at higher speeds.

• Uneven Tire Tread Depth: Using a tread depth gauge, you can measure the depth of the tread across the tire. If the inside edge has significantly less tread depth than the rest of the tire, it’s a sign of uneven wear.

If you notice any of these symptoms, it’s essential to have your vehicle inspected by a professional to determine the cause of the wear and prevent further damage.

👉How to Prevent Tire Wear on the Inside Edge

Preventing tire wear on the inside edge requires regular maintenance and attention to your vehicle's alignment, suspension, and tires. Here are some effective ways to prevent uneven tire wear:

1. Regular Wheel Alignment Checks

One of the most important steps in preventing inside tire wear is to have your wheel alignment checked regularly. Most manufacturers recommend having the alignment checked every 6,000 to 12,000 miles or whenever you get new tires.

A professional alignment service will ensure that your vehicle's camber, toe, and caster angles are within the manufacturer’s specifications, reducing the risk of uneven wear.

2. Inspect and Maintain Suspension Components

Since worn suspension components can lead to inside edge tire wear, it’s crucial to inspect your vehicle’s suspension system regularly. Look for signs of wear or damage in components like ball joints, control arms, bushings, shocks, and struts.

If any of these parts are worn or damaged, replacing them promptly can help prevent further uneven tire wear.

3. Proper Tire Inflation

Maintaining the correct tire pressure is vital for even tire wear. Check your vehicle’s owner’s manual for the recommended tire pressure and ensure your tires are inflated accordingly. Regularly check the tire pressure, especially before long trips or when carrying heavy loads.

4. Rotate Your Tires Regularly

Regular tire rotation helps ensure even wear across all four tires. Most manufacturers recommend rotating tires every 5,000 to 7,500 miles, but this can vary depending on your vehicle and driving habits.

Rotating your tires ensures that each tire experiences the same amount of wear over time, reducing the likelihood of inside edge wear.

5. Avoid Aggressive Driving

Adopting a smoother driving style can help prevent uneven tire wear. Avoid taking sharp corners at high speeds and try to drive on well-maintained roads when possible. Reducing stress on your tires will promote more even wear across the tread.

6. Address Suspension Modifications

If you’ve lowered your vehicle or made other suspension modifications, make sure to get a professional alignment service. This will ensure that the camber, toe, and caster angles are set correctly to prevent inside tire wear.

👉Solutions for Tire Wear on the Inside Edge

If you’ve already noticed tire wear on the inside edge, it’s essential to take corrective action to prevent further damage and improve your vehicle’s performance. Here are some steps you can take:

1. Have Your Alignment Checked

If misalignment is the cause of your inside tire wear, a professional alignment service will correct the angles and ensure even tire wear going forward. This is often the most effective solution for preventing further inside edge wear.

2. Replace Worn Suspension Components

If worn suspension parts are to blame, replacing them is crucial for restoring proper tire contact with the road. Consult a mechanic to identify and replace any worn components, such as ball joints, control arms, or shocks.

3. Replace Damaged Tires

In some cases, the inside edge of the tire may be too worn to repair. If the tread is significantly worn down or uneven, it’s essential to replace the damaged tires to maintain safety and performance.

4. Balance Your Tires

Unbalanced tires can cause uneven wear, including inside edge tire wear. Having your tires balanced by a professional will ensure even weight distribution and help prevent further wear issues.

💬Final Thoughts

Tire wear on the inside edge is a common but preventable issue that can have serious consequences if left unaddressed. By understanding the causes of inside tire wear, recognizing the signs, and taking preventative measures, you can extend the life of your tires, improve your vehicle’s performance, and ensure your safety on the road.

Regular maintenance, including wheel alignments, suspension inspections, and tire rotations, is key to preventing uneven wear. If you’ve already noticed inside edge wear, addressing the issue promptly will save you money and avoid more significant problems down the road.

Remember, keeping your tires in good condition not only ensures a smooth ride but also contributes to better fuel efficiency, improved handling, and increased safety. Keep an eye on your tires, and don’t hesitate to seek professional help if you suspect any issues with alignment, suspension, or inflation.

By following these guidelines, you can keep your tires in top shape and avoid the frustrations that come with tire wear on the inside edge.

Textual description of firstImageUrl

Brakes Still Spongy After Bleeding: Causes and Solutions

All about auto image

Experiencing spongy brakes after bleeding is not only frustrating but also a serious safety concern. When your brakes feel soft or spongy, it often means that your braking system isn’t functioning at its best, which can lead to longer stopping distances and a higher risk of accidents. In this comprehensive guide, we’ll explore the common causes behind spongy brakes after bleeding and offer solutions to help you resolve the issue.

👉What Does It Mean When Brakes Feel Spongy?

Before we dive into the causes and solutions, let’s clarify what “spongy brakes” actually means. When you press down on the brake pedal, you should feel a firm, responsive resistance. This resistance is created by the brake fluid transferring force to the brake components, which then apply pressure to the brake pads or shoes to slow down or stop your vehicle.

However, when the brakes feel spongy or soft, the pedal sinks more than it should, often without providing the expected stopping power. This sensation can be described as stepping on a sponge, hence the term “spongy brakes.” This issue is commonly associated with air trapped in the brake lines, but as we’ll see, there are other potential causes as well.

👉Why Bleed Brakes?

Bleeding the brakes is a process of removing air bubbles from the brake lines. Air can enter the brake system in various ways, such as when you replace brake components, experience a leak, or during routine maintenance. Since air compresses more easily than brake fluid, even a small amount of air in the brake lines can lead to a spongy brake pedal. Therefore, bleeding the brakes is a crucial step in maintaining a firm and responsive brake pedal.

👉Causes of Spongy Brakes After Bleeding

If your brakes are still spongy after you’ve bled them, it could be due to several reasons. Let’s explore the most common causes:

1. Incomplete Bleeding

Even after bleeding the brakes, air bubbles might still be trapped in the brake lines. This can happen if the bleeding process wasn’t done correctly or if the method used wasn’t thorough enough. Incomplete bleeding is one of the most common reasons for spongy brakes after bleeding.

Solution:

Rebleed the brakes, ensuring that you follow the proper procedure. Start with the brake furthest from the master cylinder (usually the rear passenger side) and work your way to the closest (usually the front driver’s side). Use a clear hose and container to monitor the fluid and watch for bubbles. Make sure to bleed each brake line thoroughly until no air bubbles are visible.

2. Air in the Master Cylinder

The master cylinder is responsible for generating the hydraulic pressure that drives the brake fluid through the brake lines. If air gets trapped in the master cylinder, it can cause spongy brakes even after the brake lines are bled.

All about auto image
Solution:

To remove air from the master cylinder, you might need to bench bleed it. This involves removing the master cylinder from the vehicle and bleeding it on a workbench. Once you’ve bled the master cylinder, reinstall it and bleed the brake lines again.

3. Old or Contaminated Brake Fluid

Brake fluid is hygroscopic, meaning it absorbs moisture over time. If the brake fluid in your system is old or contaminated with water, it can reduce the fluid’s effectiveness and cause a spongy brake pedal. Contaminated brake fluid can also lead to corrosion within the brake system, further exacerbating the problem.

All about auto
Solution:

Flush the entire brake system and replace the old brake fluid with fresh, high-quality brake fluid. Make sure to use the type of brake fluid recommended by your vehicle’s manufacturer (e.g., DOT 3, DOT 4). After flushing and refilling the system, bleed the brakes again to ensure all air is removed.

4. Worn or Damaged Brake Components

Worn or damaged brake components, such as brake pads, rotors, or calipers, can also contribute to spongy brakes. For example, if the brake pads are excessively worn, they may not make proper contact with the rotors, leading to a spongy brake pedal. Similarly, a damaged caliper may not apply the necessary pressure to the brake pads, resulting in a soft brake pedal.

Solution:

Inspect all brake components for wear and damage. Replace any worn brake pads, rotors, or other components as needed. Ensure that all parts are properly installed and functioning correctly. After replacing any components, bleed the brakes again to remove any air that may have entered the system during the repair.

5. Leaking Brake Lines or Fittings

Brake fluid leaks are a common cause of spongy brakes. Even a small leak can introduce air into the brake system, leading to a soft brake pedal. Leaks can occur at various points in the brake system, including the brake lines, fittings, or calipers.

Solution:

Inspect the entire brake system for leaks. Pay close attention to the brake lines, fittings, and calipers. If you find a leak, repair or replace the damaged components. After fixing the leak, bleed the brakes to remove any air that may have entered the system.

6. Flexible Brake Hoses

Most vehicles have flexible rubber brake hoses that connect the brake lines to the calipers or wheel cylinders. Over time, these hoses can become worn or damaged, causing them to expand when you apply the brakes. This expansion can lead to a spongy brake pedal.

Solution:

Inspect the flexible brake hoses for signs of wear, damage, or bulging. If any hoses are compromised, replace them with new ones. Consider upgrading to stainless steel braided brake hoses, which are more resistant to expansion and can improve brake pedal feel. After replacing the hoses, bleed the brakes to remove any air.

7. ABS System Issues

Modern vehicles are equipped with an Anti-lock Braking System (ABS), which helps prevent the wheels from locking up during hard braking. However, the ABS system can sometimes trap air or develop other issues that lead to spongy brakes.

Solution:

If you suspect that the ABS system is causing the problem, it’s best to have your vehicle inspected by a professional mechanic. The ABS system may require a special bleeding procedure, which typically involves using a scan tool to cycle the ABS pump and valves while bleeding the brakes.

8. Improper Brake Bleeding Technique

Using an improper bleeding technique can result in air being introduced into the brake system, causing spongy brakes. For example, some people use a "pump and hold" method, which can sometimes lead to air being sucked back into the system if not done correctly.

Solution:

Use the correct bleeding technique for your vehicle. Consider using a pressure bleeder, which forces brake fluid through the system and helps prevent air from being drawn in. Alternatively, you can use a vacuum bleeder, which pulls fluid and air out of the brake lines. Whichever method you choose, be sure to follow the instructions carefully to avoid introducing air into the system.

9. Brake Fluid Boiling

In extreme cases, brake fluid can boil due to excessive heat generated during heavy braking. When brake fluid boils, it creates vapor, which can cause a spongy brake pedal. This is more common in high-performance or heavily loaded vehicles.

Solution:

If you suspect that your brake fluid has boiled, flush the brake system and replace the old fluid with high-temperature brake fluid designed for performance applications. Consider upgrading your brake pads and rotors to high-performance versions that can better dissipate heat. After making these changes, bleed the brakes to remove any air.

10. Caliper Piston Issues

The caliper pistons are responsible for pushing the brake pads against the rotors when you apply the brakes. If the pistons are stuck or not moving freely, it can cause uneven brake pad wear and lead to a spongy brake pedal.

Solution: Inspect the caliper pistons for signs of sticking or binding. If the pistons are not moving freely, they may need to be cleaned, lubricated, or replaced. After addressing the piston issues, bleed the brakes to remove any air that may have entered the system during the repair.

👉Preventing Spongy Brakes in the Future

Once you’ve resolved the issue of spongy brakes, it’s important to take steps to prevent the problem from recurring. Here are some tips to help maintain a firm and responsive brake pedal:

• Regular Maintenance: Keep up with regular brake maintenance, including fluid changes and inspections. Replace worn components before they cause more significant issues.

• Use Quality Parts: Always use high-quality brake components and fluids. Cheap or substandard parts can lead to problems, including spongy brakes.

• Proper Bleeding Technique: When bleeding the brakes, follow the correct procedure and use the right tools. Avoid shortcuts that could introduce air into the system.

• Monitor Brake Fluid: Regularly check the brake fluid level and condition. If the fluid appears dark or contaminated, flush the system and replace it with fresh fluid.

• Inspect for Leaks: Periodically inspect the brake system for leaks. Catching a leak early can prevent air from entering the system and causing spongy brakes.

• Upgrade Components: If you frequently drive in conditions that put extra stress on your brakes (such as towing or performance driving), consider upgrading to high-performance brake components that can handle the increased demands.

👉When to Seek Professional Help

While many brake issues can be addressed with DIY repairs, there are times when it’s best to seek professional help. If you’ve tried the above solutions and your brakes are still spongy, or if you’re unsure about performing the repairs yourself, it’s a good idea to consult a professional mechanic. Brakes are a critical safety system, and it’s essential to ensure they’re in proper working order.

A professional mechanic can perform a thorough inspection of your brake system, identify the underlying cause of the spongy brakes, and recommend the appropriate repairs. They can also perform more advanced procedures, such as ABS system bleeding, that may be necessary to resolve the issue.

💬Final thoughts

Spongy brakes after bleeding can be a frustrating and potentially dangerous issue. However, by understanding the common causes and following the solutions outlined in this guide, you can restore your brake system to proper working order. Whether it’s incomplete bleeding, old brake fluid, or a more complex issue like ABS system problems, addressing the root cause is essential to maintaining a firm and responsive brake pedal.

Remember, regular brake maintenance is key to preventing spongy brakes in the future. By staying on top of brake inspections, fluid changes, and component replacements, you can ensure that your brakes perform reliably and keep you safe on the road. If you’re ever in doubt about your brake system’s condition, don’t hesitate to seek professional assistance. Your safety, and the safety of others on the road, depends on it.


Want more videos Cartech?
Subscribe to our YouTube channel👉All About Auto
Textual description of firstImageUrl

How to Choose the Right Tires for Your Car

All About Auto Image

Choosing the right tires for your car is crucial not only for safety but also for optimizing your vehicle's performance. The tires you select directly affect how your car handles, brakes, and how comfortable your rides are. However, with countless options available in the market, selecting the right set of tires can be a daunting task. This article will guide you through the essential factors to consider when deciding how to choose the right tires for your car.

👉Understanding Tire Types

The first step in choosing the right tires for your car is understanding the different types of tires available. Each tire type is designed for specific driving conditions and vehicle requirements.

1. All-Season Tires. All-season tires are the most versatile and popular choice among drivers. These tires are designed to provide a balanced performance in various weather conditions, including wet, dry, and light snow. They are a great option for drivers who experience moderate weather changes throughout the year and do not wish to switch tires seasonally.

2. Summer Tires. Summer tires are designed for performance in warm weather conditions. They offer excellent traction on dry and wet roads, making them ideal for drivers who prioritize handling and speed. However, summer tires are not suitable for cold weather or snowy conditions, as their performance can drastically decrease in low temperatures.

3. Winter Tires. Winter tires, also known as snow tires, are specifically designed to handle cold weather, snow, and icy conditions. They have deeper treads and are made from a softer rubber compound, which allows them to remain flexible in freezing temperatures. If you live in an area with harsh winters, winter tires are a must for safe driving.

4. Performance Tires. Performance tires are designed for high-speed driving and offer superior handling, braking, and cornering capabilities. These tires are often used on sports cars and performance vehicles. While they provide excellent grip and responsiveness, they may wear out faster and are typically more expensive than other tire types.

5. Off-Road Tire. Off-road tires are designed for vehicles that frequently drive on rough terrains, such as mud, sand, or rocky surfaces. They have aggressive tread patterns to provide maximum traction in challenging conditions. Off-road tires are ideal for trucks, SUVs, and other vehicles used for off-road adventures.

👉 Determining the Right Tire Size

After understanding the different types of tires, the next step in learning how to choose the right tires for your car is determining the correct tire size for your vehicle. Tire size is indicated on the sidewall of your current tires and typically looks something like this: P215/65R15.

1. Tire Width (P215). The first number in the tire size represents the tire's width in millimeters from sidewall to sidewall. In the example "P215," the tire width is 215 millimeters. A wider tire generally offers better traction, but it can also affect fuel efficiency.

2. Aspect Ratio (65). The second number is the aspect ratio, which is the height of the tire's sidewall as a percentage of the tire's width. In "65," the aspect ratio is 65%. A lower aspect ratio typically indicates a sportier tire with better handling, while a higher aspect ratio provides a more comfortable ride.

3. Radial Construction (R). The "R" stands for radial construction, which is the standard construction method for modern tires. Radial tires have layers of fabric with cords running at right angles to the tread, offering better stability and handling.

4. Wheel Diameter (15). The final number indicates the diameter of the wheel, or the rim size, in inches that the tire is designed to fit. In the example "15," the tire fits a 15-inch wheel.

5. Load Index and Speed Rating. In addition to the size, the tire's load index and speed rating are important factors. The load index indicates the maximum weight the tire can support, while the speed rating indicates the maximum speed the tire can safely handle.

👉Consider Your Driving Conditions

When figuring out how to choose the right tires for your car, it’s crucial to consider the driving conditions you frequently encounter. Different environments and climates require different tire features to ensure optimal performance and safety.

1. Urban Driving

If most of your driving occurs in a city with smooth roads, all-season or summer tires may be your best bet. These tires offer a good balance of comfort, durability, and performance on well-paved surfaces.

2. Highway Driving. For drivers who spend a lot of time on the highway, tires with a higher speed rating and lower rolling resistance are ideal. These tires provide better fuel efficiency and stability at high speeds.

3. Off-Road Driving. For those who frequently drive on unpaved roads or rough terrains, off-road tires with deeper treads and stronger sidewalls are necessary. These tires will provide the durability and traction needed to handle harsh conditions.

4. Winter Driving. If you live in an area with heavy snowfall or icy conditions, winter tires are essential. They offer the necessary grip and flexibility to navigate slippery roads safely.

👉 Budget Considerations

While you may be tempted to choose the cheapest tires available, it’s important to remember that tires are a critical safety component of your vehicle. That being said, there are options available for different budgets.

1. Premium Tires. Premium tires from well-known brands usually come with a higher price tag, but they also offer superior performance, durability, and warranties. These tires are ideal for drivers who prioritize safety and performance and are willing to invest in high-quality products.

2. Mid-Range Tires. Mid-range tires offer a good balance between cost and quality. They provide reliable performance and are often a popular choice for everyday drivers. Mid-range tires are a great option if you want decent quality without breaking the bank.

3. Budget Tires. Budget tires are the most affordable option but may come with some trade-offs in terms of performance and durability. While they can be a suitable choice for short-term use or if you’re on a tight budget, it's important to ensure that they still meet safety standards.

👉 Checking for Tire Wear Indicators

As you continue to learn how to choose the right tires for your car, it’s essential to understand how to assess tire wear. Tires wear out over time, and driving on worn-out tires can be dangerous.

1. Tread Depth. The tread depth is a key indicator of tire wear. Tires with insufficient tread depth have reduced traction, especially in wet conditions. You can check tread depth using a tread depth gauge or by performing the penny test. Insert a penny into the tread groove with Lincoln’s head facing down. If you can see the top of Lincoln’s head, it’s time to replace your tires.

2. Uneven Wear. Inspect your tires for uneven wear patterns. Uneven wear can indicate alignment issues, improper inflation, or suspension problems. If you notice uneven wear, it’s important to address the underlying issue before replacing your tires.

3. Cracks and Bulges. Check the sidewalls of your tires for any cracks, cuts, or bulges. These are signs of tire damage and can lead to a blowout if not addressed promptly.

👉 Consider the Manufacturer’s Recommendations

Your vehicle’s manufacturer provides specific recommendations for tire size, type, and pressure in the owner’s manual or on a sticker located on the driver’s side door jamb. Following these recommendations is crucial for maintaining your vehicle’s performance, safety, and fuel efficiency.

💬Final Thoughts

Choosing the right tires for your car is a decision that should not be taken lightly. By understanding the different types of tires, determining the correct tire size, considering your driving conditions, and checking for tire wear, you can make an informed decision. Remember to balance your budget with quality and always follow the manufacturer’s recommendations. With the right set of tires, you can ensure a safe and comfortable driving experience.

Learning how to choose the right tires for your car is essential for every driver. By following the guidelines in this article, you can make a well-informed decision that enhances your vehicle's performance and keeps you safe on the road.


Want more videos Cartech?
Subscribe to our YouTube channel👉All About Auto
Textual description of firstImageUrl

What Does Blue Smoke from Exhaust Mean? A Comprehensive Guide

cartech image

Blue smoke from your vehicle's exhaust is a signal that something is amiss under the hood. It’s a situation that no car owner wants to encounter because it often points to issues that, if not addressed promptly, could lead to costly repairs. But what does blue smoke from exhaust mean? In this comprehensive guide, we'll explore the causes, implications, and solutions for this troubling sign, ensuring that you understand the importance of addressing it swiftly.

Understanding Exhaust Smoke Colors

Before diving into the specifics of blue smoke, it’s helpful to understand that exhaust smoke can come in various colors, each indicating different potential issues. The most common exhaust smoke colors include:

White Smoke: Usually caused by condensation or, in more severe cases, a coolant leak into the engine.

• Black Smoke: Often a sign of too much fuel burning, usually due to a fuel system issue.

• Blue Smoke: Indicates that your engine is burning oil, a serious problem that needs immediate attention.

This article will focus specifically on blue smoke, what it signifies, and how to resolve the issues associated with it.

👉What Does Blue Smoke from Exhaust Mean?

When you notice blue smoke from your exhaust, it generally means that oil is entering the engine's combustion chamber and burning along with the fuel. This is not supposed to happen, as the combustion process is designed to burn only the air-fuel mixture, not oil.

The presence of blue smoke indicates that the oil is leaking into the combustion chamber from various sources, which could lead to significant engine damage if not addressed. The underlying reasons can range from minor seal failures to severe engine wear.

👉Common Causes of Blue Smoke from Exhaust

Understanding the potential causes of blue smoke can help you pinpoint the problem faster. Here are the most common reasons for blue smoke from the exhaust:

1. Worn Valve Seals

Valve seals control the amount of oil that lubricates the valves. Over time, these seals can wear out, leading to oil leaking into the combustion chamber. Worn valve seals are a common cause of blue smoke, especially during startup or acceleration when the engine is working hardest.

2. Damaged Piston Rings

cartech image

Piston rings are responsible for creating a seal between the piston and the cylinder walls, preventing oil from entering the combustion chamber. If the piston rings are damaged or worn out, oil can seep into the combustion chamber and burn, producing blue smoke.

3. Blown Head Gasket

cartech image

A blown head gasket can allow oil to leak into the cylinders, leading to blue smoke. This is a severe issue that typically requires immediate repair, as it can lead to engine overheating and significant damage.

4. PCV Valve Failure

cartech image

The Positive Crankcase Ventilation (PCV) valve helps regulate the pressure in the engine’s crankcase. If this valve fails, it can cause oil to be sucked into the intake manifold and burned in the combustion chamber, resulting in blue smoke from the exhaust.

5. Turbocharger Issues

cartech image

In vehicles equipped with a turbocharger, a failure in the turbo seals can cause oil to leak into the engine’s intake system. This oil then gets burned during combustion, leading to blue smoke from the exhaust.

6. Worn Cylinder Walls

If the cylinder walls are worn out, the oil can pass through the gaps between the piston and cylinder walls, resulting in oil burning and blue smoke. This is often an indication of an aging engine that may require a rebuild or replacement.

7. Overfilled Engine Oil

If too much oil is added to the engine, it can cause excessive pressure, forcing oil into the combustion chamber. This excess oil burns off as blue smoke. Always ensure that the engine oil is filled to the correct level as indicated in the vehicle’s manual.

👉Diagnosing Blue Smoke from Exhaust

Diagnosing the cause of blue smoke from your exhaust can be tricky, but it’s essential for determining the right course of action. Here are steps you can take to diagnose the problem:

1. Check for Oil Consumption

Monitor your engine oil levels regularly. If you notice that you’re adding oil more frequently than usual, it could be an indication of oil burning within the engine, leading to blue smoke.

2. Inspect the Exhaust

Examine the exhaust pipe for any signs of oil residue. If you see oily soot, it’s likely that oil is entering the combustion chamber.

3. Listen to the Engine

Listen for unusual engine noises, such as knocking or rattling, which can accompany the issues causing blue smoke.

4. Perform a Compression Test

A compression test can help determine if the piston rings or cylinder walls are worn. Low compression in one or more cylinders is a sign of engine wear, which could be causing the blue smoke.

5. Check the Spark Plugs

Remove and inspect the spark plugs. If they are covered in oil, this indicates that oil is entering the combustion chamber.

👉Consequences of Ignoring Blue Smoke from Exhaust

Ignoring blue smoke from your exhaust can lead to more severe engine problems, including:

1. Increased Oil Consumption

As oil burns off in the engine, you’ll need to add more oil frequently, which can become costly and inconvenient.

2. Engine Overheating

Burning oil can cause deposits to build up on engine components, leading to overheating. Overheating can severely damage the engine and may require extensive repairs or even an engine replacement.

3. Catalytic Converter Damage

Oil burning in the combustion chamber can cause the catalytic converter to clog or fail. Replacing a catalytic converter can be expensive, and driving with a faulty one can also lead to legal and environmental issues.

4. Failed Emissions Test

If your vehicle is emitting blue smoke, it’s likely that it will fail an emissions test, making it illegal to drive in many regions. This can result in fines and the need for costly repairs to bring the vehicle up to standard.

👉How to Fix Blue Smoke from Exhaust

Fixing blue smoke from your exhaust depends on identifying the underlying cause. Here are some potential solutions:

1. Replace Worn Valve Seals

If worn valve seals are the cause, replacing them can stop the oil from leaking into the combustion chamber. This repair typically requires disassembling part of the engine, so it’s best done by a professional mechanic.

2. Repair or Replace Piston Rings

Damaged piston rings often require significant engine work. In some cases, the piston rings can be replaced, but if the engine is severely worn, a full engine rebuild may be necessary.

3. Repair or Replace the Head Gasket

A blown head gasket should be repaired immediately to prevent further engine damage. This repair involves removing the cylinder head and replacing the gasket, which is a labor-intensive job.

4. Replace the PCV Valve

A malfunctioning PCV valve is a relatively simple and inexpensive repair. Replacing the valve can prevent oil from being sucked into the combustion chamber and eliminate the blue smoke.

5. Inspect and Repair the Turbocharger

If the turbocharger is causing the blue smoke, you may need to replace the turbo seals or the entire turbocharger, depending on the extent of the damage.

6. Overhaul the Engine

In cases where the engine is significantly worn, an overhaul or replacement may be the only solution. This is a major repair that involves rebuilding the engine or replacing it with a new or refurbished one.

7. Check and Adjust Oil Levels

If the blue smoke is caused by overfilled oil, simply draining the excess oil and ensuring the correct level can resolve the issue. Be sure to follow the manufacturer’s recommendations for oil levels.

👉Preventing Blue Smoke from Exhaust

Prevention is always better than cure, and there are steps you can take to prevent blue smoke from appearing in the first place:

1. Regular Maintenance

Keep up with regular oil changes, using the correct type and grade of oil recommended by the vehicle manufacturer. Regular maintenance helps ensure that the engine is running smoothly and can prevent oil leaks.

2. Monitor Oil Levels

Regularly check your engine oil levels and top up as needed. However, be careful not to overfill, as this can lead to blue smoke.

3. Address Issues Promptly

If you notice any signs of oil leaks or other engine issues, address them promptly to prevent more severe damage that could lead to blue smoke from the exhaust.

4. Use High-Quality Parts

When replacing engine components, such as valve seals or piston rings, use high-quality parts to ensure durability and prevent future issues.

5. Avoid Short Trips

Short trips that don’t allow the engine to reach its optimal operating temperature can lead to condensation and oil contamination. Avoid short trips when possible, and let your engine warm up properly.

💬Final Thoughts

Blue smoke from your vehicle's exhaust is a clear sign that oil is burning in the engine, which is a problem that needs immediate attention. Understanding what blue smoke from exhaust means, identifying the cause, and taking the necessary steps to fix the issue can save you from more severe engine damage and costly repairs down the line.

Regular maintenance, prompt attention to warning signs, and using high-quality parts can go a long way in preventing blue smoke from appearing in the first place. If you do encounter blue smoke, don't ignore it—address the problem quickly to keep your vehicle running smoothly and efficiently.

Remember, whether it’s worn valve seals, damaged piston rings, a blown head gasket, or another issue, the key to resolving blue smoke from the exhaust is early diagnosis and repair. By staying vigilant and proactive, you can avoid the headaches and expenses associated with this common but serious automotive issue.


Want more videos Cartech?
Subscribe to our YouTube channel👉All About Auto
Textual description of firstImageUrl

Car Warranty Importance: What You Need to Know

All about auto

When you purchase a vehicle, one of the most important considerations is the car warranty. This often overlooked aspect of buying a car can significantly impact your long-term satisfaction and financial security. In this comprehensive guide, we'll explore what a car warranty is, the different types available, and why it's essential to understand the specifics of your warranty.

👉What is a Car Warranty?

A car warranty is essentially a promise from the vehicle manufacturer or dealer to cover certain repair costs and services for a specified period or mileage. This guarantee provides peace of mind by ensuring that major repair expenses are taken care of, should any issues arise with your vehicle.

Car warranties can be a crucial part of your vehicle purchase, helping to mitigate the risk of unexpected repair costs. They vary widely in terms of coverage, duration, and conditions, so it's important to understand what you're getting.

👉Types of Car Warranties

Understanding the different types of car warranties can help you make an informed decision and choose the best option for your needs. Here are the most common types:

1. Manufacturer’s Warranty. The manufacturer’s warranty, also known as the factory warranty, is provided by the car's manufacturer. This warranty usually covers defects in materials or workmanship and is included with the purchase of a new car. It typically includes:

• Basic Coverage: This covers the fundamental components of the car and often lasts for 3 to 5 years or 36,000 to 60,000 miles, whichever comes first.

• Powertrain Coverage: This extends to the engine, transmission, and drivetrain components, often lasting longer than the basic coverage—up to 10 years or 100,000 miles.

• Corrosion Warranty: This covers rust and corrosion issues on the car’s body and generally lasts for 5 to 7 years.

2. Extended Warranty. An extended warranty, also known as a vehicle service contract, is an optional warranty that you can purchase to extend your coverage beyond the manufacturer’s warranty. It can offer additional protection for parts and services that may not be covered by the original warranty. Extended warranties vary in terms of coverage, duration, and cost.

3. Certified Pre-Owned (CPO) Warranty. If you’re buying a used car, a Certified Pre-Owned (CPO) warranty might be available. This warranty is offered by the manufacturer and is available on used cars that have undergone a rigorous inspection process. CPO warranties typically include a combination of the remaining original warranty and an additional period of coverage.

4. Powertrain Warranty. The powertrain warranty specifically covers the engine, transmission, and drivetrain. This type of warranty is crucial because it covers some of the most expensive components of a vehicle. It often lasts longer than the basic warranty, sometimes up to 10 years or 100,000 miles.

5. Roadside Assistance Warranty. Many car warranties include roadside assistance, which provides help if you experience issues like a flat tire, dead battery, or lockout. This service is typically available for the duration of the manufacturer’s warranty or the extended warranty.

👉What Does a Car Warranty Typically Cover?

Car warranties can cover a range of components and services, but the specifics can vary. Here’s a general overview of what is typically covered:

• Engine Components: This includes the engine block, cylinder heads, pistons, and other critical engine parts.

• Transmission Components: Coverage often includes the transmission assembly, torque converter, and related parts.

• Drivetrain: This includes the driveshaft, differential, and axle components.

• Electrical System: Coverage for electrical components such as the starter motor, alternator, and power windows.

• Air Conditioning System: Includes components like the compressor, condenser, and evaporator.

👉What is Not Covered by a Car Warranty?

While car warranties provide valuable protection, there are several common exclusions. Knowing what’s not covered can help you avoid unexpected expenses:

• Routine Maintenance: Regular maintenance tasks such as oil changes, tire rotations, and brake replacements are not covered by car warranties.

• Wear and Tear: Parts that naturally wear out over time, such as brake pads, batteries, and wiper blades, are generally not covered.

• Damage from Accidents: Repairs resulting from accidents or collisions are not covered by car warranties.

• Misuse or Neglect: Damage caused by improper use or neglect, such as failing to follow the manufacturer’s recommended maintenance schedule, may void the warranty.

👉How to Make the Most of Your Car Warranty

To ensure you get the most out of your car warranty, follow these essential tips:

1. Read the Fine Print. Carefully review your warranty documentation to understand the coverage, exclusions, and terms. Pay attention to any conditions or requirements that may affect your coverage.

2. Keep Detailed Records. Maintain detailed records of all maintenance and repair work performed on your vehicle. This documentation can be crucial if you need to make a claim under your warranty.

3. Follow the Manufacturer’s Maintenance Schedule. Adhere to the manufacturer’s recommended maintenance schedule to keep your warranty valid. Regular maintenance is often required to prevent warranty voiding.

4. Know Your Rights. Understand your rights under the warranty, including the process for filing a claim and any potential costs or deductibles.

5. Contact the Dealer or Manufacturer. If you have any questions or concerns about your warranty coverage, don’t hesitate to contact the dealer or manufacturer for clarification.

👉Car Warranty vs. Car Insurance: What’s the Difference?

It’s important to distinguish between car warranties and car insurance, as they serve different purposes:

• Car Warranty: Covers repairs and replacements for specific parts of your vehicle due to defects or issues related to manufacturing. It’s often included with the purchase of a new car or available as an extended option.

• Car Insurance: Provides financial protection against damages and losses resulting from accidents, theft, or other incidents. It’s a legal requirement in most places and is purchased separately from the vehicle purchase.

👉Choosing the Right Car Warranty for Your Needs

When selecting a car warranty, consider the following factors:

1. Vehicle Type and Age. New cars generally come with comprehensive warranties, while used cars may benefit from extended or CPO warranties. The age and condition of your vehicle can impact the type of warranty you choose.

2. Budget. Extended warranties come at a cost, so evaluate your budget and determine how much you’re willing to spend. Compare the cost of an extended warranty with potential repair expenses.

3. Coverage and Terms. Assess the coverage offered by different warranties, including the duration, mileage limits, and specific components covered. Choose a warranty that provides adequate protection for your needs.

4. Reputation of the Warranty Provider. Research the reputation of the warranty provider, whether it’s the manufacturer or a third-party company. Read reviews and check customer satisfaction ratings.

💬Final Thoughts

Understanding your car warranty is essential for protecting your investment and avoiding unexpected repair costs. By familiarizing yourself with the different types of warranties, what they cover, and how to make the most of them, you can ensure that you’re well-prepared for any potential issues that may arise with your vehicle.

Whether you’re buying a new car, considering an extended warranty, or purchasing a certified pre-owned vehicle, having a clear understanding of your warranty options will help you make an informed decision. Remember to read the fine print, keep detailed records, and follow the manufacturer’s maintenance schedule to maximize the benefits of your car warranty.

By following these guidelines, you’ll be well-equipped to navigate the world of car warranties and ensure that you get the protection and peace of mind you need for your vehicle.


Want more videos Cartech?
Subscribe to our YouTube channel👉All About Auto