Cartech - All About Auto

Textual description of firstImageUrl

What Drains a Car Battery? Top Causes and Prevention Tips

Cartech image

Car battery issues are one of the most frequent problems vehicle owners encounter. Your car battery powers everything from the lights to the engine start, and when it dies, it can leave you stranded. Understanding what drains a car battery and knowing how to prevent it is crucial for car owners. In this article, we'll dive into the most common reasons a car battery drains, signs of a weak or dead battery, and ways to prevent these problems to keep your vehicle running smoothly.

Understanding Car Battery Basics

A car battery stores energy in chemical form and converts it into electrical energy when needed. This electrical energy powers various components in your vehicle, such as the starter motor, headlights, radio, and other electronic systems. The battery recharges every time the engine runs, thanks to the alternator, which converts engine power into electrical energy and keeps the battery charged. However, certain conditions and actions can cause a car battery to lose its charge faster than usual.

What Drains a Car Battery? Key Causes Explained

There are several common reasons why a car battery may drain unexpectedly. Knowing these causes can help you identify potential problems early and avoid unnecessary stress or expenses.

1. Leaving the Lights On

One of the most straightforward reasons a car battery drains is leaving the headlights or interior lights on. Many newer cars have warning chimes or automatic shut-off functions to prevent this, but not all vehicles are equipped with these features. If you forget to turn off your lights after parking, they will drain the battery relatively quickly. Over time, this can reduce the battery's overall lifespan and efficiency.

2. Faulty Charging System

The alternator is responsible for recharging your battery while driving. If your charging system is malfunctioning, the alternator may not fully recharge the battery. This can result in a dead battery over time, especially if you make short trips where the alternator doesn’t have enough time to recharge the battery fully. A slipping or worn-out alternator belt can also affect the alternator's performance, leading to battery drainage.

3. Parasitic Drain

A parasitic drain occurs when electrical components continue to draw power from the battery even when the car is turned off. While some drain is normal, such as for the clock, radio presets, and security system, an excessive drain can weaken or fully deplete the battery. Common culprits of parasitic drain include malfunctioning interior lights, faulty relays, and electrical issues in various systems.

4. Extreme Temperatures

Both hot and cold temperatures can impact a car battery’s performance. In cold weather, the chemical reactions within the battery slow down, making it harder for the battery to hold a charge. In hot climates, the internal components of the battery can degrade faster, causing it to lose power more quickly. Extreme temperatures can also impact the battery fluid levels, further reducing the battery’s overall lifespan.

5. Corroded or Loose Battery Connections

Corrosion on the battery terminals or loose connections can interfere with the battery’s ability to provide power effectively. Corrosion, which appears as a white or greenish substance around the terminals, can interrupt the flow of electricity from the battery to other parts of the car. Loose cables may cause intermittent power issues or make it challenging for the alternator to charge the battery fully, resulting in a weak battery.

6. Old Battery

Car batteries typically last three to five years, depending on driving habits, climate, and battery quality. An old battery will have diminished capacity, making it more likely to drain quickly. If your battery is nearing the end of its life, it may struggle to hold a charge, even under optimal conditions. Replacing an aging battery can prevent sudden failures and improve overall vehicle reliability.

7. Frequent Short Trips

Short trips don’t give the alternator enough time to recharge the battery fully. Each time you start your car, the starter motor uses a significant amount of power from the battery. If you frequently take short trips, the battery will not recharge adequately, leading to a gradual loss of charge over time.

8. Defective Alternator Diode

A faulty alternator diode can cause battery drainage even when the car is off. Diodes allow the electrical current to flow in only one direction, ensuring that power flows from the alternator to the battery. When the diode fails, it can create a reverse current, drawing power from the battery and resulting in a dead battery.

9. Accessories Left Plugged In

Leaving phone chargers, GPS units, or other devices plugged into the car’s cigarette lighter or USB ports can drain the battery, especially if these accessories are actively drawing power. Even when they are not in use, some devices may continue to draw small amounts of power, which can accumulate over time and weaken the battery.

10. Using Electrical Components Without the Engine Running

Running the radio, air conditioning, or other electronics with the engine off places a high demand on the battery. These devices rely on the battery for power, and using them without the alternator actively recharging the battery can drain it quickly.

Signs of a Draining or Weak Car Battery

It’s essential to recognize the early signs of a weakening battery. Acting on these signs can prevent more severe issues and avoid situations where your car won’t start. Common symptoms include:

• Slow Engine Crank: If your car struggles to start or cranks slowly, it may be due to a weak battery.

• Dim Headlights: Dimming headlights, especially when idling or using multiple electrical components, can indicate low battery power.

• Dashboard Warning Light: Many cars have a battery warning light that illuminates if there’s an issue with the charging system.

• Frequent Need for Jump-Starts: If you frequently need to jump-start your vehicle, it’s a clear sign that the battery or charging system is compromised.

Preventing Car Battery Drain: Tips and Best Practices

Maintaining your car battery’s health requires a few simple practices that can extend its life and improve vehicle reliability.

1. Turn Off All Lights and Accessories

Always check that your headlights, interior lights, and other electrical components are turned off when you exit the car. Double-check to avoid accidental drainage, especially if your vehicle does not have automatic shut-off features.

2. Drive Regularly and Take Longer Trips

Driving your car regularly keeps the battery charged. Aim for at least a 20-30 minute drive every few days, particularly if you’re not using your car often. Avoid excessive short trips, as they don’t allow the alternator to recharge the battery adequately.

3. Check Battery Terminals and Clean as Needed

Inspect the battery terminals regularly for corrosion, which can prevent proper current flow. Clean the terminals with a solution of baking soda and water, then rinse with clean water. This will ensure strong connections and prolong battery life.

4. Unplug Accessories When Not in Use

Remove phone chargers, GPS units, and other devices from power outlets when they’re not in use. This simple step can prevent minor but consistent drains that add up over time.

5. Monitor the Battery’s Age and Condition

If your battery is more than three years old, consider having it tested regularly to ensure it’s still functioning properly. Many auto parts stores offer free battery testing, which can help you determine when it’s time for a replacement.

6. Limit Use of Electrical Components When Engine is Off

Avoid using the radio, lights, or other electrical systems when the engine isn’t running. These components pull power from the battery, and repeated usage can weaken it over time.

7. Have Your Alternator Checked Periodically

Your alternator is crucial for keeping the battery charged. Regularly inspect the alternator and belt for any signs of wear or malfunction. If the alternator is defective, repair or replace it as soon as possible to avoid battery issues.

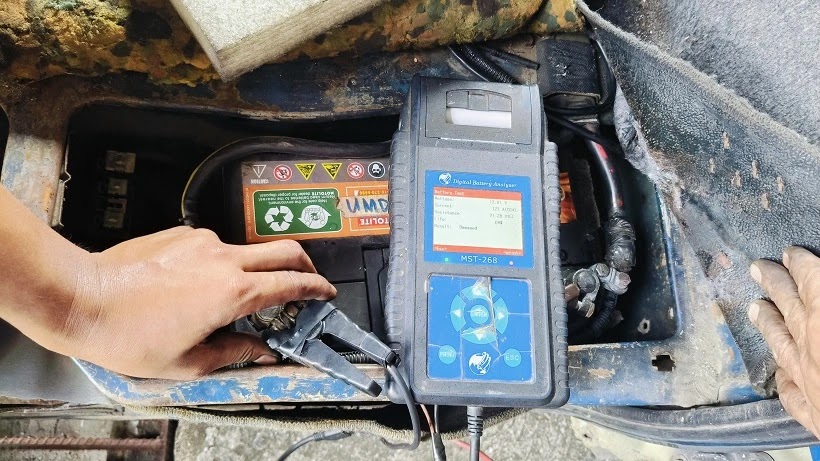
How to Test for Battery Drain (Parasitic Draw Test)

A parasitic draw test can help identify if any component is drawing excessive power when the vehicle is off. Here’s a simple process you can follow:

1. Turn Off the Car: Make sure the ignition and all accessories are off.

2. Disconnect the Battery Cable: Disconnect the negative battery cable.

3. Use a Multimeter: Connect a multimeter between the negative battery terminal and the disconnected cable.

4. Check for Draw: A typical draw should be around 50 milliamps or less. If it’s significantly higher, start pulling fuses one by one to find the circuit that’s causing the drain.

This test can help identify components with parasitic drain issues, such as a stuck relay or faulty light switch.

Conclusion

Understanding "What drains a car battery" can help you identify, troubleshoot, and prevent common battery problems. By keeping lights off, maintaining clean terminals, taking longer drives, and monitoring your battery’s age, you can reduce the risk of a drained battery. Regular maintenance checks, such as inspecting the alternator and battery condition, will also improve your car’s reliability and extend the battery's life. Following these simple practices can save you from unexpected car troubles and ensure that your vehicle is always ready to go.


Want more videos all about auto?
Subscribe to our YouTube channel👉Cartech Home
Textual description of firstImageUrl

Car Won’t Start After Replacing Battery? Common Causes

Cartech image

When you replace a car battery, you usually expect the engine to roar back to life. But what if it doesn’t? A car that won’t start after a battery replacement can be frustrating and perplexing. Fortunately, this issue is more common than you might think, and understanding the potential causes can help you resolve it efficiently. This article delves into why a car won’t start after replacing the battery, exploring key issues that could be at play, how to troubleshoot them, and practical solutions to get you back on the road.

Why a Car Won’t Start After Replacing Battery

When you replace a battery, several things could potentially go wrong. From improper installation to electrical issues or component failure, let’s explore why this might happen and what can be done about it.

1. Incorrect Battery Installation

One common reason why a car won’t start after replacing a battery is due to improper installation. If the battery terminals aren’t securely connected, the vehicle may not receive power from the battery, preventing it from starting.

Solution: Check the battery terminals and ensure that they’re properly tightened and free of corrosion. Loose or corroded connections can prevent your car from starting.

2. Wrong Battery Type or Size

Using the wrong battery can lead to starting issues. Not all car batteries are compatible with all vehicles, and installing a battery with incorrect specifications can cause power issues.

Solution: Verify that the battery meets the requirements listed in your vehicle’s manual. The correct battery size, voltage, and power rating are essential for a proper start.

3. Battery Isn’t Fully Charged

New batteries aren’t always fully charged when purchased. While some batteries are ready for use right out of the box, others require charging.

Solution: Test the battery’s voltage. If it’s below the recommended level, charge it before attempting to start the car. Most automotive batteries need at least 12.4 volts to start a car.

4. Battery Cable Corrosion

Battery cable corrosion can occur over time, especially on older vehicles. Corrosion prevents a proper electrical connection, which can cause the car not to start after replacing the battery.

Solution: Inspect and clean the battery cables using a wire brush or battery cleaner. Be sure to wear gloves and take precautions as battery corrosion can be harmful. Reattach the cables once cleaned.

5. Faulty Battery Cables

If the battery cables are damaged or frayed, they may not carry the necessary power from the battery to start the engine.

Solution: Inspect the cables for any visible wear and tear, breaks, or fraying. If they’re damaged, consider replacing the cables to ensure they transmit the necessary power effectively.

6. Blown Fuses

In some cases, replacing a battery can lead to blown fuses, which can interfere with starting your car. Fuses protect electrical components from power surges, but a battery change can sometimes trigger a fuse to blow.

Solution: Consult your vehicle’s manual and check the fuse box for any blown fuses. Replace any damaged fuses with ones that have the same amperage rating.

7. Ignition Switch Problems

If your car’s ignition switch is faulty, replacing the battery might not solve your starting problem. The ignition switch is responsible for sending power to the starter motor, and a faulty switch could prevent the car from starting.

Solution: If you suspect the ignition switch, consider consulting a mechanic for testing and possible replacement. Ignition switch issues can be complex and are often best handled by a professional.

Diagnosing Electrical Issues After Battery Replacement

Apart from the mechanical issues, electrical problems can also prevent a car from starting. Here are some of the main electrical issues to consider when diagnosing a car that won’t start after replacing the battery:

1. Immobilizer System Activated

Modern cars often come with an immobilizer system designed to prevent theft. If you replace the battery, it might reset or trigger the immobilizer, preventing the car from starting.

Solution: Check if the immobilizer warning light is on. Consult your owner’s manual to deactivate or reset the immobilizer. In some cases, you may need to use a special key fob function to unlock the immobilizer.

2. Computer System Reset

In modern cars, the onboard computer (ECU) can sometimes “forget” key settings when the battery is replaced. This can lead to issues with the car not starting as the ECU may need to re-learn certain functions.

Solution: Many vehicles require an ECU reset. Try turning the ignition key to the “on” position without starting the car, and leave it for a few minutes. This can help the computer reset. Alternatively, consult a mechanic to properly reinitialize the system.

3. Starter Motor Issues

If the battery has been replaced, but the starter motor is faulty, the car may fail to start. This is because the starter motor is responsible for cranking the engine, and without it functioning properly, the car won’t start.

Solution: Test the starter motor by turning the key. If you hear a clicking noise, the starter may not be receiving enough power or could be failing. Consider having it tested and replaced if necessary.

4. Alternator Problems

The alternator is essential in keeping the battery charged while driving. If alternator is bad or it’s not working properly, the new battery may drain quickly, leaving the car unable to start.

Solution: If your battery is frequently losing charge, have the alternator tested. Most auto shops offer this service and can diagnose if the alternator needs replacing.

5. Grounding Issue

The vehicle’s electrical system relies on a grounding connection to function properly. Poor grounding can prevent the car from starting even after a battery replacement.

Solution: Check the grounding cable for any signs of corrosion or looseness. Clean and secure the grounding connection to restore proper functionality.

Advanced Troubleshooting for Why Car Won’t Start After Replacing Battery

When basic troubleshooting doesn’t resolve the issue, more advanced methods may be needed to identify the problem.

1. Perform a System Diagnostic

Many auto repair shops or auto part stores have diagnostic tools that can scan your vehicle’s system for error codes. These tools can pinpoint issues with sensors, modules, or other electrical components that may prevent your car from starting.

Solution: Run a diagnostic scan to identify any fault codes. Address the specific error codes based on the scan results.

2. Check for Parasitic Draw

A parasitic draw occurs when electrical components drain the battery while the vehicle is off. This can prevent a car from starting after battery replacement.

Solution: To check for a parasitic draw, disconnect the battery’s negative terminal, connect a multimeter in series, and measure the draw. If there’s a high draw, locate the source by removing fuses one by one until the draw decreases, which can indicate the circuit causing the problem.

3. Inspect Relays

Relays are crucial for many vehicle systems, including starting. A faulty relay can prevent the car from starting even if the battery is brand new.

Solution: Check the starter relay, located in the fuse box, for any signs of malfunction. Swap it with a similar relay to test if the issue persists.

4. Test the Fuel System

Sometimes, a car won’t start after replacing a battery due to fuel-related issues. A weak fuel pump, clogged fuel filter, or fuel injector problem can also cause starting issues.

Solution: Listen for the fuel pump’s hum when turning the ignition to “on.” If it’s silent, you may have a fuel delivery issue that requires professional inspection.

Preventive Measures to Avoid Car Not Starting After Battery Replacement

Now that you’ve seen the possible causes and solutions, let’s discuss some preventive measures to avoid these issues in the future:

1. Use the Correct Battery Type: Always refer to your car’s manual for the recommended battery specifications.

2. Secure Battery Connections: Ensure the battery terminals are tightened securely and free of corrosion.

3. Maintain Electrical Components: Periodically inspect cables, fuses, and relays for wear or damage.

4. Check Charging System Regularly: Routine alternator checks can prevent sudden battery drains.

5. Avoid Draining Accessories: Reduce the usage of power-draining accessories when the engine is off to prevent unnecessary battery strain.

When to Seek Professional Help

If you’ve exhausted the above troubleshooting steps and your car still won’t start after replacing the battery, it may be time to consult a mechanic. Professionals have the tools and expertise to diagnose complex issues that may go unnoticed in a DIY approach. Certain electrical or mechanical issues, such as a failing starter or ECU malfunction, are best handled by professionals to ensure accurate diagnostics and repairs.

Summary

If your car won’t start after replacing the battery, don’t panic. This problem can stem from a variety of issues, ranging from improper installation, electrical problems, or component malfunctions. By methodically troubleshooting common causes—such as checking battery connections, testing the starter motor, and inspecting fuses—you can often resolve the problem yourself. In cases where DIY solutions aren’t enough, professional assistance is recommended to diagnose and address complex issues.

Understanding why your car won’t start after a battery replacement, along with practical troubleshooting steps, empowers you to address the issue confidently. Remember, preventive measures like using the correct battery and maintaining electrical components can also help prevent future issues, ensuring your car remains dependable and ready to go when you need it.


Want more videos all about auto?
Subscribe to our YouTube channel👉Cartech Home
Textual description of firstImageUrl

Transmission Slipping: Causes, Symptoms, and How to Fix It

Cartech image

Transmission slipping is a common issue that affects the performance and longevity of vehicles. When a transmission slips, it struggles to stay in the correct gear, leading to a host of problems, from jerky shifts to reduced power. In this article, we’ll discuss the causes, symptoms, and solutions of transmission slipping, providing you with a complete understanding of the issue.

What is Transmission Slipping?

Transmission slipping occurs when a vehicle’s transmission shifts unpredictably or fails to remain in the correct gear. Instead of smoothly shifting from one gear to another, the transmission may struggle, creating a delay or causing the engine to rev up unexpectedly. This can result in loss of power, excessive wear on transmission parts, and even dangerous driving conditions.

Understanding the basics of transmission function can help clarify why transmission slipping is problematic. A vehicle’s transmission is responsible for transferring power from the engine to the wheels through a series of gears. When everything works correctly, the car’s speed increases smoothly as the transmission shifts gears. However, if the transmission starts slipping, this balance is disrupted, and your vehicle’s performance suffers.

Common Symptoms of Transmission Slipping

Detecting transmission slipping early can save you from expensive repairs and potential breakdowns. Here are some telltale symptoms:

1. Delayed or Rough Shifts

A slipping transmission often hesitates before shifting to the next gear. You may notice that the RPM (revolutions per minute) spikes before the gear change occurs. This delay can be particularly evident during acceleration.

2. Unexpected Shifting

In some cases, the transmission may shift gears unexpectedly, such as shifting into neutral or another unintended gear while driving. This loss of control can lead to hazardous driving conditions.

3. Overheating Transmission

Transmission slipping causes friction within the gearbox, resulting in excess heat. If your transmission temperature warning light comes on, it could be a sign of transmission slipping.

4. Loss of Power

When a transmission slips, it can’t efficiently transfer power from the engine to the wheels, which results in sluggish performance. You may experience reduced acceleration or feel as though the car is struggling to move forward.

5. Unusual Noises

Grinding, clunking, or whining sounds from the transmission can also indicate slipping. These noises typically suggest that internal components are not engaging properly, leading to increased wear on gears and bearings.

6. Transmission Fluid Leaks

If your transmission is slipping, it’s essential to check for fluid leaks. Low transmission fluid can be both a cause and a result of transmission problems, as it prevents proper lubrication and cooling of transmission components.

Common Causes of Transmission Slipping

Transmission slipping can be triggered by several factors, each affecting the transmission’s ability to shift gears effectively.

1. Low or Contaminated Transmission Fluid

Transmission fluid lubricates and cools the transmission, allowing for smooth gear shifts. When fluid levels are low, friction increases within the transmission, causing it to overheat and slip. Additionally, dirty or contaminated transmission fluid can also hinder the transmission’s performance.

2. Worn Clutch Plates

In automatic transmissions, clutch plates help facilitate smooth gear shifts. Over time, these plates can wear out, reducing their ability to engage properly. Worn clutch plates are a leading cause of transmission slipping, especially in high-mileage vehicles.

3. Faulty Solenoids

Transmission solenoids are small valves that control the flow of transmission fluid. A faulty solenoid can result in erratic shifting or prevent the transmission from holding a gear, leading to slipping.

4. Damaged or Worn Bands

Transmission bands link the gears together in an automatic transmission. Over time, these bands may become loose or worn, causing the transmission to slip between gears or fail to engage altogether.

5. Overheating

Excessive heat is a common culprit in transmission slipping. Overheating can damage vital transmission components, causing seals and gaskets to break down, leading to fluid leaks and loss of pressure.

6. Worn Gears

Over time, the gears within the transmission can wear down, especially if the transmission fluid has not been changed regularly. Worn gears are less able to mesh properly, leading to slipping, rough shifts, and eventual failure.

Diagnosing Transmission Slipping

Identifying transmission slipping requires careful observation of the symptoms mentioned above. However, a mechanic can perform a more thorough diagnosis through:

1. Diagnostic Scan

Modern vehicles are equipped with onboard diagnostics (OBD) systems that store error codes when problems arise. A mechanic can use a scanner to retrieve these codes, which can indicate issues such as solenoid failures or clutch wear.

2. Fluid Inspection

Transmission fluid should be clear and red in color. If it appears brown, smells burnt, or contains metal shavings, it’s likely contaminated and may indicate internal transmission damage.

3. Road Test

Mechanics may also perform a road test, where they monitor how the transmission behaves under various driving conditions. This helps identify issues such as delayed shifting, loss of power, and unusual noises.

4. Pressure Test

A transmission pressure test can reveal whether the transmission is receiving adequate hydraulic pressure. Low pressure is a common cause of transmission slipping and can often be traced to low fluid levels, leaks, or solenoid issues.

How to Fix Transmission Slipping

The appropriate solution for transmission slipping depends on the severity of the issue and the underlying cause. Here are some common repair options:

1. Transmission Fluid Change

If your transmission fluid is low or contaminated, a simple fluid change may resolve slipping issues. In some cases, mechanics recommend a fluid flush, which removes all the old fluid and replaces it with fresh fluid. Regular fluid changes are critical to preventing transmission slipping.

2. Replacing Worn Clutch Plates or Bands

If worn clutch plates or bands are causing transmission slipping, they may need to be replaced. Replacing these parts can be labor-intensive, but it is often necessary for high-mileage vehicles or those subjected to heavy loads.

3. Repairing or Replacing Solenoids

Faulty solenoids can usually be replaced without removing the entire transmission. This can be a cost-effective solution if the slipping is due to solenoid failure.

4. Transmission Rebuild or Replacement

In cases where transmission slipping is caused by extensive wear and tear or internal damage, a full rebuild or replacement may be necessary. Rebuilding involves replacing worn-out parts and reassembling the transmission. While expensive, it’s often more economical than a complete transmission replacement.

5. Addressing Transmission Overheating

If overheating is causing your transmission to slip, installing a transmission cooler can help regulate temperature, preventing further damage.

6. Adjusting the Transmission Bands

Some transmissions allow for band adjustments, which can help reduce slipping. However, not all transmissions have adjustable bands, so consult your mechanic to see if this option is available.

Preventing Transmission Slipping

Routine maintenance and mindful driving can help prevent transmission slipping, saving you time and money in the long run.

1. Regular Fluid Checks

Checking transmission fluid levels regularly can prevent slipping caused by low fluid. Ensure you are using the correct type of transmission fluid recommended by your vehicle manufacturer.

2. Replace Fluid at Regular Intervals

Transmission fluid loses its effectiveness over time, so following the manufacturer’s recommendation for fluid replacement can keep your transmission running smoothly.

3. Avoid Overloading

Avoid exceeding your vehicle’s weight limit, as overloading can strain the transmission and lead to premature wear.

4. Allow the Engine to Warm Up

In cold weather, give your engine a few minutes to warm up before driving. This allows the transmission fluid to reach optimal temperature, ensuring smooth gear changes.

5. Drive Mindfully

Avoid sudden accelerations and hard braking, as these driving habits place undue stress on the transmission. Instead, drive smoothly and gradually increase speed.

When to See a Mechanic

If you notice any symptoms of transmission slipping, it’s crucial to consult a mechanic as soon as possible. Delaying repairs can lead to further damage and higher costs. Additionally, since transmission slipping can impact your vehicle’s safety, timely attention can prevent accidents caused by unexpected shifting or loss of power.

Cost of Fixing Transmission Slipping

Repairing a slipping transmission can range from a few hundred dollars to several thousand, depending on the severity of the issue. For example:

• Transmission Fluid Change or Flush: $80 to $250
• Solenoid Replacement: $200 to $500
• Clutch or Band Replacement: $500 to $1,500
• Transmission Rebuild or Replacement: $1,500 to $4,000 or more


These costs vary by vehicle make, model, and location. Transmission repairs can be costly, but proactive maintenance can help reduce the likelihood of expensive repairs.

Conclusion

Transmission slipping is a significant issue that can compromise the performance and safety of your vehicle. By recognizing the symptoms early and understanding the causes, you can take the necessary steps to fix or prevent this problem. Whether it’s a fluid change, solenoid replacement, or a full transmission rebuild, addressing transmission slipping promptly is essential for maintaining a reliable vehicle. Remember, regular maintenance and mindful driving can go a long way in keeping your transmission in good condition, ultimately helping you avoid costly repairs.

Textual description of firstImageUrl

Why Is My Car AC Not Cold? Top Reasons & Fixes Explained

If you’ve ever been on a hot day drive, turned on your car’s air conditioner, and felt nothing but warm air, you know how frustrating it can be when your car’s AC isn’t working properly. Not only is it uncomfortable, but it can also be puzzling to figure out why your AC isn’t cooling as it should. In this guide, we’ll explore the most common reasons for an underperforming car AC, including easy-to-fix issues and more complex problems that may require a professional.

How Does a Car AC Work?

Before diving into troubleshooting, it’s helpful to understand the basics of how a car’s AC system works. Your car’s air conditioning system involves several components that work together to cool the air. These include:

• Compressor: Pressurizes the refrigerant and circulates it through the system.
• Condenser: Located near the radiator, it cools down the refrigerant.
• Evaporator: The evaporator absorbs heat from the air, cooling it down before it reaches the cabin.
• Expansion Valve: Controls the refrigerant flow into the evaporator.
• Refrigerant: A chemical responsible for cooling the air in the system.

Each of these parts plays an essential role in cooling the air before it reaches the cabin. If any component is damaged, malfunctioning, or low on refrigerant, your AC’s performance can suffer. Let’s look at the top reasons why your car AC may not be cold.

Common Reasons Your Car AC Isn’t Cold

1. Low Refrigerant Level

The most common reason for warm air from your car’s AC is a low refrigerant level. The refrigerant, also known as Freon, is essential for cooling the air. Over time, refrigerant levels can drop due to small leaks in the system, especially if your car is older. When the refrigerant is low, the system cannot produce cool air.

Solution: If you suspect low refrigerant, have a professional inspect and recharge the system. It’s also important to repair any leaks to avoid the same problem recurring.

2. AC Compressor Issues

The compressor is the heart of the AC system, responsible for circulating refrigerant. If the compressor isn’t working correctly, refrigerant can’t flow, resulting in warm air. Compressors can fail due to electrical problems, mechanical breakdowns, or refrigerant issues. If the compressor’s clutch (which engages and disengages the compressor) isn’t functioning, it may not be cooling as intended.

Solution: Compressor issues often require the help of a technician. They can diagnose if the compressor needs repair or replacement.

3. Condenser Blockages or Damage

The condenser’s job is to cool down the refrigerant before it moves into the evaporator. Positioned near the front of your car, the condenser is exposed to dirt, debris, and even small rocks that can damage or clog it. If airflow is blocked or the condenser is damaged, your AC system won’t cool effectively.

Solution: Inspect the condenser for any visible blockages or damage. Clear away any debris and, if necessary, have a professional examine and repair the condenser.

4. Faulty Cooling Fans

Cooling fans help dissipate the heat from the refrigerant. If the fans are damaged or not working properly, the condenser may overheat, preventing proper cooling of the refrigerant. Fans can stop working due to electrical issues, damaged blades, or burnt-out motors.

Solution: Inspect the cooling fans for visible damage or obstructions. If they aren’t running, a mechanic can determine if the issue is electrical or if the fans need replacing.

5. Faulty or Blocked Expansion Valve

The expansion valve controls how much refrigerant enters the evaporator. If the expansion valve is stuck open or closed, it can disrupt the refrigerant flow, impacting the AC’s ability to cool the air. A blocked or malfunctioning expansion valve can cause warm air to blow from the vents.

Solution: A professional can check the expansion valve and clean or replace it as needed to ensure proper refrigerant flow.

6. Malfunctioning Evaporator

The evaporator absorbs heat from the air before it enters your car’s cabin. If the evaporator is clogged or damaged, the AC will not cool efficiently. Mold, mildew, and debris can accumulate in the evaporator over time, reducing its effectiveness.

Solution: Cleaning the evaporator can sometimes solve the issue. In cases of severe blockage or damage, you may need a replacement, which should be done by a professional.

7. Electrical Issues

Electrical problems can affect multiple parts of your AC system. Wiring issues, blown fuses, and faulty relays can interrupt the power supply to essential AC components, such as the compressor and fans.

Solution: A mechanic can inspect your vehicle’s electrical system to identify faulty wiring, fuses, or relays, repairing them to restore AC function.

8. Faulty AC Control System

Modern cars have complex electronic systems that control the AC. If these controls or sensors are faulty, they can prevent the AC from functioning as intended. For instance, a malfunctioning thermostat sensor may fail to detect cabin temperature accurately, leading to inadequate cooling.

Solution: Diagnosing AC control system issues often requires a technician who can use diagnostic tools to pinpoint and repair control system malfunctions.

Signs That Your Car AC Needs Attention

If you’re unsure whether your AC problem needs immediate attention, here are some warning signs to watch for:

• Warm or inconsistent air: A definite indicator that the AC isn’t cooling properly.

• Unusual noises: Grinding, clicking, or hissing sounds could signal a problem within the AC system.

• Unpleasant smells: Mold, mildew, or refrigerant leaks can cause a foul odor when you turn on the AC.

• AC works intermittently: If the AC blows cold air one moment and warm air the next, it may be a sign of a failing compressor or low refrigerant.

• Visible leaks: Pools of liquid (often oily) under the car could indicate refrigerant leakage.

How to Maintain Your Car’s AC System

Proper maintenance can help keep your car’s AC running efficiently. Here are a few ways to maintain it:

1. Run the AC regularly: Even in winter, run your AC for a few minutes every few weeks. This keeps the compressor lubricated and prevents seals from drying out.

2. Change the cabin air filter: A clogged air filter can reduce airflow and put additional strain on your AC system. Follow the manufacturer’s recommendation on filter replacement.

3. Check refrigerant levels: If you notice reduced cooling power, check refrigerant levels. A recharge may be all that’s needed.

4. Inspect for leaks: Regularly check under your car for any signs of refrigerant leakage and fix any leaks immediately.

5. Professional AC service: Have your AC inspected annually by a professional, especially before summer, to catch potential issues early.

DIY Troubleshooting Tips for a Car AC That’s Not Cold

Some car AC issues can be addressed at home. Here are a few DIY troubleshooting tips you can try before consulting a mechanic:

1. Check the AC Settings

Double-check that your AC settings are correct. Make sure you’ve selected the lowest temperature and highest fan setting. Sometimes, the “recirculate” option provides cooler air than the “fresh air” setting.

2. Inspect the AC Vents

Debris, dust, and pet hair can accumulate in the AC vents. Regularly cleaning your vents with a vacuum or a small brush can improve airflow and cooling.

3. Listen for Unusual Sounds

Turn on the AC and listen carefully. Any unusual noises like clicking, grinding, or hissing can help pinpoint where the issue lies. For example, a clicking sound might indicate compressor issues, while a hissing sound could signal a refrigerant leak.

4. Check the Condenser for Blockages

Open the hood and look at the condenser, located near the front of the car. Clear away any leaves, debris, or dirt that may be obstructing it. A clear condenser allows for better cooling performance.

5. Inspect the Compressor Clutch

When you turn on the AC, you should hear a click indicating that the compressor clutch is engaging. If you don’t hear this click, it could mean the clutch is not engaging, pointing to a potential compressor issue.

When to Visit a Mechanic

If you’ve tried basic troubleshooting and your AC is still blowing warm air, it may be time to visit a professional. Certain components, like the compressor, condenser, and evaporator, often require specific diagnostic tools and technical skills to assess and repair.

Conclusion

If you find yourself asking, “Why is my car AC not cold?” there’s no need to panic. With a little understanding of the system and some troubleshooting, you may be able to identify the cause and possibly fix it yourself. However, more complex problems will need a professional’s expertise to ensure your AC is back to keeping you cool and comfortable on the road. Regular maintenance, like checking refrigerant levels, replacing the cabin filter, and cleaning vents, can go a long way in preventing AC issues in the future.

By staying aware of potential issues and addressing them early, you’ll be able to enjoy a cool, refreshing ride even on the hottest days. If your car’s AC is not working as it should, try the tips above, and don’t hesitate to consult a mechanic for a more thorough inspection and solution.


Want more videos all about auto?
Subscribe to our YouTube channel👉Cartech Home
Textual description of firstImageUrl

How to Tell If Car Battery Is Dying: Key Signs and Solutions

Cartech image

A reliable car battery is essential for ensuring a smooth start every time you turn the key. However, as car batteries age, they become prone to issues that can leave you stranded at the worst possible times. Knowing the early signs of a dying battery can save you the inconvenience of unexpected breakdowns. In this article, we’ll cover everything you need to know about identifying a dying car battery, the common causes of battery problems, and practical solutions to keep your vehicle running smoothly.

Understanding the Role of a Car Battery

A car battery is more than just a source of power to start your vehicle. It supplies the electricity necessary to power your car’s electrical systems when the engine isn’t running and helps stabilize voltage to keep your engine running efficiently. Typically, car batteries last between three to five years, but this depends on factors like usage, weather conditions, and overall maintenance.

Common Signs That Your Car Battery is Dying

Recognizing the signs of a dying battery can help you avoid being stranded. Here are some of the most common indicators:

a. Slow Engine Crank

One of the earliest signs of a dying car battery is a slow engine crank. If you notice the engine taking longer than usual to start or the cranking sound seems weak, it may mean your battery is losing power.

b. Dim Headlights and Interior Lights

Dimming headlights, dashboard lights, or interior lights are common indicators of a battery that’s losing its charge. Since the battery powers these lights, a failing battery may struggle to keep them at full brightness.

c. Clicking Sound When Turning the Key

When your car’s battery is low, it may not provide enough power to start the engine, leading to a clicking noise when you turn the key. This sound is a clear indication that the battery doesn’t have enough charge to engage the starter motor.

d. Electrical Component Malfunction

A dying battery may cause various electrical components to malfunction. These include power windows, radio, air conditioning, and other systems that rely on battery power when the engine is off.

e. Check Engine or Battery Warning Light

If you see a battery warning light or check engine light on your dashboard, it could signal a weak battery. While other factors can trigger these lights, a faulty battery is a common cause.

f. Frequent Need for Jump-Starts

If you find yourself frequently needing jump-starts to get your car going, it’s likely that your battery is nearing the end of its life.

g. Swollen or Bloated Battery Case

A swollen battery case typically indicates that the battery has overheated or is holding too much pressure, which can reduce its lifespan and reliability. It’s best to replace a battery if you notice any bulging.

Causes of a Dying Car Battery

Understanding the causes of battery failure can help you take steps to prolong its life. Here are the main reasons why car batteries fail:

a. Age and Wear

The typical car battery lasts between three to five years. As batteries age, their ability to hold a charge weakens due to internal wear and chemical breakdown.

b. Extreme Temperatures

High temperatures can cause the battery fluid to evaporate, leading to reduced battery life. On the other hand, cold weather can reduce the battery’s capacity to generate enough power, making it harder to start the engine.

c. Short Drives and Frequent Start-Stops

Short trips don’t give your battery enough time to recharge fully. Frequent starting and stopping of the engine puts extra strain on the battery, reducing its lifespan over time.

d. Parasitic Drains

Parasitic drains occur when electrical components or accessories drain battery power even when the engine is off. Common culprits include lights left on, faulty wiring, or electronic devices plugged into the car’s power outlets.

e. Corroded Battery Terminals

Corrosion on battery terminals can interfere with the flow of power from the battery to the car. This reduces the battery’s effectiveness and can lead to failure if left unchecked.

f. Faulty Charging System

If your car’s alternator isn’t working properly, it may fail to recharge the battery as you drive. A faulty charging system can cause the battery to die prematurely.

g. Loose or Damaged Connections

Loose or damaged battery cables can prevent your battery from charging properly, making it difficult to start your car and eventually leading to a dead battery.

How to Test Your Car Battery’s Health

Testing your car battery periodically can help you assess its health and know when it’s time for a replacement. Here’s how you can test your battery:

a. Use a Multimeter

A multimeter is a simple tool to measure voltage. To check your battery, set the multimeter to 20 volts, place the red lead on the positive terminal and the black lead on the negative terminal. A healthy battery should read around 12.6 volts or higher.

b. Perform a Load Test

A load test measures the battery’s ability to hold a charge under load. You can either use a battery tester or visit an auto repair shop for a professional load test.

c. Check for Corrosion

Visually inspect the battery terminals for any signs of corrosion. Clean any buildup with a battery cleaner or a mixture of baking soda and water to ensure good connectivity.

d. Look at Battery Fluid Levels

If you have a non-sealed battery, you can check the fluid levels by removing the caps on each cell. Low levels may indicate the battery is drying out, which reduces its ability to hold a charge.

Steps to Prolong Your Car Battery Life

Taking steps to extend your battery’s life can save you money and prevent unexpected issues. Here are some tips:

a. Limit Short Trips

If possible, avoid short trips that don’t give your alternator enough time to recharge the battery. Consider driving longer distances or using a battery charger if you frequently take short drives.

b. Turn Off All Accessories

Ensure all lights, radio, and other accessories are turned off when the engine is off. This helps prevent parasitic drain on the battery.

c. Park in a Garage or Shade

Parking in a garage or shaded area can protect your battery from extreme temperatures that can shorten its lifespan.

d. Clean the Terminals Regularly

Keep the battery terminals clean to ensure a strong connection. Regularly inspect and clean the terminals if you notice corrosion.

e. Invest in a Battery Charger or Maintainer

For those who don’t drive their cars often, a battery maintainer or trickle charger can keep the battery at an optimal charge level and prevent it from dying.

When to Replace Your Car Battery

A car battery nearing the end of its lifespan may struggle to keep up with your vehicle’s electrical demands, even with regular maintenance. Here are some situations that signal it’s time for a replacement:

a. Battery Age Exceeds Five Years

If your battery is over five years old, consider replacing it, even if it still works. Older batteries are more prone to sudden failure.

b. Consistent Starting Issues

If your engine struggles to start repeatedly, even after jump-starts, a replacement is likely needed.

c. Failed Battery Test

If a load test or voltage test shows poor performance, it’s time for a new battery.

Choosing the Right Replacement Battery

When it’s time to replace your battery, choosing the right one is crucial. Consider the following factors:

a. Battery Size

Ensure the replacement battery fits the dimensions of your car’s battery compartment. Batteries come in different group sizes based on car model and make.

b. Cold Cranking Amps (CCA)

CCA measures the battery’s ability to start in cold weather. Higher CCA ratings are recommended for regions with cold winters.

c. Reserve Capacity (RC)

RC indicates how long the battery can supply power if the alternator fails. A higher RC can be beneficial for cars with a lot of electrical equipment.

d. Warranty

Look for a battery with a good warranty for peace of mind. A longer warranty often indicates better quality and reliability.

Frequently Asked Questions (FAQs) About Car Batteries

Q1: How often should I check my car battery? It’s best to check your battery at least twice a year or as part of routine maintenance.

Q2: Can a dying battery damage my car? Yes, a weak battery can stress the car’s charging system and alternator, potentially leading to more expensive repairs.

Q3: How long can I drive with a dying battery? A failing battery could last days to months, but driving with it is risky as it may fail unexpectedly.

Q4: Are there eco-friendly options for disposing of old batteries? Yes, most auto parts stores and repair shops offer recycling programs for old batteries.

Q5: Can I revive a dead battery? Some batteries can be temporarily revived with a jump-start, but if it’s consistently failing, replacement is the best option.

Conclusion

Knowing how to tell if your car battery is dying can save you from inconvenient and costly breakdowns. By recognizing the early warning signs, understanding the causes, and following proper maintenance steps, you can prolong your battery’s life and keep your car running smoothly. Regular testing and timely replacement are essential to avoid surprises on the road. If you suspect your battery is failing, consider replacing it sooner rather than later to ensure a reliable start every time.


Want more videos all about auto?
Subscribe to our YouTube channel👉Cartech Home
Textual description of firstImageUrl

Top Signs of a Bad Car Battery: How to Spot a Failing Battery

Cartech image

A car battery is essential for starting the engine and powering the vehicle’s electrical systems. While batteries are designed to be durable, they will eventually lose their effectiveness and need replacement. Knowing the signs of a bad car battery can prevent unexpected breakdowns, costly repairs, and the inconvenience of being stranded. This article will discuss in detail the various signs of a bad car battery, explaining what to look for to identify when your battery is reaching the end of its life.

What Does a Car Battery Do?

A car battery performs the critical task of supplying electrical power to the vehicle's starter motor, allowing it to crank the engine. It also powers lights, the radio, the dashboard, and other electrical components when the engine isn’t running. Additionally, it plays a part in stabilizing voltage and supplying power to electronic parts.

Since the battery plays such a central role, it’s important to recognize the signs of a failing battery early to avoid disruptions to your daily routines. Let’s take a closer look at the common signs of a bad car battery so you can spot trouble before it worsens.

1. Slow Engine Crank

One of the first signs of a bad car battery is a slow engine crank. When the engine cranks slowly, it might sound labored, as if it’s struggling to start. A healthy battery should provide enough power to the starter motor to turn over the engine quickly and smoothly.

• What It Means: A weak or failing battery doesn’t have the power to fully engage the starter motor, making it harder for the engine to crank.

• How to Check: Pay attention to how your engine starts each time. If it cranks slower than usual, it’s worth checking the battery health.

2. Dim Headlights and Electrical Issues

Another sign of a bad car battery is dimming headlights and interior lights. Since the battery powers all the vehicle’s electronics, weak battery power will affect the brightness of lights.

• providing enough power. Dimming can become worse when other electrical components are in use, such as the radio or air conditioner.

• How to Check: Observe the brightness of the headlights, interior lights, and dashboard indicators. If they are dim or flicker, especially when the engine isn’t running, this is a clear sign of a battery issue.

3. Dashboard Warning Light (Battery Indicator)

Most modern cars have a dashboard warning light that looks like a small battery icon. This indicator light typically illuminates when there’s an issue with the charging system or battery.

• What It Means: When the battery warning light comes on, it may not always mean the battery itself is failing but indicates a problem in the charging system.

• How to Check: If this light comes on, it’s best to have a professional diagnose the exact cause. In some cases, it may also indicate a failing alternator, which charges the battery while the engine is running.

4. Swollen or Bloated Battery Case

If the battery case is swollen or bloated, it’s usually a sign of internal damage. Extreme temperatures can cause the chemical reaction within the battery to change, leading to bulging in the case.

• What It Means: A swollen battery is a definite sign that it’s failing and needs replacement as soon as possible. Overcharging or exposure to high heat can also contribute to this issue.

• How to Check: Open the hood and visually inspect the battery. If the case is misshapen or swollen, the battery should be replaced to avoid leakage and potential hazards.

5. Frequent Jump-Starting Required

If your car requires frequent jump-starts, this is a major sign of a bad car battery. While occasional jump-starts can happen due to leaving the lights on or other accidental drains, needing them frequently signals a weak battery.

• What It Means: When a battery repeatedly loses its charge and can’t maintain a stable power supply, it’s on the verge of failure.

• How to Check: Keep track of how often you need a jump-start. Needing a jump-start more than once in a short period suggests it’s time for a new battery.

6. Corrosion on Battery Terminals

Corrosion is a common problem for car batteries and usually appears as a white or blue powdery substance on the battery terminals.

• What It Means: Corrosion reduces the battery’s ability to transfer electricity effectively. It can result from leaking acid and can cause voltage issues, impacting the overall battery performance.

• How to Check: Check the terminals for any signs of corrosion. Cleaning it can improve the connection, but if corrosion reappears often, it’s a sign of a battery nearing the end of its lifespan.

7. Electrical Malfunctions

A bad car battery can cause various electrical issues in your vehicle, including malfunctioning windows, mirrors, or locks, and an unresponsive infotainment system.

• What It Means: Since all electronics rely on the battery for power, a failing battery can cause these systems to behave erratically or become completely unresponsive.

• How to Check: Pay attention to any unusual behavior in electrical components, especially when starting the car. If these problems occur along with other signs, it could indicate a battery problem.

8. Unusual Smell (Rotten Egg Odor)

A sulfuric smell (similar to rotten eggs) coming from the battery or under the hood is a sign of a leaking battery. The sulfuric acid inside the battery can leak and produce this odor.

• What It Means: A leaking battery can be dangerous and should be replaced immediately. The chemical reaction within the battery has likely gone awry, causing the smell.

• How to Check: Smell near the battery and check for any visible leaks. Leaks are a serious hazard, and replacing a leaking battery is essential for safety.

9. Battery Age

Car batteries typically last between 3 to 5 years. If your battery is older than this, it may start to show signs of wear and tear, even if you haven’t noticed specific symptoms yet.

• What It Means: An older battery is more likely to fail due to the gradual depletion of its chemical energy stores.

• How to Check: Check your battery’s manufacturing date, usually located on the battery label. If it’s more than 3 years old, you may want to consider testing or replacing it before it fails completely.

10. Clicking Noise When Starting the Engine

When you turn the key, a single or repeated clicking noise may indicate a weak battery. This happens when there isn’t enough power to fully engage the starter motor.

• What It Means: The starter motor relies on battery power to start, and when the battery can’t supply enough power, it results in a clicking noise.

• How to Check: Try turning the ignition multiple times. If the clicking noise persists without starting, the battery may need attention.

11. Battery Won’t Hold a Charge

Even if you charge the battery, it might still fail to retain a charge. If your battery won’t hold a charge after being fully charged, it’s likely time for a replacement.

• What It Means: When a battery can’t hold a charge, it means that the internal components are deteriorating, and the battery is losing its capacity.

• How to Check: Use a multimeter to check the voltage after charging. If it drops quickly or doesn’t stay charged, the battery is likely bad.

Testing and Replacing a Bad Car Battery

If you observe any of these signs, it’s wise to have your battery tested. A mechanic or auto parts store can typically perform a battery test for free. This test measures the battery’s voltage, cold-cranking amps (CCA), and overall condition.

• Testing Equipment: A multimeter is a handy tool to check a battery’s voltage. Ideally, a fully charged car battery should have a voltage of about 12.6 volts. Anything below 12 volts indicates a weak or potentially failing battery.

• Replacing the Battery: When replacing a battery, make sure to choose the right size and type for your vehicle. Consult your owner’s manual or ask for advice from an auto parts store.

How to Prolong Battery Life

While every battery eventually needs to be replaced, you can prolong its life with proper maintenance:

1. Keep Battery Terminals Clean: Regularly clean off any corrosion to maintain good connections.

2. Limit Short Trips: Starting the car takes a significant amount of power. Frequent short trips don’t give the alternator enough time to recharge the battery.

3. Turn Off Accessories When Not in Use: This includes lights, radio, and air conditioning.

4. Check the Battery’s Physical Condition: Look out for cracks, leaks, or swelling.

Store the Car Properly: If you don’t use your car frequently, consider a trickle charger to keep the battery from losing charge.

Conclusion

Recognizing the signs of a bad car battery is essential for keeping your car in top shape. Slow cranking, dim headlights, frequent jump-starts, and a rotten egg odor are just a few signs that may indicate it’s time for a replacement. By paying attention to these warning signs and taking action early, you can avoid the inconvenience of a dead battery and keep your vehicle running smoothly.

Regular battery testing and maintenance are the best practices to ensure you aren’t caught off guard by a failing battery. With proper care, your car battery can last longer, giving you peace of mind and reliable performance every time you drive.


Want more videos all about auto?
Subscribe to our YouTube channel👉Cartech Home
Textual description of firstImageUrl

Car Cranks but Won’t Start: Top Causes and How to Fix It

If you’re facing an issue where your car cranks but won’t start, you’re not alone. This common problem can be frustrating, especially if you're not sure what's causing it or how to fix it. This guide will walk you through the possible reasons why a car cranks but doesn’t start, provide solutions to get you back on the road, and offer tips for preventing this issue in the future. Whether you’re a seasoned driver or new to car maintenance, this article will help you understand the factors involved and give you the confidence to address them.

What Does “Car Cranks but Won’t Start” Mean?

When we say a car “cranks but won’t start,” it means the engine turns over (or cranks) when you try to start it, but it fails to ignite and fully start. When the engine doesn’t catch and run, it can often point to a problem in one or more essential areas of the car’s starting system. These issues can range from fuel and ignition problems to air intake or sensor malfunctions.

Common Causes of a Car Cranking but Not Starting

Several potential causes can lead to this issue, and understanding each one can help you pinpoint the root problem. Here’s a look at the primary reasons a car cranks but won’t start.

1. Fuel System Issues

Fuel system issues are a frequent cause of this problem, as an engine needs a consistent fuel supply to start and run.

• Empty Fuel Tank: It might sound simple, but an empty fuel tank is a common cause for a car that cranks but won’t start. Always check your fuel gauge to rule this out.

• Clogged Fuel Filter: Over time, fuel filters can get clogged, limiting fuel flow to the engine. If the fuel can’t reach the engine, it will crank but not start.

• Fuel Pump Failure: The fuel pump is responsible for sending fuel from the tank to the engine. A failing fuel pump means that fuel doesn’t reach the engine, which can prevent it from starting.

• Faulty Fuel Injectors: Fuel injectors spray fuel into the engine’s combustion chamber. If they’re clogged or malfunctioning, the engine won’t get enough fuel to start.

2. Ignition System Problems

The ignition system is essential for starting an engine, and any issues here can cause a car to crank without starting.

• Dead or Weak Spark Plugs: Spark plugs ignite the air-fuel mixture in the engine. If the spark plugs are dirty, worn out, or not working, the engine may crank but won’t start.

• Faulty Ignition Coil: The ignition coil supplies power to the spark plugs. A faulty coil can prevent the spark plugs from firing, stopping the engine from starting.

• Distributor Problems: In older cars, the distributor sends voltage to the spark plugs. Any issues with the distributor can prevent the engine from starting.

3. Battery and Electrical Issues

The battery and electrical components play a crucial role in getting the engine to start.

• Weak or Dead Battery: A weak battery might provide enough power to crank the engine but not to start it. This is especially true in colder weather.

• Bad Battery Connections: Corroded or loose battery terminals can reduce the power flow to the engine, causing it to crank without starting.

• Blown Fuses or Bad Wiring: Electrical issues like a blown fuse or faulty wiring can prevent the car from starting even if it cranks.

4. Air Intake Problems

An engine needs a mix of fuel and air to start. Issues in the air intake system can affect this balance.

• Clogged Air Filter: If the air filter is clogged, the engine may not get enough air, making it difficult to start.

• Faulty Mass Air Flow Sensor (MAF): The MAF sensor measures the amount of air entering the engine and adjusts fuel delivery. A faulty MAF sensor can disrupt this balance, preventing the engine from starting.

5. Engine Timing Issues

Engine timing refers to the precise synchronization of components in the engine’s combustion cycle.

• Broken or Worn Timing Belt/Chain: A timing belt that breaks or slips out of place will disrupt the combustion cycle, stopping the engine from starting.

• Faulty Crankshaft Position Sensor: This sensor tells the engine’s computer the position of the crankshaft, which is essential for timing. A bad sensor can prevent the engine from starting.

6. Security System Malfunctions

In modern cars, a security system can sometimes prevent the car from starting.

• Immobilizer Issue: Many cars have an immobilizer that only allows the engine to start if the correct key is detected. If there’s an issue with the key or the immobilizer system, the car may crank but not start.

How to Diagnose a Car that Cranks but Won’t Start

Diagnosing the problem when a car cranks but won’t start can be tricky, but a systematic approach can help.

1. Check for Fuel Issues

Listen for a humming sound from the fuel pump when you turn the key. No sound might indicate a faulty fuel pump. Also, check the fuel gauge and inspect the fuel filter for signs of clogging.

2. Inspect the Ignition System

Remove a spark plug and check if it’s worn or dirty. Clean or replace as necessary. If the plugs look fine, the ignition coil might be the issue, and a multimeter test can confirm it.

3. Test the Battery

Use a voltmeter to check the battery voltage. A reading below 12.4 volts means the battery is weak and might need charging or replacement. Also, inspect the battery terminals for corrosion or looseness.

4. Look at the Air Filter

Examine the air filter for dirt or clogging. A clogged filter should be replaced to ensure proper air intake.

5. Check the Timing Belt

If the car is an older model with a timing belt, inspect it for wear or damage. A damaged belt should be replaced immediately, as it can lead to more severe engine damage.

6. Verify the Security System

If you suspect an immobilizer issue, try using a spare key. If the spare key works, there may be an issue with the original key's transponder.

How to Fix a Car that Cranks but Won’t Start

Once you've identified the possible cause, you can start fixing the issue.

1. Refuel or Replace Fuel Components

If the tank is empty, refuel. For clogged fuel filters or failing fuel pumps, replace these components. Clean or replace fuel injectors as necessary.

2. Replace Spark Plugs or Ignition Components

Install new spark plugs if the old ones are worn out. If the ignition coil or distributor is faulty, replace them.

3. Charge or Replace the Battery

Charge the battery if it’s low, or replace it if it’s weak. Clean the battery terminals to ensure a good connection.

4. Replace the Air Filter

If the air filter is clogged, replace it to ensure the engine receives sufficient airflow.

5. Repair or Replace the Timing Belt

A broken or worn timing belt needs to be replaced, and this should be done by a professional if you’re not experienced with engine repairs.

6. Reset or Repair the Security System

If the immobilizer is causing issues, consult your owner’s manual for resetting the system, or contact a dealership for help.

Prevention Tips for Avoiding a No-Start Condition

Here are some tips to prevent your car from cranking but not starting in the future.

1. Regular Maintenance: Routine maintenance, such as oil changes, spark plug replacements, and air filter checks, can prevent many no-start issues.

2. Keep the Battery Charged: Ensure your battery is always in good condition by having it checked during regular service appointments.

3. Use Quality Fuel: Use high-quality fuel and avoid letting your tank run too low, as debris in the tank can clog fuel filters.

4. Check Timing Belt Regularly: If your car has a timing belt, have it inspected at the recommended intervals.

5. Be Mindful of Security System: Avoid issues with the immobilizer by keeping the key in good condition and not exposing it to strong magnetic fields.

When to Seek Professional Help

Some fixes for a car that cranks but won’t start are simple and can be done on your own. However, certain issues, like timing belt replacement or complex electrical diagnostics, are best handled by professionals. Seek help if:

• You’re unable to diagnose the issue
• The repair involves complex engine components
• Your car requires specialized equipment for repairs

Conclusion

A car that cranks but won’t start can be caused by a range of issues, from fuel system problems to ignition faults and even security system malfunctions. By following the steps outlined in this guide, you can diagnose, address, and potentially prevent future no-start conditions. Regular maintenance and a proactive approach to car care can go a long way in keeping your vehicle running smoothly and avoiding frustrating starting issues.


Want more videos all about auto?
Subscribe to our YouTube channel👉Cartech Home

How to Tell if Tires Are Bald? Signs, Dangers, and Solutions

Tire maintenance is essential for vehicle safety and performance, and keeping an eye on your tire's condition is critical. Tires provide traction, stability, and control when you’re driving. However, as they wear out over time, their performance can be significantly compromised, particularly when they become “bald.” Bald tires are unsafe, as they lack the necessary tread depth for optimal grip on the road. So, knowing how to identify bald tires is crucial for every car owner. In this article, we’ll discuss various ways to check if your tires are bald, why bald tires are dangerous, and what you should do if you identify bald spots.

Why Is Tread Important for Tires?

Before diving into how to tell if tires are bald, it’s helpful to understand why tread is essential. The tread is the rubber pattern on the tire’s surface that makes contact with the road. It improves traction and helps channel water away from the tires, reducing the chances of hydroplaning in wet conditions. Over time, this tread wears down due to friction with the road, exposure to the elements, and general use. Tires become bald when this tread wears down to a level that no longer provides the grip necessary for safe driving.

How to Tell if Tires Are Bald

There are a few simple methods to check whether your tires are bald or nearing baldness. Here’s a detailed breakdown of each technique to make it easy for you to monitor your tire tread regularly.

1. The Penny Test

The penny test is a quick and easy method to check the tread depth. It’s been a popular technique for years, and here’s how it works:

• Take a penny and place it with Lincoln’s head down into the tire tread.

• Observe how much of Lincoln’s head is visible.

• If you can see the top of his head, the tread is too shallow, meaning your tires are either bald or close to it.

Typically, if the tread depth is less than 2/32 of an inch, it’s time to replace your tires. This test is a quick, no-tools-required way to check tread depth.

2. The Quarter Test

If you prefer a more conservative approach, you can use the quarter test instead:

• Place a quarter into the tread groove, with George Washington’s head facing down.

• If the tread reaches the top of his head, your tires have about 4/32 inches of tread depth left.

This method can help you identify tires that, while not bald yet, are nearing the end of their safe lifespan.

3. Built-in Tire Wear Indicators

Most modern tires come with built-in tread wear indicators, also known as wear bars. These indicators are small rubber bars that run across the tread grooves. When the tread wears down to the point where it’s level with these bars, it’s a clear sign your tires are bald or nearly bald.

• Look closely at the tire grooves; if the wear indicators are level with the tread, the tire has reached its safe limit and needs replacing.

• This feature makes it easier for drivers to identify bald tires without using any additional tools or performing tests.

4. Tread Depth Gauge

For the most accurate measurement, you can use a tread depth gauge. These inexpensive devices are available at most auto parts stores and provide a precise reading of tread depth.

• Insert the gauge into the tire’s tread grooves and check the measurement.

• A reading of less than 2/32 inches indicates that the tire is bald.

Using a tread depth gauge can help you monitor tread wear more precisely and ensure that your tires remain within safe tread limits.

5. Visual Inspection

Sometimes, bald tires are noticeable with a simple visual inspection. Here’s what to look for:

• Smooth areas: If certain spots on the tire look completely smooth without grooves, your tire is bald.

• Exposed cords: Tires that have worn down to the point of exposing metal or fabric cords are dangerously bald and should be replaced immediately.

• Cracks and Bulges: If the tire has cracks, bulges, or punctures, these could indicate aging and additional wear.

While visual inspections are not as precise as a gauge or wear indicator, they can be a good starting point if you suspect your tires may be bald.

Why Are Bald Tires Dangerous?

Driving on bald tires poses several risks, some of which could lead to serious accidents. Here are some of the dangers associated with bald tires:

1. Reduced Traction

Bald tires lack the tread necessary for optimal grip on the road, especially in wet conditions. Without sufficient tread, the tires cannot channel water away, which can increase the risk of hydroplaning. This means that on wet roads, bald tires can cause the vehicle to skid uncontrollably, putting both the driver and others on the road in danger.

2. Longer Stopping Distances

When your tires are bald, the braking distance required to stop your vehicle increases. If you suddenly need to stop or reduce speed, bald tires might fail to grip the road properly, resulting in a delayed or ineffective stop. This delay can be life-threatening in situations requiring immediate braking.

3. Increased Risk of Blowouts

Tires with minimal or no tread are more vulnerable to punctures and blowouts. Driving on bald tires, especially at high speeds, can lead to tire failure. A blowout can make you lose control of the vehicle, which could result in an accident.

4. Poor Handling

Bald tires significantly impact your car’s handling, making it harder to navigate turns or curves. In challenging driving conditions, such as rain or snow, bald tires make it difficult to control the vehicle, increasing the likelihood of an accident.

Legal Requirements for Tire Tread Depth

Many regions have legal requirements regarding tire tread depth. In the United States, for instance, the legal minimum tread depth is 2/32 inches. Driving with bald tires may not only lead to fines but also disqualify your car from passing inspection in certain states. To avoid potential legal issues, be aware of your local tire tread requirements.

How Often Should You Check for Bald Tires?

Regular tire checks can help you catch signs of wear early and avoid driving on bald tires. Here’s a suggested schedule for checking tire tread:

• Monthly Inspections: Ideally, perform a visual inspection every month. It only takes a few minutes and can help you identify issues early.

• Seasonal Changes: As temperatures change, tire wear can accelerate. Conduct a more thorough inspection when transitioning between seasons, especially before winter or rainy seasons.

• Before Long Trips: If you’re planning a long trip, always check your tires for signs of baldness or wear before hitting the road.

What to Do If You Identify Bald Tires

If you notice that your tires are bald or nearing baldness, it’s essential to replace them as soon as possible. Here’s what you can do:

1. Visit a Tire Professional: If you’re unsure about the condition of your tires, a professional can inspect them and recommend whether they need to be replaced.

2. Invest in Quality Tires: When replacing bald tires, opt for high-quality tires suitable for your driving needs. Consider factors like climate, road conditions, and how often you drive.

3. Keep Tires Inflated: Proper tire inflation extends the lifespan of your tires. Check the tire pressure regularly and keep it within the recommended range.

4. Rotate Your Tires Regularly: Regular tire rotation helps ensure even wear, which prolongs the life of your tires and prevents early balding on specific tires.

How to Prevent Bald Tires

Preventative care is the best way to avoid bald tires. Here are some tips to extend the lifespan of your tires:

• Regularly Rotate Tires: Rotate your tires every 5,000 to 7,500 miles to promote even tread wear.

• Check Tire Pressure: Under-inflated tires wear out more quickly, so check your tire pressure monthly.

• Balance and Align Tires: Proper alignment and balance help prevent uneven wear that can lead to bald tires.

• Drive Carefully: Aggressive driving habits like fast acceleration, hard braking, and sharp turns can wear out your tires faster.

Conclusion

Understanding how to tell if tires are bald is crucial for vehicle safety and performance. Bald tires are dangerous and compromise your ability to control the vehicle, especially in wet or slippery conditions. Regular inspections and simple tests like the penny or quarter method can help you quickly determine if your tires are nearing baldness. Additionally, being mindful of tire maintenance practices, such as regular rotations, proper inflation, and careful driving, can prevent premature balding.

If you identify that your tires are bald, make it a priority to replace them. Safe tires not only ensure better handling but also provide peace of mind every time you’re on the road. Remember, safety always comes first when it comes to driving, and maintaining your tires is a key part of ensuring a safe driving experience.