Cartech - All About Auto

Showing posts with label transmission. Show all posts
Textual description of firstImageUrl

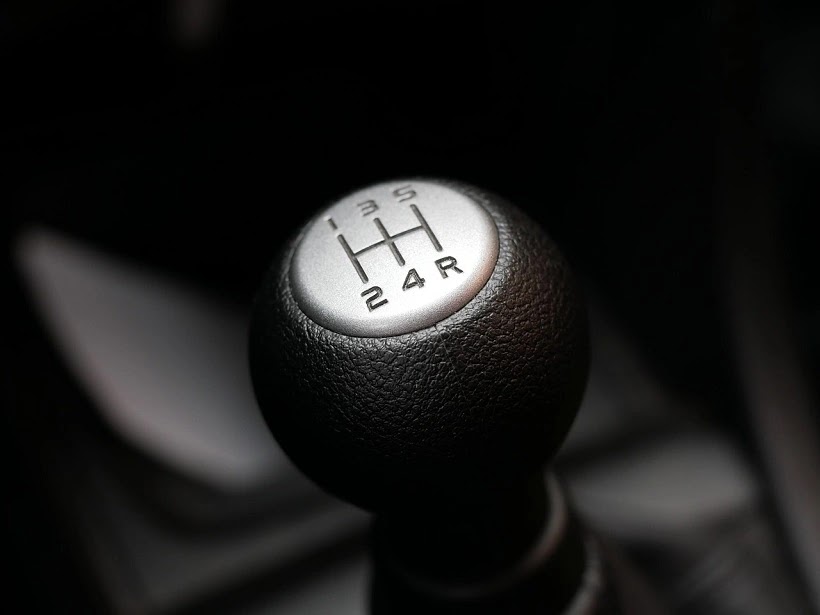
5 Mistakes to Avoid in a Manual Transmission Car

cartechhome image

5 Things You Should Never Do In A Manual Transmission Vehicle

Driving a manual transmission vehicle offers an engaging and rewarding experience, but it also requires skill and proper technique. Unlike automatic cars, manual vehicles demand more control and awareness from the driver. Unfortunately, many people develop bad habits that can lead to costly repairs, reduced fuel efficiency, and even safety hazards. To keep your car running smoothly and extend its lifespan, it’s crucial to avoid certain common mistakes.

In this article, we will explore the 5 Things You Should Never Do In A Manual Transmission Vehicle and explain why these habits can be detrimental. Whether you are a beginner or an experienced driver, following these tips will help you maintain your car in optimal condition.

1. Resting Your Foot on the Clutch Pedal

One of the most common mistakes manual transmission drivers make is riding the clutch—keeping their foot on the clutch pedal when it is not needed. This habit, even if done lightly, can cause unnecessary wear and tear on the clutch components.

Why Is It Bad?

• Premature Clutch Wear – The clutch disc and pressure plate are designed to engage and disengage completely. Keeping slight pressure on the clutch pedal prevents full disengagement, leading to increased friction and early wear.

• Reduced Fuel Efficiency – Riding the clutch can cause inefficient power transfer from the engine to the wheels, resulting in poor fuel economy.

• Potential Slippage – If the clutch does not fully engage, it can slip, leading to a loss of power and potential overheating.

How to Avoid It

• Keep your left foot off the clutch pedal when not shifting gears.

• Use the dead pedal (a footrest area next to the clutch) to avoid unnecessary clutch engagement.

• Ensure that the clutch is either fully engaged or fully disengaged when driving.

2. Keeping the Car in Gear at a Stoplight

Many manual drivers keep their car in gear while waiting at a stoplight, often with the clutch pedal pressed in. This might seem convenient, but it can cause significant damage over time.

Why Is It Bad?

• Increased Clutch Wear – Holding the clutch down keeps the release bearing under constant pressure, causing premature failure.

• Unnecessary Strain on Transmission Components – Keeping the car in gear at a stop puts stress on the transmission, leading to accelerated wear.

• Fatigue and Potential Mistakes – Holding the clutch down for extended periods can lead to leg fatigue, increasing the chances of an accidental stall or lurch.

How to Avoid It

• When stopped at a light, shift into neutral and release the clutch pedal.

• Use the handbrake if you’re on an incline to prevent rolling.

• Engage the clutch and shift into gear only when the light is about to turn green.

3. Resting Your Hand on the Gear Shifter

Many manual drivers develop the habit of resting their hand on the gear shifter while driving. While it might seem harmless, this practice can lead to significant damage over time.

Why Is It Bad?

• Premature Wear on Transmission Components – The gear shifter is connected to the transmission via selector forks. Resting your hand on the shifter applies constant pressure, leading to excessive wear on these components.

• Reduced Control – Keeping one hand on the shifter instead of both hands on the steering wheel reduces control and reaction time in emergencies.

• Potential Gear Misalignment – Unintentional pressure on the gear shifter may cause slight misalignment, leading to inefficient shifting and increased wear.

How to Avoid It

• Keep both hands on the steering wheel when not actively shifting gears.

• Use the gear shifter only when necessary to change gears.

• If you need to rest your hand, do so on the armrest or another comfortable location.

4. Using the Clutch to Hold the Car on an Incline

When stopped on a hill, some drivers use the clutch to keep the car from rolling backward instead of engaging the handbrake. This technique, known as riding the clutch on a hill, is a serious mistake.

Why Is It Bad?

• Excessive Clutch Wear – Keeping the clutch partially engaged while on an incline generates unnecessary friction and heat, leading to premature wear and possible failure.

• Overheating the Clutch – Prolonged use of the clutch in this manner can cause it to overheat, leading to reduced performance and potential clutch slippage.

• Loss of Control – Relying on the clutch instead of the handbrake can make it harder to maintain control, especially in heavy traffic or steep inclines.

How to Avoid It

• Use the handbrake (parking brake) to hold the car in place when stopped on a hill.

• When ready to move, release the handbrake while simultaneously engaging the clutch and accelerator.

• Practice proper hill start techniques to improve smooth takeoffs.

5. Downshifting to Slow Down Instead of Using Brakes

Some manual drivers downshift aggressively to slow the car instead of using the brakes. While engine braking is a useful technique in some situations, excessive reliance on downshifting can cause unnecessary wear.

Why Is It Bad?

• Increased Wear on the Transmission – Using the gearbox to slow down puts extra strain on the transmission, clutch, and engine components.

• Reduced Brake Effectiveness – The braking system is designed to handle stopping forces efficiently. Over-reliance on engine braking can lead to reduced braking performance over time.

• Potential Loss of Control – Abrupt downshifting can cause the wheels to lock up or skid, especially in slippery conditions.

How to Avoid It

• Use the brakes as the primary method for slowing down.

• Downshift gradually and smoothly when necessary, but do not rely on it as the main braking technique.

• Maintain a proper following distance to avoid sudden braking situations.

Conclusion

Driving a manual transmission vehicle is a skill that requires proper technique and awareness. By avoiding these 5 Things You Should Never Do In A Manual Transmission Vehicle, you can ensure the longevity of your car, improve fuel efficiency, and maintain overall driving safety.

To recap:

1. Do not rest your foot on the clutch pedal – It causes premature clutch wear and slippage.

2. Do not keep the car in gear at a stoplight – It strains the clutch and transmission.

3. Do not rest your hand on the gear shifter – It wears down transmission components.

4. Do not use the clutch to hold the car on an incline – It overheats and damages the clutch.

5. Do not downshift aggressively to slow down – It strains the transmission and reduces control.

By following these simple guidelines, you can extend the life of your manual transmission vehicle and enjoy a smoother driving experience. Whether you are a new driver or an experienced one, maintaining good habits will help you get the most out of your car. Drive smart, shift responsibly, and enjoy the control and fun that a manual transmission offers!


Textual description of firstImageUrl

Clunk Noise When Shifting Gears: Causes, Fixes, and Prevention

All About Auto Image

Hearing a clunk noise when shifting gears can be concerning, especially if it occurs consistently. This sound may indicate an issue within your transmission or another related part, and addressing it quickly is essential to prevent further damage. This article will cover common causes of clunking noises when shifting gears, DIY troubleshooting steps, estimated repair costs, and preventive maintenance tips to keep your vehicle running smoothly.

Understanding the Clunk Noise: What Does It Mean?

When you hear a clunk noise while shifting gears, it typically signals an irregularity within the vehicle's drivetrain or transmission system. A clunk noise can arise from several sources, such as worn-out transmission components, loose parts, or lack of lubrication. The noise usually points to an impact of metal-on-metal contact that shouldn't occur under normal conditions, indicating that something in the system has worn down or loosened over time.

Common Causes of Clunk Noise When Shifting Gears

1. Worn U-Joints or CV Joints

Universal joints (U-joints) and constant velocity (CV) joints are essential to the driveline and handle the rotational force that propels your vehicle. When these joints become worn or damaged, they can create clunking noises, especially when shifting or accelerating.

2. Damaged or Worn Transmission Mounts

Transmission mounts secure the transmission to the vehicle's chassis, absorbing vibration and noise. Over time, these mounts can weaken, crack, or shift, causing the transmission to move excessively when gears change. This movement may create a clunking sound as the transmission shifts out of alignment.

3. Low or Degraded Transmission Fluid

Transmission fluid acts as a lubricant for the gears and moving parts within the transmission. When the fluid level is low or has degraded, it may lead to increased friction and excessive wear. The metal parts will make contact more forcefully, resulting in clunking noises during gear shifts.

4. Worn Synchronizers in Manual Transmissions

In manual transmissions, synchronizers (or synchros) help gears engage smoothly. When synchros wear out, shifting gears may cause grinding or clunking sounds, particularly when moving between gears that rely on worn synchros for smooth engagement.

5. Faulty Transmission Gears

Damaged or worn gears can lead to clunking noises, especially when shifting to higher or lower gears. Transmission gears may develop wear due to excessive heat, friction, or lack of lubrication, eventually affecting performance and leading to audible sounds.

6. Differential Issues

A malfunctioning differential can also contribute to clunking noises during shifts. The differential ensures that each wheel spins at a different rate while turning, and any problems within it—such as worn gears, a lack of lubrication, or damage—can cause clunking sounds when shifting.

7. Loose or Damaged Driveshaft

The driveshaft connects the transmission to the wheels, and if it becomes loose or damaged, it can cause vibrations and clunking noises, particularly during gear shifts or acceleration.

8. Axle Issues

Axles transfer power from the transmission to the wheels. If the axle is damaged or has loose components, it can produce clunking noises when changing gears or accelerating.

9. Clutch Problems in Manual Transmissions

A faulty or worn clutch can create clunking noises, particularly if it is not engaging or disengaging correctly. If the clutch is not functioning smoothly, you may hear clunks or grinding sounds during shifts.

DIY Troubleshooting Steps for Clunk Noise When Shifting Gears

Step 1: Check Transmission Fluid Levels

Low or degraded transmission fluid can cause clunking sounds. Locate the transmission fluid dipstick, check the level, and inspect the fluid's color. Transmission fluid should generally be red or pink and translucent; dark or dirty fluid may need replacement.

Step 2: Inspect U-Joints or CV Joints

To check the U-joints or CV joints, lift the vehicle securely and inspect these parts for signs of wear, rust, or looseness. If they move too freely or make noise when manipulated, they likely need replacement.

Step 3: Examine Transmission Mounts

Inspect the transmission mounts by visually examining them for cracks, rust, or visible wear. If the mounts appear damaged or excessively worn, they could be the cause of the clunking noise and may need replacement.

Step 4: Check Driveshaft for Looseness

Inspect the driveshaft by gently pushing and pulling on it. If it moves significantly, it may be loose, which could be causing clunking noises during shifts.

Step 5: Look at the Differential Fluid and Condition

Differential issues can also create clunking noises. Locate the differential (usually in the back of the vehicle), and check for fluid leaks or signs of wear around it. Low fluid levels or visible damage may require attention.

Step 6: Listen for Additional Clues While Driving

Pay attention to when and where the clunking sound occurs. This can help identify if it's specific to one gear, speed, or shifting scenario. The more specific you are with these observations, the easier it will be to diagnose the problem.

Estimated Repair Costs for Clunk Noise Issues

Here’s a breakdown of typical repair costs for common causes of clunking noises:

Transmission Fluid Change $80 - $250
U-Joint Replacement $225 - $450
CV Joint Replacement $300 - $750
Transmission Mount Replacement $200 - $500
Differential Repair $400 - $800
Driveshaft Replacement $500 - $1000
Clutch Repair (Manual) $500 - $2500
Transmission Gear Repair $1500 - $3000

Repair costs can vary significantly based on the vehicle's make and model, labor costs in your area, and the complexity of the repair. In some cases, parts for luxury or specialized vehicles may be more expensive than average.

Preventive Maintenance Tips for Reducing Clunk Noises

1. Regularly Check and Change Transmission Fluid

Transmission fluid lubricates essential parts and prevents metal-on-metal contact. Check the fluid levels regularly and change the fluid as recommended in your vehicle’s owner’s manual, usually every 30,000 to 60,000 miles.

2. Inspect the Driveshaft, CV, and U-Joints Periodically

U-joints, CV joints, and the driveshaft are integral parts of the transmission and should be checked periodically. Replacing worn parts early can prevent more extensive damage and reduce the risk of hearing clunk noises.

3. Monitor Transmission Mount Condition

Regularly inspect the transmission mounts to ensure they are in good condition. Replacing worn mounts early on will keep the transmission stable and minimize clunking sounds.

4. Avoid Aggressive Driving and Hard Shifting

Aggressive driving and sudden shifts can wear down transmission components more quickly. Drive smoothly, avoid sudden gear changes, and use the transmission gently to prolong its life and avoid hearing clunks.

5. Follow Scheduled Maintenance for the Differential

Differentials are durable, but they still require regular maintenance, including fluid changes. Adhering to the maintenance schedule can help avoid excessive wear and prevent clunk noises caused by differential issues.

6. Get a Professional Transmission Inspection Periodically

A professional inspection every 30,000 to 50,000 miles can help identify early signs of wear or damage, giving you the opportunity to address issues before they escalate. Early detection is essential to prevent costly repairs and eliminate clunking noises.

When to Seek Professional Help

If you’ve attempted basic troubleshooting but can’t locate the source of the clunking noise, or if the noise worsens, it’s advisable to consult a professional mechanic. Delaying repairs for clunk noises can lead to more significant transmission or drivetrain problems, which could result in higher repair costs and vehicle downtime.

A trained mechanic can conduct a full inspection, pinpoint the issue, and provide accurate repair recommendations. Additionally, professionals have specialized tools that can diagnose complex issues in the transmission or differential that may not be visible to the untrained eye.

Conclusion

Hearing a clunk noise when shifting gears can be unnerving, but understanding the potential causes and taking preventive measures can help you maintain a smooth-running transmission. From worn U-joints to low transmission fluid, several factors can contribute to clunking sounds, but most of these issues are manageable if identified early.

If you experience a clunk noise while shifting gears, try basic troubleshooting steps like checking transmission fluid, inspecting mounts, and listening for additional clues. While some repairs can be handled on your own, don’t hesitate to seek professional assistance if the issue persists or worsens.

Textual description of firstImageUrl

Transmission Slipping: Causes, Symptoms, and How to Fix It

Cartech image

Transmission slipping is a common issue that affects the performance and longevity of vehicles. When a transmission slips, it struggles to stay in the correct gear, leading to a host of problems, from jerky shifts to reduced power. In this article, we’ll discuss the causes, symptoms, and solutions of transmission slipping, providing you with a complete understanding of the issue.

What is Transmission Slipping?

Transmission slipping occurs when a vehicle’s transmission shifts unpredictably or fails to remain in the correct gear. Instead of smoothly shifting from one gear to another, the transmission may struggle, creating a delay or causing the engine to rev up unexpectedly. This can result in loss of power, excessive wear on transmission parts, and even dangerous driving conditions.

Understanding the basics of transmission function can help clarify why transmission slipping is problematic. A vehicle’s transmission is responsible for transferring power from the engine to the wheels through a series of gears. When everything works correctly, the car’s speed increases smoothly as the transmission shifts gears. However, if the transmission starts slipping, this balance is disrupted, and your vehicle’s performance suffers.

Common Symptoms of Transmission Slipping

Detecting transmission slipping early can save you from expensive repairs and potential breakdowns. Here are some telltale symptoms:

1. Delayed or Rough Shifts

A slipping transmission often hesitates before shifting to the next gear. You may notice that the RPM (revolutions per minute) spikes before the gear change occurs. This delay can be particularly evident during acceleration.

2. Unexpected Shifting

In some cases, the transmission may shift gears unexpectedly, such as shifting into neutral or another unintended gear while driving. This loss of control can lead to hazardous driving conditions.

3. Overheating Transmission

Transmission slipping causes friction within the gearbox, resulting in excess heat. If your transmission temperature warning light comes on, it could be a sign of transmission slipping.

4. Loss of Power

When a transmission slips, it can’t efficiently transfer power from the engine to the wheels, which results in sluggish performance. You may experience reduced acceleration or feel as though the car is struggling to move forward.

5. Unusual Noises

Grinding, clunking, or whining sounds from the transmission can also indicate slipping. These noises typically suggest that internal components are not engaging properly, leading to increased wear on gears and bearings.

6. Transmission Fluid Leaks

If your transmission is slipping, it’s essential to check for fluid leaks. Low transmission fluid can be both a cause and a result of transmission problems, as it prevents proper lubrication and cooling of transmission components.

Common Causes of Transmission Slipping

Transmission slipping can be triggered by several factors, each affecting the transmission’s ability to shift gears effectively.

1. Low or Contaminated Transmission Fluid

Transmission fluid lubricates and cools the transmission, allowing for smooth gear shifts. When fluid levels are low, friction increases within the transmission, causing it to overheat and slip. Additionally, dirty or contaminated transmission fluid can also hinder the transmission’s performance.

2. Worn Clutch Plates

In automatic transmissions, clutch plates help facilitate smooth gear shifts. Over time, these plates can wear out, reducing their ability to engage properly. Worn clutch plates are a leading cause of transmission slipping, especially in high-mileage vehicles.

3. Faulty Solenoids

Transmission solenoids are small valves that control the flow of transmission fluid. A faulty solenoid can result in erratic shifting or prevent the transmission from holding a gear, leading to slipping.

4. Damaged or Worn Bands

Transmission bands link the gears together in an automatic transmission. Over time, these bands may become loose or worn, causing the transmission to slip between gears or fail to engage altogether.

5. Overheating

Excessive heat is a common culprit in transmission slipping. Overheating can damage vital transmission components, causing seals and gaskets to break down, leading to fluid leaks and loss of pressure.

6. Worn Gears

Over time, the gears within the transmission can wear down, especially if the transmission fluid has not been changed regularly. Worn gears are less able to mesh properly, leading to slipping, rough shifts, and eventual failure.

Diagnosing Transmission Slipping

Identifying transmission slipping requires careful observation of the symptoms mentioned above. However, a mechanic can perform a more thorough diagnosis through:

1. Diagnostic Scan

Modern vehicles are equipped with onboard diagnostics (OBD) systems that store error codes when problems arise. A mechanic can use a scanner to retrieve these codes, which can indicate issues such as solenoid failures or clutch wear.

2. Fluid Inspection

Transmission fluid should be clear and red in color. If it appears brown, smells burnt, or contains metal shavings, it’s likely contaminated and may indicate internal transmission damage.

3. Road Test

Mechanics may also perform a road test, where they monitor how the transmission behaves under various driving conditions. This helps identify issues such as delayed shifting, loss of power, and unusual noises.

4. Pressure Test

A transmission pressure test can reveal whether the transmission is receiving adequate hydraulic pressure. Low pressure is a common cause of transmission slipping and can often be traced to low fluid levels, leaks, or solenoid issues.

How to Fix Transmission Slipping

The appropriate solution for transmission slipping depends on the severity of the issue and the underlying cause. Here are some common repair options:

1. Transmission Fluid Change

If your transmission fluid is low or contaminated, a simple fluid change may resolve slipping issues. In some cases, mechanics recommend a fluid flush, which removes all the old fluid and replaces it with fresh fluid. Regular fluid changes are critical to preventing transmission slipping.

2. Replacing Worn Clutch Plates or Bands

If worn clutch plates or bands are causing transmission slipping, they may need to be replaced. Replacing these parts can be labor-intensive, but it is often necessary for high-mileage vehicles or those subjected to heavy loads.

3. Repairing or Replacing Solenoids

Faulty solenoids can usually be replaced without removing the entire transmission. This can be a cost-effective solution if the slipping is due to solenoid failure.

4. Transmission Rebuild or Replacement

In cases where transmission slipping is caused by extensive wear and tear or internal damage, a full rebuild or replacement may be necessary. Rebuilding involves replacing worn-out parts and reassembling the transmission. While expensive, it’s often more economical than a complete transmission replacement.

5. Addressing Transmission Overheating

If overheating is causing your transmission to slip, installing a transmission cooler can help regulate temperature, preventing further damage.

6. Adjusting the Transmission Bands

Some transmissions allow for band adjustments, which can help reduce slipping. However, not all transmissions have adjustable bands, so consult your mechanic to see if this option is available.

Preventing Transmission Slipping

Routine maintenance and mindful driving can help prevent transmission slipping, saving you time and money in the long run.

1. Regular Fluid Checks

Checking transmission fluid levels regularly can prevent slipping caused by low fluid. Ensure you are using the correct type of transmission fluid recommended by your vehicle manufacturer.

2. Replace Fluid at Regular Intervals

Transmission fluid loses its effectiveness over time, so following the manufacturer’s recommendation for fluid replacement can keep your transmission running smoothly.

3. Avoid Overloading

Avoid exceeding your vehicle’s weight limit, as overloading can strain the transmission and lead to premature wear.

4. Allow the Engine to Warm Up

In cold weather, give your engine a few minutes to warm up before driving. This allows the transmission fluid to reach optimal temperature, ensuring smooth gear changes.

5. Drive Mindfully

Avoid sudden accelerations and hard braking, as these driving habits place undue stress on the transmission. Instead, drive smoothly and gradually increase speed.

When to See a Mechanic

If you notice any symptoms of transmission slipping, it’s crucial to consult a mechanic as soon as possible. Delaying repairs can lead to further damage and higher costs. Additionally, since transmission slipping can impact your vehicle’s safety, timely attention can prevent accidents caused by unexpected shifting or loss of power.

Cost of Fixing Transmission Slipping

Repairing a slipping transmission can range from a few hundred dollars to several thousand, depending on the severity of the issue. For example:

• Transmission Fluid Change or Flush: $80 to $250
• Solenoid Replacement: $200 to $500
• Clutch or Band Replacement: $500 to $1,500
• Transmission Rebuild or Replacement: $1,500 to $4,000 or more


These costs vary by vehicle make, model, and location. Transmission repairs can be costly, but proactive maintenance can help reduce the likelihood of expensive repairs.

Conclusion

Transmission slipping is a significant issue that can compromise the performance and safety of your vehicle. By recognizing the symptoms early and understanding the causes, you can take the necessary steps to fix or prevent this problem. Whether it’s a fluid change, solenoid replacement, or a full transmission rebuild, addressing transmission slipping promptly is essential for maintaining a reliable vehicle. Remember, regular maintenance and mindful driving can go a long way in keeping your transmission in good condition, ultimately helping you avoid costly repairs.

Textual description of firstImageUrl

Transmission Jump Out of 2nd Gear: Causes, Symptoms, and Fixes

Cartech image

If you're driving a vehicle with a manual transmission and suddenly notice that it jumps out of 2nd gear, you're likely dealing with a frustrating and potentially unsafe situation. A vehicle jumping out of gear can lead to driving issues, compromised vehicle performance, and even damage to the transmission over time. Understanding why your transmission jumps out of 2nd gear, the symptoms associated with this issue, and how to fix it can help you maintain a safer, more reliable driving experience.

In this article, we'll explore the reasons behind transmission jump out of 2nd gear, the common signs that indicate you're facing this issue, and the various solutions available to fix it. Whether you're a seasoned car enthusiast or just an everyday driver, this guide will break everything down in a way that's easy to understand.

What Does It Mean When a Transmission Jumps Out of Gear?

A transmission jump out of 2nd gear occurs when your vehicle's manual transmission disengages from the selected gear, causing it to return to neutral without any input from the driver. This issue can happen suddenly, often during acceleration, and can make it difficult to maintain smooth control over your vehicle.

When a transmission jumps out of 2nd gear, it can occur at any speed, but it’s most commonly experienced when shifting between gears, especially in lower gears like 1st, 2nd, or 3rd. This problem may not only affect gear selection but could also lead to transmission wear or other mechanical issues if left unresolved.

Symptoms of Transmission Jumping Out of 2nd Gear

To identify whether your vehicle's transmission is jumping out of 2nd gear, watch for the following signs:

1. Sudden Neutral Position: When driving in 2nd gear, you might notice that your gearstick suddenly slips back into neutral, often accompanied by a jerking motion. This loss of gear engagement can be abrupt and may catch you off guard.

2. Difficulty in Engaging 2nd Gear: You may find it challenging to shift into 2nd gear properly. The gear may feel resistant or not fully engage, causing it to slip back to neutral after a short period of driving.

3. Grinding Noise: A grinding noise when attempting to shift into or hold 2nd gear could indicate that the transmission is having trouble maintaining a steady position. This sound is typically a sign of worn-out components inside the transmission.

4. Shifter Vibration: Excessive vibration or movement in the gearstick while you're in 2nd gear may suggest that the gear is not fully engaged, increasing the likelihood of it jumping out.

5. Reduced Vehicle Performance: If your vehicle consistently jumps out of 2nd gear, you'll notice decreased overall performance, especially when accelerating or driving in lower gears.

Common Causes of Transmission Jumping Out of 2nd Gear

Several factors can contribute to a manual transmission jumping out of 2nd gear. Below are some of the most common causes:

1. Worn Synchros

Synchros (or synchronizers) are essential components inside the transmission that help match the speed of the gears to make shifting smoother. If the synchro for 2nd gear is worn or damaged, it may not allow the gear to engage properly, leading to the transmission jumping out of 2nd gear.

2. Worn or Damaged Gear Teeth

Over time, the teeth on the gears inside the transmission can wear down or become damaged due to wear and tear, poor lubrication, or improper shifting techniques. If the teeth on 2nd gear are worn out, the gear may not stay engaged, causing it to slip back into neutral.

3. Loose or Misaligned Shift Linkage

The shift linkage is responsible for connecting the gearstick to the transmission. If the shift linkage is loose, misaligned, or worn out, it may prevent the transmission from fully engaging in 2nd gear, leading to it slipping out.

4. Faulty Shift Fork

The shift fork is another important component inside the transmission that helps move the gears into place. A bent, worn, or damaged shift fork can prevent the proper engagement of 2nd gear, causing the transmission to jump out.

5. Weak Detent Springs

Detent springs are responsible for holding the transmission in place once a gear is selected. If the detent springs for 2nd gear are weak or broken, they may not provide enough force to keep the gear engaged, leading to the transmission slipping back to neutral.

6. Excessive Wear on Bearings or Shafts

Bearings and shafts inside the transmission are subject to wear over time, particularly in high-mileage vehicles. If the bearings or shafts that support 2nd gear are worn out, it can lead to improper alignment and cause the transmission to jump out of gear.

7. Improper Shifting Technique

Drivers who frequently "ride" the clutch or shift gears without fully depressing the clutch pedal can put undue stress on the transmission. Over time, improper shifting can wear out internal components, causing the transmission to jump out of 2nd gear.

8. Transmission Fluid Issues

Transmission fluid plays a critical role in keeping the gears lubricated and reducing wear. Low fluid levels or using the wrong type of transmission fluid can lead to increased friction and damage to the gears, causing issues with gear engagement.

How to Diagnose Transmission Jumping Out of 2nd Gear

Diagnosing why your transmission is jumping out of 2nd gear requires a systematic approach. Below are the steps that a mechanic would typically follow to identify the root cause:

1. Visual Inspection of Linkage and Shift Fork

The first step in diagnosing this issue is to visually inspect the shift linkage and shift fork. A mechanic will check for loose, bent, or misaligned parts that may prevent the transmission from engaging properly.

2. Check Transmission Fluid

Low or dirty transmission fluid can contribute to gear engagement issues. A mechanic will check the fluid level and condition, making sure that it's at the correct level and that the fluid is not contaminated.

3. Inspect Synchros and Gear Teeth

If the fluid and linkage are in good condition, the mechanic may need to disassemble the transmission to inspect the internal components, such as the synchros and gear teeth, for signs of wear or damage.

4. Test Detent Springs

The detent springs play a crucial role in holding the gears in place. A mechanic may check the tension and condition of the detent springs to see if they are providing enough force to keep 2nd gear engaged.

5. Road Test

To get a better sense of how the transmission behaves, a mechanic may take the vehicle for a road test. This allows them to observe the issue in real-world driving conditions, which can provide important clues about the cause of the problem.

How to Fix Transmission Jumping Out of 2nd Gear

Once you've identified the cause of the problem, it's time to consider the appropriate fix. Below are some common solutions for fixing a transmission that jumps out of 2nd gear:

1. Replace Worn Synchros

If worn-out synchros are causing your transmission to jump out of 2nd gear, replacing them is often the most effective solution. This will ensure smoother shifting and better gear engagement.

2. Repair or Replace Gear Teeth

Damaged or worn gear teeth may need to be repaired or replaced. This involves disassembling the transmission to access the affected gears and replacing the damaged components.

3. Adjust or Replace Shift Linkage

If the issue is related to loose or misaligned shift linkage, adjusting or replacing the linkage may solve the problem. This is a relatively simple fix that can improve gear engagement.

4. Replace Shift Fork

If the shift fork is bent or damaged, replacing it can help restore proper gear engagement and prevent the transmission from jumping out of 2nd gear.

5. Replace Detent Springs

If weak detent springs are the cause of the problem, replacing them can provide the necessary force to keep 2nd gear engaged.

6. Rebuild or Replace Transmission

In severe cases where multiple components inside the transmission are damaged or worn out, a full transmission rebuild or replacement may be required. While this is a more costly repair, it may be necessary to restore reliable gear operation.

Preventing Transmission from Jumping Out of Gear

To prevent your vehicle's transmission from jumping out of gear in the future, follow these tips:

• Proper Shifting Technique: Always fully depress the clutch when shifting gears and avoid "riding" the clutch. This will reduce wear on the transmission components.

• Regular Maintenance: Keep up with regular transmission maintenance, including fluid changes and inspections, to ensure the internal components are properly lubricated and functioning correctly.

• Monitor Transmission Fluid Levels: Make sure your transmission fluid is always at the correct level and in good condition. Low or dirty fluid can lead to premature wear on the transmission.

• Address Issues Early: If you notice any symptoms of transmission problems, such as grinding or difficulty engaging gears, have your vehicle inspected by a mechanic right away. Early intervention can prevent more serious issues down the road.

Conclusion

A transmission that jumps out of 2nd gear can be an inconvenient and potentially dangerous problem. By understanding the symptoms and causes of this issue, you can take the necessary steps to diagnose and fix it before it leads to more significant damage. Whether it's a worn synchro, a damaged gear, or a misaligned shift linkage, addressing the problem early will help maintain your vehicle's performance and reliability.

If you're experiencing transmission jump out of 2nd gear, it's essential to have your vehicle inspected by a qualified mechanic. With the right diagnosis and repairs

Textual description of firstImageUrl

From a Stop I Can't Shift Into First Gear: Causes & Fixes

All About Auto Image

When you're ready to start driving, not being able to shift into first gear can be frustrating and concerning. Whether it’s a manual or automatic transmission, shifting issues can stem from various underlying problems. This article is designed to help you understand why your car might struggle to engage first gear from a stop, what common causes are, and how you can troubleshoot and fix the problem. We’ll explore both the technical aspects of what might be causing this issue and practical steps to resolve it.

Understanding the Role of First Gear

First gear is essential for starting your car from a stop because it provides the most torque, allowing you to gradually accelerate. When you’re unable to shift into this gear, it can prevent you from moving at all, which may result in an inconvenient or potentially dangerous situation. For this reason, it’s crucial to know the root causes and how to address them.

Common Causes of Not Being Able to Shift Into First Gear

Several reasons might explain why you’re unable to shift into first gear from a stop. Here are the most common causes:

1. Clutch Issues

• Clutch Not Fully Engaging or Disengaging: If the clutch isn’t engaging or disengaging fully, it can prevent you from shifting into first gear. This might be due to worn clutch components, such as the clutch plate, pressure plate, or release bearing.

• Air in the Clutch Line: For vehicles with a hydraulic clutch system, air bubbles in the clutch line can disrupt the system’s ability to fully disengage, causing difficulty in shifting into gear.

• Worn Clutch Components: Over time, the clutch plate, pressure plate, and other clutch components wear out. This can make it harder to engage first gear, especially when you’re starting from a stop.

2. Low or Contaminated Transmission Fluid

• Low Fluid Levels: Transmission fluid is essential for proper gear function. If the fluid is too low, the system may not have enough lubrication, which can result in rough or difficult shifting.

• Contaminated Fluid: Old, dirty, or contaminated transmission fluid can cause the components to stick, making it harder to shift into first gear.

3. Shift Linkage Problems

• Damaged or Misaligned Shift Linkage: The shift linkage is responsible for transferring your shift movement to the transmission. If it’s damaged or misaligned, it can prevent you from shifting into first gear.

• Loose Cables: Over time, the shift cables may become loose or detached, leading to difficulty in engaging first gear from a stop.

4. Transmission Synchronizer Wear (Manual Transmissions)

• Worn Synchronizers: In manual transmissions, synchronizers are responsible for matching the speeds of the gears before they engage. If the first-gear synchronizer is worn, it can cause problems when trying to shift from a stop.

5. Faulty Transmission Solenoids (Automatic Transmissions)

• Malfunctioning Solenoids: Transmission solenoids control the flow of fluid within the transmission. If one of these solenoids is malfunctioning, it may make it difficult to shift into first gear, particularly in an automatic transmission.

Troubleshooting Steps: How to Diagnose and Fix the Issue

To determine the exact cause of why you can’t shift into first gear, there are several troubleshooting steps you can take. Here’s a step-by-step guide to help you identify the root problem and address it:

Step 1: Check the Clutch System

1. Test the Clutch Pedal: Press the clutch pedal down fully and then attempt to shift into first gear. If the clutch feels soft or fails to engage, you might have air in the hydraulic system or worn-out clutch components.

2. Inspect the Clutch Fluid: Check the clutch fluid reservoir (for hydraulic clutches) to ensure there is enough fluid. If the fluid is low, fill it up and check for leaks.

3. Examine the Clutch Components: If you’re comfortable, examine the clutch components, including the clutch plate, release bearing, and pressure plate, for signs of wear. A mechanic might need to do a deeper inspection.

Step 2: Check Transmission Fluid Levels

1. Locate the Dipstick: In vehicles with a dipstick for transmission fluid, you can check the fluid level while the engine is warm and running.

2. Assess the Fluid Quality: If the fluid appears dark, dirty, or has a burnt smell, it’s likely contaminated and should be replaced.

3. Top Up if Necessary: If the transmission fluid is low, add the recommended fluid type to your vehicle. Check the owner’s manual for specific instructions.

Step 3: Inspect the Shift Linkage

1. Examine the Linkage Connection: Look at the shift linkage under the vehicle or in the engine bay. If you notice any broken or damaged parts, this could be the reason for your shifting issue.

2. Adjust or Replace Linkage Components: If the linkage appears loose or misaligned, adjusting it may solve the problem. You may need a mechanic to replace any worn or damaged parts.

Step 4: Test the Transmission Synchronizer (Manual Only)

1. Perform a Road Test: Take your vehicle for a short drive and attempt to shift into first gear from a stop repeatedly. If it continues to resist, the synchronizer for first gear might be worn.

2. Consult a Transmission Specialist: Replacing or repairing a synchronizer typically requires the assistance of a transmission specialist, as it involves opening up the transmission.

Step 5: Check Transmission Solenoids (Automatic Only)

1. Monitor Shifting Patterns: If you’re experiencing issues shifting into first gear, pay attention to other gears. Consistent problems can point to a faulty solenoid.

2. Use a Diagnostic Scanner: A scanner can read the transmission codes to identify solenoid issues. If one is faulty, it may need to be replaced by a professional.

Common Fixes for "From a Stop I Can’t Shift Into First Gear"

Once you’ve identified the cause, there are several fixes you can consider:

1. Clutch System Repairs

• Bleed the Clutch Line: For hydraulic clutches, bleeding the line will remove air and restore proper function.

• Replace Worn Components: Replace any worn-out clutch components, including the clutch plate and release bearing, to improve shifting.

2. Transmission Fluid Change

• Flush and Replace Fluid: If your transmission fluid is old or contaminated, a fluid change can improve shifting. Be sure to use the fluid specified for your vehicle.

3. Adjust or Replace Shift Linkage

• Tighten or Realign the Linkage: If your shift linkage is loose or misaligned, tightening it may resolve the problem.

• Replace Damaged Components: For severely worn or broken linkage components, replacements might be necessary.

4. Synchronizer Replacement (Manual Transmission)

• Replace the First-Gear Synchronizer: This will likely require professional assistance but will restore smooth shifting into first gear.

5. Transmission Solenoid Replacement (Automatic Transmission)

• Replace Malfunctioning Solenoids: If your diagnostic scanner reveals a solenoid issue, have it replaced by a mechanic. This fix can resolve shifting problems.

Preventing Issues with First Gear Shifting

Regular maintenance can help prevent issues with first gear shifting. Here are some tips to ensure that your car’s transmission remains in good condition:

1. Regularly Check and Replace Transmission Fluid

• Monitor fluid levels and change the fluid according to the manufacturer’s recommendations to keep your transmission operating smoothly.

2. Inspect and Maintain the Clutch System

• If you have a manual transmission, keep an eye on clutch wear and replace components as needed. Hydraulic systems should be inspected for leaks and topped off as necessary.

3. Be Gentle on the Transmission

• Avoid aggressive driving habits, such as slamming into gear, as these can accelerate wear on the transmission and clutch components.

When to See a Professional Mechanic

If you’re unable to determine the cause of your shifting issue, or if the problem persists after trying the fixes mentioned above, it’s time to consult a professional mechanic. Some transmission issues, such as synchronizer wear and solenoid failure, require specialized tools and expertise to repair.

Final Thoughts

Experiencing difficulty shifting into first gear from a stop can be inconvenient, but it’s often a sign of underlying issues that can be addressed. By understanding the common causes and following these troubleshooting steps, you can identify and resolve the problem. Whether it’s a simple adjustment, a fluid replacement, or a more extensive repair, addressing this issue promptly will help keep your car running smoothly. Regular maintenance is key to preventing future transmission issues, so be sure to keep an eye on your fluid levels and clutch system to ensure optimal performance.

Textual description of firstImageUrl

Why Your Car Won't Shift Into First Gear: Causes & Fixes

All About Auto Image

If you find that your car won’t shift into first gear, it can be both inconvenient and frustrating. Not only can this issue hinder your driving experience, but it can also be a sign of underlying problems that, if left unaddressed, might lead to more serious and costly repairs. This article will explore the potential reasons why your car might not be shifting into first gear, offer some actionable solutions, and provide tips on preventing future issues.

Understanding the Importance of First Gear

First gear is essential for initiating movement from a complete stop, especially for vehicles with manual transmissions. In automatic transmissions, first gear also plays a critical role, typically engaging when you accelerate from a halt. Failing to shift into first gear can cause your vehicle to struggle with acceleration, making it difficult to drive, particularly in situations that require precise control, like driving up steep hills or maneuvering through heavy traffic.

Common Causes of the “Won’t Shift into First Gear” Problem

There are several reasons why a car might have trouble shifting into first gear. Some issues are unique to manual transmissions, while others pertain to automatics. Here are the most common causes:

1. Clutch Issues (Manual Transmission)

• Worn Clutch Disc: If the clutch disc is worn out, it may not engage correctly, making it difficult to shift into first gear.

• Clutch Pedal Adjustment: For manual transmissions, the clutch pedal needs proper adjustment to fully disengage the clutch. If it isn’t, it can prevent shifting.

• Clutch Master Cylinder or Slave Cylinder Malfunctions: In a hydraulic clutch system, the master or slave cylinder may leak or fail, preventing full disengagement.

2. Low or Dirty Transmission Fluid

• Transmission fluid lubricates and cools transmission components. When the fluid level is low or the fluid is dirty, it can cause shifting difficulties.

• Automatic Transmission: Low fluid can lead to gear slipping, difficulty engaging gears, and failure to shift into the first gear.

• Manual Transmission: If fluid is not replaced regularly, the contaminants can cause wear on the synchronizers, which assist with smooth shifting.

3. Worn or Damaged Synchronizers (Manual Transmission)

• Synchronizers help align gear speeds for a smooth transition. When they are worn out or damaged, shifting can become difficult, particularly into lower gears like first gear.

• This issue is common in older manual transmissions or those with high mileage.

4. Faulty Shift Solenoids (Automatic Transmission)

• Shift solenoids are responsible for controlling the flow of transmission fluid within the system. If a solenoid fails, it can prevent the transmission from shifting into the first gear.

5. Transmission Control Module (TCM) Malfunction

• The TCM regulates the timing and selection of gears in automatic transmissions. If the TCM is faulty or has a bad connection, it can lead to gear-shifting issues, including the inability to shift into first gear.

6. Worn Transmission Gears or Components

• Over time, gears and other transmission components can wear down, making it difficult for them to engage correctly. This is a more severe issue that often requires a transmission rebuild or replacement.

7. Misaligned or Damaged Shift Linkage (Manual Transmission)

• The shift linkage connects the gear shift lever to the transmission. If the linkage is damaged or misaligned, it can interfere with the shifting process.

8. Electronic Control Unit (ECU) Issues

• In modern vehicles, the ECU can influence how an automatic transmission shifts. If the ECU is experiencing issues, it may send incorrect signals, causing shifting problems.

Diagnosing the Problem

If your car won’t shift into first gear, it’s essential to diagnose the problem accurately. Here’s how you can identify potential causes:

Step 1: Check the Transmission Fluid

• Inspect the Fluid Level: Use the dipstick to ensure the transmission fluid level is adequate. Low fluid levels can lead to shifting problems.

• Examine Fluid Condition: Transmission fluid should be clean and have a pink or red color. If the fluid is brown or has a burnt smell, it’s time for a replacement.

Step 2: Test the Clutch (Manual Transmission)

• Clutch Pedal Response: If the pedal feels soft or you experience difficulty disengaging the clutch, this could indicate a problem with the clutch or the hydraulic system.

• Listen for Noises: Grinding noises when shifting can indicate worn synchronizers or a clutch issue.

Step 3: Use an OBD-II Scanner

• Retrieve Diagnostic Codes: For automatic transmissions, an OBD-II scanner can help identify error codes related to the transmission control module or other electronic components.

Step 4: Inspect the Shift Linkage

• Examine the Linkage: For manual transmissions, ensure that the linkage is aligned and not worn or damaged. Misaligned linkage can make shifting difficult or impossible.

Solutions for the “Won’t Shift into First Gear” Problem

Once you’ve identified the issue, you can take steps to resolve it. Here are solutions based on the specific cause:

1. Replace or Adjust the Clutch (Manual Transmission)

• Worn Clutch Replacement: If the clutch disc is worn, replacing it can restore proper shifting into first gear.

• Clutch Pedal Adjustment: If the pedal isn’t fully engaging, it may require adjustment to ensure the clutch disengages fully when you shift.

2. Flush and Refill Transmission Fluid

• Fluid Replacement: If the fluid is dirty, a transmission flush followed by a refill with new fluid can help improve shifting.

• Top Off Low Fluid Levels: For low fluid levels, top off the transmission fluid with the recommended type.

3. Repair or Replace Shift Solenoids (Automatic Transmission)

• Replace Faulty Solenoids: If diagnostic codes indicate a shift solenoid issue, replacing the faulty solenoid can resolve the shifting issue.

• Check Electrical Connections: Sometimes, solenoid issues stem from loose or corroded connections. Inspect the wiring and connectors and repair them as needed.

4. Transmission Control Module Replacement or Reprogramming

• Reprogram or Replace the TCM: In some cases, a TCM issue can be resolved through reprogramming. In other cases, the module may need to be replaced entirely.

5. Replace Worn Synchronizers (Manual Transmission)

• Rebuild Transmission: If the synchronizers are worn, a transmission rebuild may be necessary, especially for high-mileage vehicles. This can restore smooth shifting capabilities.

6. Repair the Shift Linkage

• Realign or Replace Linkage: For manual transmissions, realigning or replacing damaged linkage can restore normal shifting function.

Preventing Future Shifting Issues

To avoid future problems with your vehicle’s ability to shift into first gear, regular maintenance and attentive driving habits are crucial. Here are some prevention tips:

1. Perform Regular Transmission Fluid Changes

• Follow the Manufacturer’s Recommendations: Check the owner’s manual for the recommended fluid change intervals. Fresh transmission fluid helps keep gears and other components lubricated.

• Use the Correct Fluid Type: Always use the recommended type of transmission fluid for your vehicle, as using the wrong type can lead to transmission issues.

2. Practice Good Driving Habits

• Avoid Aggressive Shifting: For manual transmission vehicles, avoid shifting too quickly or forcing the shifter. This can lead to premature wear on the synchronizers.

• Use the Clutch Properly: Always press the clutch fully when shifting gears. This helps prevent strain on the transmission and ensures smooth gear engagement.

3. Monitor Transmission Temperature

• Prevent Overheating: In automatic transmissions, overheating can cause fluid degradation and component wear. If you frequently drive in hot conditions or tow heavy loads, consider installing a transmission cooler.

4. Get Regular Transmission Inspections

• Routine Checkups: Have your transmission inspected by a professional mechanic during regular vehicle maintenance appointments. Early detection of issues can prevent more costly repairs in the future.

5. Address Warning Signs Early

• Listen for Unusual Noises: Grinding, clunking, or whining sounds when shifting can indicate a problem. Address these issues as soon as they appear to prevent further damage.

When to Seek Professional Help

If you’ve attempted some basic diagnostics and the issue persists, or if the cause appears to be serious, it’s best to consult a professional mechanic. Transmission repairs can be complex and may require specialized tools and expertise. A professional can diagnose the problem accurately and provide the necessary repairs to ensure your vehicle operates safely.

Final Thoughts

Encountering a car that won’t shift into first gear can be concerning, but understanding the potential causes and solutions can help you address the issue confidently. Regular maintenance, attentive driving, and addressing minor issues early on are key to preventing transmission problems and ensuring your vehicle shifts smoothly for years to come. Remember, if in doubt, consult a professional mechanic to protect your car’s transmission and maintain safe, reliable performance on the road.

Why Does My Car Jerk When Shifting Gears? Causes and Fixes

Experiencing a jerking sensation when shifting gears is not only frustrating but can also indicate that something may be wrong with your car’s transmission or other mechanical components. If you’ve been wondering, "Why does my car jerk when shifting gears?", this article will provide you with a detailed guide on the possible causes, symptoms, and solutions to this problem.

In most vehicles, gear shifting should be smooth, whether you're driving an automatic or manual car. When the car jerks or lurches during gear shifts, it disrupts the driving experience and may signal a more significant issue. Let’s dive into why your car jerks when shifting gears, what you can do about it, and how to prevent further damage.

Common Causes of Car Jerking When Shifting Gears

Several mechanical issues can cause a car to jerk when shifting gears. Below are the most common causes:

1. Transmission Fluid Problems

One of the leading causes of jerking during gear shifts is low or dirty transmission fluid. Transmission fluid lubricates the gears, allowing for smooth transitions. If the fluid is low, contaminated, or old, it can cause friction between the gears, leading to jerking or slipping.

Signs of Transmission Fluid Issues:

• Delayed shifting
• Grinding noises
• Leaking fluid under the car
• Transmission overheating

Solution:

Check the transmission fluid level and quality. If it’s low, top it up with the appropriate transmission fluid. If the fluid is dirty or has a burnt smell, a transmission fluid flush may be needed. In some cases, you might need to replace the transmission fluid filter if it's clogged.

2. Worn-Out Clutch (Manual Cars)

For drivers with manual transmissions, a worn-out clutch can be the primary reason for jerky shifts. The clutch is responsible for disengaging the engine from the wheels while shifting gears. Over time, the clutch plate wears down, leading to difficulty in shifting gears smoothly.

Signs of a Failing Clutch:

• Difficulty engaging gears
• Clutch pedal feels soft or spongy
• Grinding noise when shifting gears
• Clutch slipping when accelerating

Solution:

If the clutch is worn out, it may need to be adjusted or replaced. Regularly checking the clutch for signs of wear and tear can help prevent future issues.

3. Failing Transmission Control Module (Automatic Cars)

The transmission control module (TCM) in automatic cars is an electronic component responsible for managing gear shifts. If the TCM malfunctions or fails, it can cause erratic shifting, including jerking between gears.

Signs of a Bad Transmission Control Module:
• Unpredictable or hard shifting
• Gear slipping
• Check engine light may come on

Solution:

A faulty TCM may need to be reprogrammed or replaced by a professional mechanic. A diagnostic test using specialized equipment can determine whether the TCM is the source of the jerking.

4. Worn Transmission Mounts

The transmission mounts hold the transmission in place. Over time, these mounts can wear out or become loose, causing excessive movement in the transmission. This can lead to jerking or a clunking sound when shifting gears.

Signs of Worn Transmission Mounts:
• Excessive vibrations in the car
• Clunking sound when shifting gears
• Jerky movements during gear shifts

Solution:

If the transmission mounts are worn, they should be replaced. This can restore stability and prevent jerking when shifting gears.

5. Dirty or Worn Spark Plugs

Worn or dirty spark plugs can cause your engine to misfire, especially when shifting gears. Misfires can result in the car jerking or sputtering. Spark plugs are responsible for igniting the fuel mixture in the engine, and when they fail, it can lead to engine performance issues.

Signs of Bad Spark Plugs:


• Engine misfires
• Poor acceleration
• Rough idling
• Difficulty starting the car

Solution:

Replace old or dirty spark plugs. Regular maintenance of spark plugs can improve engine performance and prevent jerking when shifting gears.

6. Vacuum Leaks

Your car's engine relies on a vacuum system to help control airflow. If there’s a vacuum leak, it can affect engine performance and lead to jerking when shifting gears.

Signs of a Vacuum Leak:
• Hissing sound from the engine
• Rough idling
• Poor fuel efficiency
• Check engine light may come on
Solution:

A vacuum leak can be challenging to diagnose. A professional mechanic can use diagnostic equipment to locate and fix the leak.

7. Failing Mass Air Flow (MAF) Sensor

The mass air flow (MAF) sensor measures the amount of air entering the engine. If this sensor is malfunctioning, it can cause an incorrect air-to-fuel mixture, leading to jerking or hesitation during gear shifts.

Signs of a Bad MAF Sensor:


• Poor fuel economy
• Car jerks or stalls when accelerating
• Engine hesitates or surges
• Check engine light may come on
Solution:

A faulty MAF sensor can be cleaned or replaced, depending on the severity of the issue. Routine cleaning and maintenance can help avoid problems with the MAF sensor.

8. Failing Fuel Pump or Clogged Fuel Filter

A failing fuel pump or clogged fuel filter can restrict fuel flow to the engine, causing it to sputter or jerk, especially when shifting gears. If the engine isn’t receiving enough fuel, it won’t run smoothly, leading to jerking during acceleration and gear changes.

Signs of Fuel System Problems:


• Difficulty starting the car
• Stalling or jerking while driving
• Poor acceleration
• Whining noise from the fuel tank

Solution:

If the fuel pump or filter is clogged or failing, they will need to be replaced. Regularly changing the fuel filter can help maintain a healthy fuel system and prevent jerking issues.

9. Throttle Position Sensor (TPS) Issues

The throttle position sensor (TPS) monitors the position of the throttle and communicates this information to the engine control unit (ECU). A malfunctioning TPS can lead to erratic shifts or jerking when changing gears.

Signs of a Bad TPS:


• Car jerks or surges when accelerating
• Unstable idling
• Poor throttle response
• Check engine light may come on

Solution:

A faulty throttle position sensor may need to be recalibrated or replaced by a professional mechanic.

10. Engine Mount Problems

Like transmission mounts, engine mounts are designed to keep the engine stable. If the engine mounts are worn or damaged, the engine can move excessively when shifting gears, causing a jerking sensation.

Signs of Worn Engine Mounts:


• Excessive vibrations in the cabin
• Clunking or banging noises
• Jerking or lurching when shifting gears

Solution:

Replacing worn engine mounts will reduce vibrations and prevent jerking during gear shifts.

Diagnosing the Issue

Diagnosing why your car jerks when shifting gears requires a thorough inspection. You can perform some basic checks at home, but more complicated issues may need a professional mechanic’s expertise. Here's a step-by-step guide to help you diagnose the problem:

1. Check the Transmission Fluid: Start by checking the transmission fluid level and condition. If it's low or dirty, this could be the cause of the jerking.

2. Listen for Unusual Noises: Pay attention to any grinding, clunking, or whining noises, especially when shifting gears. These can point to specific issues like worn mounts, clutch problems, or a failing transmission.

3. Observe the Gear Shifts: Take note of when the jerking happens. Is it during acceleration, deceleration, or while idling? This can help narrow down the cause.

4. Look for Warning Lights: If the check engine light or other warning lights are illuminated, it’s essential to get a diagnostic scan to identify any error codes. Many auto parts stores offer free diagnostic scanning.

5. Check for Fluid Leaks: Look under your car for any signs of fluid leaks. Transmission fluid leaks can cause a variety of shifting issues, including jerking.

6. Inspect the Engine and Transmission Mounts: Worn or damaged mounts can lead to jerking, especially during gear shifts. If the mounts appear worn or loose, they may need replacement.

7. Consult a Mechanic: If you're unable to diagnose the problem on your own, it's a good idea to consult a mechanic who can perform a comprehensive inspection.

Preventing Future Jerking Issues

Preventing car jerking when shifting gears often comes down to regular maintenance and timely repairs. Here are some tips to keep your car running smoothly:

• Regularly Change Transmission Fluid: Follow your vehicle manufacturer’s recommended service intervals for transmission fluid changes. Fresh, clean fluid is essential for smooth gear shifts.

• Check and Replace Worn Parts: Clutches, spark plugs, and other components wear down over time. Regularly inspecting and replacing these parts can prevent jerking and other performance issues.

• Inspect and Clean Sensors: Keep sensors like the MAF and TPS clean and functional to ensure they communicate accurately with the engine control unit (ECU).

• Address Warning Lights Promptly: If any warning lights come on, get a diagnostic scan right away. Ignoring these lights can lead to more significant and expensive problems down the road.

• Keep Up with Scheduled Maintenance: Follow your car’s maintenance schedule for routine checks and services. Regular inspections can help catch problems early before they cause more severe damage.

Final Thought

When you find yourself asking, "Why does my car jerk when shifting gears?", it’s essential to understand that various factors can be at play. From transmission fluid issues

Want more videos all about auto?
Subscribe to our YouTube channel👉Cartech Home

Where to Put Transmission Fluid: A Complete Guide

Transmission fluid is crucial for maintaining the proper functioning of your vehicle’s transmission system, whether it’s automatic or manual. Knowing where to put transmission fluid and understanding how it works can save you from costly repairs and help keep your car running smoothly. This article will walk you through everything you need to know about transmission fluid, including where transmission fluid goes, how to check and fill it, and common signs of low fluid levels.

By the end of this guide, you will have a clear understanding of where to put transmission fluid and be better equipped to maintain your vehicle.

What is Transmission Fluid?

Transmission fluid serves several important functions. It lubricates the internal components of your transmission, cools it down, and helps maintain the hydraulic pressure needed for proper gear shifting in automatic transmissions. In manual transmissions, transmission fluid acts as a lubricant to reduce wear and tear on gears.

In automatic transmissions, the fluid also works as a coolant to prevent overheating. Regularly checking and refilling transmission fluid is a simple task that helps avoid transmission failure and prolongs your car’s lifespan.

Types of Transmission Fluid

Before diving into where transmission fluid goes, it’s essential to know that not all transmission fluids are the same. There are different types for various transmission systems. Using the wrong type of fluid can lead to transmission damage.


• Automatic Transmission Fluid (ATF): Specifically formulated for automatic transmissions, ATF is one of the most commonly used transmission fluids. It has additives that improve its ability to reduce heat and friction while also helping with hydraulic pressure.

• Manual Transmission Fluid (MTF): Typically used in manual transmission vehicles, MTF is thicker and specifically designed for manual gearbox systems.

• Continuously Variable Transmission Fluid (CVT): This fluid is used for cars with continuously variable transmissions and ensures smooth operation of the belt-driven systems.

Always check your vehicle’s manual to determine the correct type of transmission fluid for your car.

Where to Put Transmission Fluid in an Automatic Car

If you own an automatic car, the transmission fluid is vital for the hydraulic system to operate correctly. So, where do you put transmission fluid in an automatic car?

Here are the steps:

1. Locate the Transmission Fluid Dipstick: In most vehicles, the transmission fluid dipstick is found near the engine bay, typically closer to the back of the engine. It often has a brightly colored handle (usually red or yellow) to make it easy to spot.

2. Check Fluid Levels First: Before adding more fluid, check the current fluid level. Pull out the dipstick, wipe it clean, and reinsert it fully. Then, pull it out again to observe the fluid level. There should be markings on the dipstick indicating whether the fluid is low, optimal, or too high.

3. Add Transmission Fluid: If the fluid level is low, you will need to add more transmission fluid. To do this:

• Place a funnel at the dipstick opening to avoid spillage.

• Slowly pour the recommended type of transmission fluid into the funnel.

• Add small amounts at a time and continuously check the fluid level to avoid overfilling.

4. Check Fluid Levels Again: After adding the fluid, insert the dipstick again and check to ensure the fluid level is within the recommended range. Be careful not to overfill, as this can cause transmission issues.

5. Start the Engine: After adding the fluid, start your vehicle and let it run for a few minutes. Check the dipstick one more time to confirm the level is appropriate.

Where to Put Transmission Fluid in a Manual Car

Manual cars do not have a dipstick like automatic cars, so where transmission fluid goes in a manual transmission differs slightly. Manual transmissions generally have a fill plug located on the transmission casing itself. Here’s how you add transmission fluid to a manual car:

1. Locate the Fill Plug: First, locate the fill plug on your car's transmission. This is usually a bolt located on the side of the transmission. You will likely need to raise the car to access the fill plug, so use a jack and jack stands or a ramp for safety.

2. Remove the Fill Plug: Use a wrench or socket set to remove the fill plug. Be sure to have a container or rag nearby, as some fluid might leak out when you remove the plug.

3. Check the Fluid Level: The fluid should be level with the bottom of the fill hole. If it is low, you’ll need to add more fluid.

4. Add Transmission Fluid: Using a fluid pump or funnel, add the appropriate type of transmission fluid until it reaches the correct level (just below the fill hole). Be sure to add it slowly and avoid overfilling.

5. Reinstall the Fill Plug: After adding the transmission fluid, reinstall the fill plug securely.

6. Test Drive: After refilling, drive the vehicle around to make sure the transmission shifts smoothly and there are no leaks.

How Often Should You Add Transmission Fluid?

Now that you know where to put transmission fluid, the next question is how often you should check and add it. Transmission fluid doesn’t burn off like oil, so under normal circumstances, you shouldn’t need to add fluid unless there’s a leak. However, it’s a good idea to check your transmission fluid regularly, such as during oil changes or every 30,000 to 60,000 miles, depending on your car’s make and model.

Always refer to your vehicle’s owner manual for the recommended transmission fluid change interval, as well as what type of transmission fluid to use.

Common Signs of Low Transmission Fluid

Being proactive about transmission fluid levels can help you avoid serious issues down the road. Here are some common signs that your vehicle might be low on transmission fluid:

• Transmission Slipping: If your transmission shifts unexpectedly or “slips” in and out of gears, low fluid might be the cause.

• Rough or Delayed Shifting: A delay or roughness when changing gears is another potential indicator of low transmission fluid.

• Transmission Overheating: Transmission fluid helps cool your transmission, so if the fluid level is low, your transmission may overheat.

• Strange Noises: Grinding or clunking noises when shifting gears could indicate low transmission fluid.

• Fluid Leaks: If you see red or brown fluid underneath your vehicle, it could be a sign of a transmission fluid leak.

How to Check for Transmission Fluid Leaks

If you find that your transmission fluid levels are consistently low, you might have a leak. Detecting a transmission fluid leak early can prevent significant damage. Here’s how to check for leaks:

1. Inspect the Transmission Pan: Look under your vehicle for wet spots or puddles of red, brown, or dark fluid. Transmission fluid is typically a reddish color when new and turns darker as it ages.

2. Check Seals and Gaskets: Worn or damaged seals and gaskets are common sources of leaks. Check around the transmission casing and near the transmission fluid lines for signs of leaking fluid.

3. Inspect the Cooler Lines: Transmission cooler lines, which carry fluid to and from the transmission cooler, can crack or develop leaks over time.

4. Examine the Dipstick Tube: The dipstick tube where you check your transmission fluid can also be a source of leaks.

5. Check the Torque Converter: In automatic transmissions, the torque converter can develop leaks due to cracks or worn seals.

How to Prevent Transmission Fluid Leaks

Preventing transmission fluid leaks can help you avoid costly repairs. Here are some preventive measures:

• Regular Maintenance: Stick to a regular maintenance schedule and check your transmission fluid level often.

• Use the Correct Fluid: Always use the transmission fluid recommended in your car’s owner manual. Using the wrong type of fluid can cause leaks and other transmission problems.

• Avoid Overfilling: Overfilling your transmission can lead to excess pressure, which can cause seals to break and leaks to occur.

• Check Seals and Gaskets: Regularly inspect seals and gaskets for wear or damage and replace them as needed.

Final Thoughts

Knowing where to put transmission fluid and how to maintain it is crucial for the health of your vehicle’s transmission. Whether you drive a manual or automatic car, properly maintaining your transmission fluid levels can prevent overheating, ensure smooth gear shifts, and avoid costly repairs. Always use the correct type of fluid for your vehicle, and regularly check for leaks or signs of low fluid levels. By taking the time to understand where transmission fluid goes and following proper maintenance procedures, you can ensure a long-lasting and efficient transmission system.

Following these guidelines will not only keep your vehicle running smoothly but also save you from the headache of dealing with more serious transmission issues down the line.

Whining Noise When Accelerating: Causes and Solutions

When your car makes a whining noise while accelerating, it's not only annoying but also a signal that something is amiss with your vehicle. Understanding the underlying causes of this sound is essential, as neglecting the issue can lead to bigger, more expensive problems down the road. This article delves into the possible reasons for the whining noise when accelerating, providing insights and solutions to help you keep your car running smoothly.

What Is a Whining Noise?

A whining noise is typically high-pitched and can come from different parts of the vehicle. It often occurs when a component is worn or malfunctioning, leading to friction or lack of lubrication. The sound is usually most noticeable during acceleration, as the engine and other moving parts work harder, increasing stress on these components.

Common Causes of a Whining Noise When Accelerating

Several mechanical issues can cause a whining noise when you press the accelerator. Here are the most common causes:

1. Transmission Issues

Transmission problems are one of the leading causes of whining noises when accelerating. The transmission is responsible for transferring power from the engine to the wheels. When it malfunctions, it can lead to various noises, including whining.

Signs of Transmission Issues:

• Difficulty shifting gears
• Slipping gears
• Burning smell
• Transmission fluid leaks

Possible Transmission Problems:

• Low or Dirty Transmission Fluid: Low transmission fluid can cause the gears to grind, resulting in a whining noise. Dirty or contaminated fluid can also lead to increased friction in the transmission system.

• Worn Transmission Gears: Over time, the gears in the transmission can wear out, leading to a whining sound when accelerating. Worn gears create more friction, which produces a high-pitched noise.

• Faulty Torque Converter: The torque converter connects the engine to the transmission and is responsible for transmitting power. If the torque converter is damaged or malfunctioning, it can produce a whining noise, particularly when accelerating.

Solution:

• Check and refill transmission fluid if necessary.
• If the fluid is dirty, perform a transmission flush.
• Consult a mechanic to inspect the gears and torque converter.
2. Differential Problems

The differential helps manage the power that goes to the wheels, especially when turning. If there’s a problem with the differential, it can cause a whining sound, particularly when accelerating or making turns.

Signs of Differential Issues:

• Whining noise during acceleration and deceleration
• Vibration or clunking noise from the rear of the vehicle
• Uneven tire wear

Possible Differential Problems:

• Low Differential Fluid: Like the transmission, the differential requires lubrication to function properly. Low fluid levels can result in a whining noise due to increased friction.
• Worn Differential Gears: The gears inside the differential can wear down, especially if they aren’t properly lubricated. This can lead to a whining noise, which worsens when you accelerate.

Solution:

• Check the differential fluid and top it up if necessary.
• Have a professional inspect the differential gears for wear and replace them if needed.
3. Power Steering Pump Issues

A faulty power steering pump is another common cause of whining noise when accelerating, particularly if the sound becomes more noticeable when turning the steering wheel. The power steering system uses hydraulic fluid to help you steer the vehicle, and problems in this system can cause whining noises.

Signs of Power Steering Pump Problems:

• Difficulty steering, especially at low speeds
• Whining noise when turning the steering wheel
• Fluid leaks under the vehicle

Possible Power Steering Pump Problems:

• Low Power Steering Fluid: If the power steering fluid is low, the pump will have to work harder, leading to a whining sound. This can also cause damage to the pump if not addressed promptly.
• Worn Power Steering Pump: The power steering pump can wear out over time, especially if it has been under strain from low fluid levels. A worn-out pump can cause a high-pitched whining noise.

Solution:

• Refill the power steering fluid if it's low.
• Inspect the power steering pump for wear and replace it if necessary.
4. Serpentine Belt Issues

The serpentine belt, also known as the drive belt, is responsible for powering many of the car’s components, including the alternator, power steering pump, and air conditioning compressor. If the belt is worn or misaligned, it can cause a whining or squealing noise when accelerating.

Signs of Serpentine Belt Issues:

• Squealing or whining noise, especially during acceleration
• Cracks or visible wear on the belt
• Power steering or alternator issues

Possible Serpentine Belt Problems:

• Worn or Cracked Belt: Over time, the serpentine belt can become worn or cracked, leading to a whining sound as it moves over the pulleys.
• Loose or Misaligned Belt: A loose or misaligned belt can also cause the pulleys to make a whining noise as they try to compensate for the lack of tension.

Solution:

• Inspect the serpentine belt for wear or damage and replace it if necessary.
• Adjust the belt tension or realign it if it's loose or misaligned.
5. Vacuum Leaks

Vacuum leaks are another common cause of whining noise when accelerating. The engine relies on a precise air-to-fuel mixture for optimal performance, and a vacuum leak can disrupt this balance, leading to strange noises, including a high-pitched whine.

Signs of a Vacuum Leak:

• Whining or hissing noise from the engine
• Rough idling
• Decreased engine performance
• Check engine light

Possible Vacuum Leak Problems:

• Cracked or Broken Vacuum Hose: The vacuum hoses in the engine bay can become cracked or damaged over time, leading to air leaks that cause a whining noise.
• Faulty Intake Manifold Gasket: The intake manifold gasket seals the connection between the engine and the intake manifold. If this gasket is damaged, it can lead to a vacuum leak and a whining sound.

Solution:

• Inspect the vacuum hoses for cracks or damage and replace them if necessary.
• Check the intake manifold gasket and replace it if it’s faulty.
6. Alternator Problems

The alternator generates electricity to power the car’s electrical systems and recharge the battery. If the alternator is failing, it can produce a whining noise, particularly when the engine is under load (such as during acceleration).

Signs of Alternator Issues:

• Whining noise, especially during acceleration
• Dim or flickering headlights
• Battery warning light on the dashboard
• Difficulty starting the car

Possible Alternator Problems:

• Worn Alternator Bearings: The alternator has bearings that allow it to spin smoothly. If these bearings wear out, they can produce a whining sound when the engine is running.
• Faulty Voltage Regulator: The voltage regulator controls the amount of electricity produced by the alternator. If it malfunctions, it can cause the alternator to make a whining noise.

Solution:

• Have the alternator bearings inspected and replaced if they are worn.
• Check the voltage regulator and replace it if it's faulty.
7. Turbine Whine in Turbocharged Cars

In vehicles with turbochargers, a whining noise when accelerating can be attributed to the turbo system. Turbochargers are designed to force more air into the engine, increasing power. However, a failing turbocharger or issues within the system can cause a whining or whistling noise.

Signs of Turbocharger Issues:

• Whining noise that increases with acceleration
• Loss of power or performance
• Black smoke from the exhaust
• Check engine light

Possible Turbocharger Problems:

• Worn Turbo Bearings: The turbocharger spins at incredibly high speeds, and its bearings can wear out over time. This can lead to a whining noise that becomes more pronounced as the turbo spools up.
• Leaking Intercooler or Turbo Hoses: If there are leaks in the turbo or intercooler hoses, it can cause the system to lose pressure and make a whining sound.

Solution:

• Inspect the turbocharger and its bearings for wear.
• Check the intercooler and turbo hoses for leaks and replace them if necessary.
8. Wheel Bearings

While less common, wheel bearing problems can also cause a whining noise when accelerating. Wheel bearings allow the wheels to rotate smoothly. When they wear out, they can cause friction and a whining sound that varies with speed.

Signs of Worn Wheel Bearings:

• Whining or grinding noise that changes with vehicle speed
• Vibration in the steering wheel
• Uneven tire wear

Solution:

• Have the wheel bearings inspected and replaced if they are worn.

Diagnosing the Whining Noise When Accelerating

Properly diagnosing the source of the whining noise is crucial to fixing the problem. Here’s how you can go about diagnosing the issue:

1. Listen for the Noise

Pay close attention to when the noise occurs. Does it only happen when you accelerate? Does it get louder as you go faster? Understanding when the noise occurs can help narrow down the possible causes.

2. Check the Fluid Levels

Low fluid levels in systems like the transmission, power steering, or differential can cause whining noises. Check the fluid levels and top them off if necessary.

3. Inspect Belts and Hoses

Check the serpentine belt and vacuum hoses for signs of wear or damage. If they are cracked, loose, or misaligned, they may be causing the whining noise.

4. Consult a Mechanic

If you’re unable to diagnose the problem on your own, it’s best to take your car to a mechanic. They can perform a more thorough inspection and identify the root cause of the whining noise.

Preventing Whining Noises When Accelerating

To prevent whining noises from occurring in the future, regular maintenance is key. Here are a few tips to keep your car running smoothly and quietly:

• Regular Fluid Checks: Ensure that fluids like transmission fluid, power steering fluid, and differential fluid are at the correct levels and clean.
• Inspect Belts and Hoses: Check your serpentine belt, vacuum hoses, and other components for wear during routine maintenance.
• Timely Repairs: Address small problems early before they turn into bigger, more expensive issues.
• Regular Servicing: Keep up with your car’s maintenance schedule to ensure all systems are functioning properly.

Final Thoughts

Whining noise when accelerating can be caused by a range of mechanical issues, from low fluid levels to worn-out components. Identifying the source of the noise and addressing it early can save you time and money in the long run. If you're unsure about the cause, it's always best to consult a mechanic to ensure your vehicle remains in optimal condition.


Want more videos all about auto?
Subscribe to our YouTube channel 👉Cartech Home
Textual description of firstImageUrl

Gears Slipping on Car: Causes, Symptoms, and Solutions

Cartech image

When a car's gears begin to slip, it’s not only an inconvenience, but it can also signify serious transmission issues that need immediate attention. Understanding the causes, symptoms, and possible solutions for gears slipping in a car is vital for drivers to maintain the safety and performance of their vehicles.

This comprehensive guide covers everything you need to know about gears slipping on a car, including how to recognize the signs, the possible causes, and what you can do to fix it. Whether you drive a manual or automatic transmission vehicle, knowing how to address gear slippage can help you prevent further damage and costly repairs.

👉What Does It Mean When Gears Slip on a Car?

Gears slipping on a car refers to a situation where the vehicle shifts out of gear unexpectedly, often causing the engine to rev without the vehicle gaining speed. It can happen in both automatic and manual transmissions, but the underlying causes and solutions may differ depending on the type of transmission.

In an automatic transmission, gear slippage means that the car fails to stay in the correct gear ratio for the driving conditions. In manual transmissions, it can mean that the gear physically slips out of place, often falling back into neutral. In either case, gear slipping is a sign of a potential transmission problem that needs immediate attention to avoid more extensive damage.

👉Symptoms of Gears Slipping on a Car

The symptoms of gears slipping on a car can vary depending on the severity of the problem and the type of transmission system. However, some common warning signs may indicate your car is experiencing gear slippage:

1. Unexpected Gear Changes: If you notice your car shifting gears without any input from you, it’s a clear sign of a slipping transmission. For automatic vehicles, the transmission may jump from one gear to another, while in manual vehicles, the gear may slip out of place or even into neutral.

2. Engine Revving Without Acceleration: A common symptom of gears slipping is that the engine will rev higher than usual, but the car won’t accelerate accordingly. This mismatch between engine power and vehicle movement is often the first thing drivers notice when gears begin to slip.

3. Delayed or Hesitant Gear Engagement: When gears are slipping, there may be a delay or hesitation before the car shifts into gear. This can occur when shifting between drive and reverse in an automatic car or when manually changing gears in a manual vehicle.

4. Grinding or Strange Noises: Gear slippage can also be accompanied by unusual noises, such as grinding, clunking, or whining. These sounds often occur when the transmission is struggling to engage or stay in gear.

5. Burning Smell: If your car’s transmission is overheating due to slipping gears, you may notice a burning smell. This is often caused by overheating transmission fluid, which can lead to further transmission damage if left unchecked.

6. Transmission Warning Light: In many modern vehicles, a transmission warning light on the dashboard may illuminate when there’s an issue with the transmission. If this light comes on, it’s essential to have your vehicle inspected as soon as possible.

👉Causes of Gears Slipping on a Car

Several factors can cause gears to slip on a car, ranging from low transmission fluid to mechanical failures within the transmission system. Understanding the potential causes can help you diagnose the problem and determine the best course of action.

1. Low Transmission Fluid: One of the most common causes of gear slippage is low transmission fluid. Transmission fluid lubricates and cools the transmission components, allowing the system to function smoothly. When fluid levels are low, it can cause overheating and increased friction, leading to gear slippage.

2. Worn Clutch (Manual Transmission): In manual transmission vehicles, a worn clutch can cause gears to slip. The clutch is responsible for engaging and disengaging the transmission, and over time, it can wear down, causing the gears to slip or fail to engage properly.

3. Damaged or Worn Transmission Bands: In automatic transmissions, transmission bands help control the various gears. If these bands become worn or damaged, they may not be able to hold the gears in place, resulting in gear slippage.

4. Faulty Torque Converter: The torque converter in an automatic transmission helps transfer engine power to the transmission. If the torque converter is malfunctioning, it can lead to gear slippage, as the transmission may not receive the power it needs to operate correctly.

5. Worn Gears or Bearings: Over time, the gears and bearings within the transmission can wear out due to normal wear and tear or lack of maintenance. Worn gears can result in the transmission struggling to stay in the correct gear, causing it to slip.

6. Electronic Control Unit (ECU) Problems: In modern cars, the transmission is often controlled by an ECU, which monitors and regulates shifting. If there’s a problem with the ECU, such as a faulty sensor or software glitch, it can lead to improper shifting and gear slippage.

7. Overheating Transmission: Excessive heat can cause the transmission fluid to degrade, leading to friction and gear slippage. Overheating may be caused by driving conditions, such as towing heavy loads or driving in extreme temperatures, or by mechanical issues like a malfunctioning cooling system.

8. Misadjusted Transmission Linkage (Manual Transmission): If the linkage that connects the gear shifter to the transmission is misadjusted or damaged, it can prevent the gears from fully engaging, leading to slippage.

👉How to Fix Gears Slipping on a Car

Fixing gear slippage depends on the underlying cause. Some issues, such as low transmission fluid, can be easily addressed, while others may require more extensive repairs. Here are the steps you can take to resolve gears slipping on a car:

1. Check and Refill Transmission Fluid: If the cause of gear slippage is low transmission fluid, the solution may be as simple as topping off or replacing the fluid. Be sure to use the correct type of fluid recommended for your vehicle. If the fluid appears burnt or dirty, it’s a good idea to have it flushed and replaced.

2. Replace Worn Clutch (Manual Transmission): If the clutch is worn, it will need to be replaced. A slipping clutch can lead to significant transmission damage if not addressed promptly, so it’s important to have this issue repaired by a professional.

3. Adjust or Replace Transmission Bands (Automatic Transmission): If worn or damaged transmission bands are causing gear slippage, they may need to be adjusted or replaced. This is typically a job for a transmission specialist, as it involves opening up the transmission.

4. Repair or Replace the Torque Converter: If the torque converter is malfunctioning, it may need to be repaired or replaced. This is another job that should be handled by a professional, as it involves complex transmission components.

5. Inspect and Replace Worn Gears or Bearings: If the gears or bearings within the transmission are worn, they will need to be replaced. This is a more involved repair that requires disassembling the transmission, so it’s best to have this done by a qualified mechanic.

6. Reset or Reprogram the ECU: If the ECU is causing gear slippage due to faulty sensors or software issues, resetting or reprogramming the unit may resolve the problem. This can often be done by a dealership or transmission specialist.

7. Prevent Transmission Overheating: To prevent overheating, avoid driving conditions that put excessive strain on the transmission, such as towing heavy loads or driving in extreme heat for extended periods. You may also need to install an additional transmission cooler if you frequently drive under these conditions.

8. Adjust Transmission Linkage (Manual Transmission): If the transmission linkage is misadjusted or damaged, a mechanic can adjust or replace it to ensure the gears fully engage and prevent slippage.

👉Preventing Gears Slipping on a Car

While some transmission issues are unavoidable, there are steps you can take to reduce the risk of gears slipping on a car. Regular maintenance and careful driving habits can go a long way in extending the life of your transmission and preventing costly repairs.

1. Regular Transmission Fluid Checks: Checking your transmission fluid regularly and replacing it according to the manufacturer’s recommendations is one of the best ways to prevent gear slippage. Low or dirty transmission fluid is a leading cause of transmission problems, so staying on top of fluid maintenance is crucial.

2. Avoid Aggressive Driving: Aggressive driving, such as rapid acceleration, hard braking, and frequent stop-and-go traffic, can put unnecessary strain on your transmission. Driving more smoothly and avoiding excessive speeds can help prolong the life of your transmission.

3. Service Your Transmission: Regular transmission services, such as fluid changes and filter replacements, can help catch minor issues before they turn into major problems. Many transmission specialists recommend servicing your transmission every 30,000 to 60,000 miles, depending on your vehicle and driving habits.

4. Use the Correct Transmission Fluid: Always use the transmission fluid recommended by your vehicle’s manufacturer. Using the wrong type of fluid can lead to transmission damage and gear slippage.

5. Monitor for Warning Signs: Pay attention to any early warning signs of transmission problems, such as unusual noises, difficulty shifting, or slipping gears. Addressing these issues early can help prevent more serious damage and costly repairs.

💬Final Thoughts

Gears slipping on a car is a serious issue that requires immediate attention. Whether you drive a manual or automatic transmission, addressing the symptoms early can prevent further damage to your vehicle and save you from costly repairs. By understanding the causes, symptoms, and solutions for gear slippage, you can keep your car running smoothly and safely for years to come.

Proper maintenance and regular inspections are key to preventing gears from slipping on a car. Always stay alert to any changes in your vehicle’s performance and take action promptly if you suspect a problem with your transmission.


Want more videos all about auto?
Subscribe to our YouTube channel 👉Cartech Home