Cartech - All About Auto

Textual description of firstImageUrl

What is Wheel Balancing? Cost, How Often to Balance?

Cartech image

Car maintenance can sometimes feel overwhelming, especially when unfamiliar terms like "wheel balancing" come into play. However, understanding essential maintenance tasks like wheel balancing can greatly improve your vehicle’s performance and extend the life of your tires. Whether you’re curious about what wheel balancing is, how often it should be done, or how much it costs, this comprehensive guide will provide all the details you need to keep your car running smoothly. We'll break down the concepts in simple terms to ensure that even those new to vehicle maintenance can easily follow along.

👉What is Wheel Balancing?

Wheel balancing is a crucial automotive service that ensures that the tires and wheels on your vehicle spin evenly and without causing vibration. Over time, small differences in weight distribution between the wheel and tire can occur, leading to imbalance. When this happens, you might notice uneven tire wear, poor handling, or a shaking steering wheel, especially when driving at high speeds.

The goal of wheel balancing is to distribute the weight evenly across all wheels. A properly balanced wheel helps your car operate smoothly, providing a safer and more comfortable driving experience.

👉How Does Wheel Balancing Work?

Wheel balancing is performed by placing the wheel and tire assembly on a specialized machine called a balancer. The machine spins the wheel at high speeds to determine if the weight is distributed evenly. If any imbalances are detected, small weights are added to the wheel’s rim to correct the uneven distribution. These weights are typically made of metal and are placed either on the inside or outside of the wheel, depending on the type of wheel and the method used.

There are two main types of wheel balancing methods:

1. Static Balancing: This type addresses imbalances on one point of the wheel. It ensures that the wheel does not bounce up and down.

2. Dynamic Balancing: This method addresses imbalances both vertically and horizontally. It ensures that the wheel does not wobble side to side or up and down.

Most modern vehicles use dynamic balancing for optimal performance and comfort.

👉Signs That Your Wheels Need Balancing

Identifying the need for wheel balancing is crucial to maintaining the overall health of your vehicle. Below are common symptoms of unbalanced wheels:

1. Vibrating Steering Wheel: One of the most common signs of unbalanced wheels is a vibrating steering wheel, especially at higher speeds. This is caused by uneven weight distribution and can make driving uncomfortable.

2. Uneven Tire Wear: If you notice that your tires are wearing down unevenly, this may be a sign that your wheels are out of balance. Unbalanced wheels put additional stress on certain parts of the tire, leading to premature wear.

3. Poor Handling: Unbalanced wheels can affect your car's handling, making it feel unstable or difficult to control, particularly when turning or at high speeds.

4. Increased Fuel Consumption: Unbalanced wheels can also reduce fuel efficiency. When the wheels are not balanced, the vehicle has to work harder, resulting in increased fuel consumption.

5. Noisy Ride: You may hear unusual noises coming from your tires if they are unbalanced. This could be due to uneven contact between the tire and the road, which can produce sounds like humming or thumping.

If you experience any of these symptoms, it’s time to have your wheels checked and balanced by a professional.

👉Why is Wheel Balancing Important?

Wheel balancing plays a significant role in your vehicle’s overall performance and safety. Here are several reasons why maintaining balanced wheels is critical:

1. Improved Ride Comfort: A balanced wheel ensures a smooth and vibration-free ride. This not only makes driving more comfortable but also reduces strain on your vehicle’s suspension components.

2. Increased Tire Lifespan: Balanced wheels prevent uneven tire wear, which can extend the lifespan of your tires. Unbalanced tires wear out faster, potentially leading to costly replacements.

3. Enhanced Fuel Efficiency: Properly balanced wheels help the vehicle move more efficiently, reducing fuel consumption. Unbalanced wheels can create drag, requiring more energy and fuel to maintain speed.

4. Better Handling and Stability: Balanced wheels provide better control, especially at higher speeds or when making sharp turns. This results in a safer driving experience, especially on highways.

5. Protection for Suspension and Steering Systems: Unbalanced wheels can cause additional stress on the suspension and steering components. Regular wheel balancing reduces the wear and tear on these systems, helping them last longer and function effectively.

👉Wheel Balancing vs. Wheel Alignment: What’s the Difference?

Many people confuse wheel balancing with wheel alignment, but these are two distinct services. Both are important for maintaining the health of your vehicle, but they address different issues.

• Wheel Balancing: As discussed, wheel balancing focuses on the even distribution of weight around the wheels to eliminate vibrations and ensure a smooth ride.
• Wheel Alignment: Wheel alignment, on the other hand, adjusts the angles of the wheels to ensure they are parallel to each other and perpendicular to the ground. This service ensures that your car drives straight and doesn’t pull to one side.

Both services are essential, but wheel balancing is typically required more frequently than alignment, especially after hitting potholes or rough roads.

👉Wheel Balancing How Often Should It Be Done?

How often you should balance your wheels depends on several factors, including your driving habits and the condition of the roads you frequently travel. Here are some general guidelines to follow:

1. During Tire Rotation: A good rule of thumb is to have your wheels balanced every time you rotate your tires, typically every 5,000 to 7,000 miles. This ensures that your tires wear evenly and last longer.

2. When New Tires Are Installed: Anytime you get new tires, it’s essential to have them balanced to ensure smooth driving and prevent premature tire wear.

3. If You Notice Symptoms: If you experience any of the signs of unbalanced wheels (vibration, uneven tire wear, or poor handling), it’s a good idea to get your wheels balanced immediately.

4. After Impact: If you hit a pothole, curb, or other obstacles on the road, it may knock your wheels out of balance. In such cases, it’s wise to have your wheels checked and balanced to avoid further issues.

👉Wheel Balancing Cost

You might be wondering, "How much does a wheel balancing cost?" The cost of wheel balancing varies depending on your location, the type of vehicle you drive, and the specific shop you visit. However, here are some general estimates:

• Standard Cars: For most standard vehicles, the cost of wheel balancing is typically between $15 and $50 per tire. This price may include labor and the cost of any weights added to the wheels.
• Luxury or Specialty Vehicles: For high-performance or luxury vehicles, the cost may be higher, ranging from $50 to $100 per tire.
• Package Deals: Some auto repair shops offer package deals for wheel balancing and tire rotation. This can be a more cost-effective option if you need both services.

👉Factors Affecting Wheel Balancing Cost

Several factors can influence how much wheel balancing costs:

1. Type of Vehicle: Larger vehicles like trucks and SUVs may require more labor and different equipment, increasing the cost.

2. Location: Prices can vary significantly based on your geographic location. Urban areas tend to have higher labor rates compared to rural regions.

3. Type of Balancing: Dynamic balancing, which is more precise and complex, can be more expensive than static balancing.

4. Service Provider: The cost may differ depending on whether you visit a dealership, a tire specialist, or a general repair shop. Dealerships and specialized shops often charge more than independent repair shops.

5. Additional Services: Some shops might offer additional services like tire rotation, alignment checks, or tire repair, which can affect the final cost.

👉How to Save on Wheel Balancing Costs

While wheel balancing is essential, it doesn't have to break the bank. Here are some tips to help you save money on this service:

1. Shop Around: Compare prices from different service providers to find the best deal. Many tire shops offer competitive pricing, so it’s worth taking the time to research.

2. Look for Promotions: Many shops run promotions or offer discounts on wheel balancing services. Keep an eye out for seasonal sales or package deals that include balancing and rotation.

3. Combine Services: Some shops offer discounted prices when you combine services like tire rotation, alignment, and balancing. Bundling these services can save you money in the long run.

4. Regular Maintenance: Preventive maintenance can reduce the frequency of wheel balancing. By keeping your tires properly inflated and rotating them regularly, you can avoid the need for frequent balancing.

💬Final Thoughts

Wheel balancing is an essential aspect of car maintenance that ensures smooth driving, prolongs tire life, and enhances overall vehicle performance. Whether you’re experiencing a vibrating steering wheel, uneven tire wear, or poor handling, getting your wheels balanced can resolve these issues and improve your driving experience.

The cost of wheel balancing is relatively affordable, typically ranging from $15 to $100 per tire, depending on various factors. Regular wheel balancing, especially when done during tire rotation or after installing new tires, can prevent more expensive repairs down the line.

By understanding what wheel balancing is, how often it should be done, and how much it costs, you can ensure that your vehicle remains in top condition, providing you with a safe and comfortable driving experience for years to come.

Want more videos all about auto?
Subscribe to our YouTube channel👉Cartech Home
Textual description of firstImageUrl

Car Shakes When Braking Downhill: Causes and Solutions

All about auto image

Driving downhill can be challenging, especially when your car shakes while braking. This unsettling experience can raise concerns about your vehicle's safety and performance. If you're facing this issue, you're not alone. Many drivers encounter the problem where their car shakes when braking downhill. This article will explore the causes, potential consequences, and solutions to help you understand and address this problem effectively.

Understanding the Basics: Why Does Your Car Shake?

Before diving into the specific reasons for a car shaking while braking downhill, it’s essential to understand the basic mechanics behind why a car might shake or vibrate. When you press the brake pedal, the braking system slows down your car by applying friction to the wheels. This friction generates heat, which can cause various components of the braking system to wear out or become uneven over time. When these components are not functioning correctly, it can lead to vibrations that you feel in the steering wheel, brake pedal, or even throughout the entire car.

Common Causes of Car Shakes When Braking Downhill

1. Warped Brake Rotors

• Explanation: Brake rotors are metal discs that the brake pads clamp onto to slow down the car. Over time, especially with heavy use such as frequent downhill braking, these rotors can become warped due to excessive heat. When the rotors are not perfectly flat, the brake pads cannot maintain consistent contact, leading to vibrations.

• Signs: If your car shakes when braking downhill, especially if the shaking is more noticeable when braking at high speeds, warped brake rotors are likely the culprit.

2. Worn Brake Pads

• Explanation: Brake pads wear down over time as they are used to clamp onto the rotors. If the pads wear unevenly or become too thin, they can cause vibrations when braking. In some cases, the brake pads might also glaze over due to excessive heat, making them less effective and prone to causing shaking.

• Signs: If you hear a squealing noise along with the shaking when you brake downhill, it’s a strong indication that your brake pads are worn out and need to be replaced.

3. Imbalanced Tires

• Explanation: Tires need to be balanced correctly to ensure smooth driving. If your tires are out of balance, it can cause the car to shake, particularly when driving at high speeds or during braking. This issue can be exacerbated when braking downhill because of the added stress on the tires.

• Signs: If your car shakes when braking downhill and you notice uneven tire wear or the shaking seems to correlate with specific speeds, tire imbalance might be the issue.

4. Suspension Issues

• Explanation: The suspension system in your car is responsible for maintaining contact between the tires and the road surface. If components like the shocks or struts are worn out, they might not absorb the impact of braking properly, leading to vibrations.

• Signs: If the shaking is accompanied by a bouncy ride or if your car dips excessively when braking, your suspension might be the problem.

5. Alignment Problems

• Explanation: Proper wheel alignment ensures that your tires meet the road at the correct angle. Misalignment can cause uneven tire wear and vibrations, particularly noticeable when braking downhill due to the increased forces at play.

• Signs: If your car pulls to one side when braking or the steering wheel is off-center even when driving straight, alignment issues could be the cause of the shaking.

6. Brake Caliper Problems

• Explanation: The brake caliper squeezes the brake pads against the rotors to slow down the car. If a caliper is sticking or malfunctioning, it can cause uneven braking pressure, leading to vibrations.

• Signs: A sticking caliper might also cause your car to pull to one side when braking, in addition to the shaking.

5. Overheated Brakes

• Explanation: Continuous or heavy braking, especially downhill, can cause the brakes to overheat. When brakes overheat, the brake fluid can boil, or the rotors can become temporarily warped, both of which can lead to vibrations.

• Signs: If the shaking occurs after prolonged braking, particularly downhill, and is accompanied by a burning smell, your brakes may be overheating.

Potential Consequences of Ignoring the Problem

Ignoring the issue when your car shakes when braking downhill can lead to several serious consequences:

1, Increased Wear and Tear: Continuous shaking can accelerate the wear on your car’s braking system, tires, and suspension components, leading to more expensive repairs down the line.

2. Reduced Braking Efficiency: If your brakes are causing the shaking, this could mean they are not functioning at their best, reducing your ability to stop quickly and safely.

3. Steering Problems: Vibrations can affect the steering system, making it harder to control the car, especially in emergency situations.

4. Compromised Safety: Ultimately, any issue that affects your car’s braking and handling can compromise your safety. A car that shakes when braking downhill is not only uncomfortable to drive but could also increase the risk of accidents, particularly in challenging driving conditions.

Diagnosing the Problem

To effectively address the issue of your car shaking when braking downhill, it’s crucial to accurately diagnose the problem. Here are some steps you can take:

1. Visual Inspection

• What to Do: Start by visually inspecting your brake rotors, pads, and tires. Look for signs of wear, uneven surfaces, or any visible damage.

• Why It Helps: A visual inspection can help you identify obvious issues like worn brake pads or imbalanced tires.

2. Test Drive

• What to Do: Take your car for a test drive in a controlled environment, preferably where you can safely brake downhill. Pay close attention to when the shaking occurs, how intense it is, and whether it’s accompanied by any unusual sounds.

• Why It Helps: A test drive can help you pinpoint whether the shaking is related to speed, braking pressure, or specific conditions like downhill driving.

3. Professional Diagnosis

• What to Do: If you’re unable to identify the problem yourself, or if the shaking persists, it’s best to take your car to a professional mechanic. They can use diagnostic tools to check the brake system, suspension, tires, and alignment.

• Why It Helps: A professional diagnosis ensures that the issue is correctly identified and that you don’t end up replacing parts unnecessarily.

Solutions to Stop Your Car from Shaking When Braking Downhill

Once you’ve identified the cause of the shaking, you can proceed with the appropriate solution. Here are some common fixes:

1. Resurface or Replace Brake Rotors

• What to Do: If your brake rotors are warped, they can often be resurfaced (machined) to make them smooth again. However, if they are too thin or severely warped, replacement might be necessary.

• Cost Consideration: Resurfacing is generally less expensive than replacement, but make sure to consult with your mechanic about the best option for your situation.

2. Replace Worn Brake Pads

• What to Do: If your brake pads are worn out or glazed, replacing them is the best course of action. Be sure to choose high-quality pads that are suitable for your driving conditions, especially if you frequently drive downhill.

• Cost Consideration: Brake pads vary in price, but investing in higher-quality pads can improve braking performance and reduce the likelihood of future vibrations.

3. Balance and Align Tires

• What to Do: If your tires are imbalanced, have them professionally balanced. If your alignment is off, a wheel alignment will correct the angles and prevent further uneven tire wear.

• Cost Consideration: Tire balancing and alignment are relatively inexpensive services that can significantly improve your car’s handling and comfort.

4. Inspect and Repair Suspension Components

• What to Do: If your suspension is causing the shaking, have it inspected by a professional. Replacing worn-out shocks, struts, or other suspension components can restore smooth braking.

• Cost Consideration: Suspension repairs can be more costly, but they are crucial for maintaining vehicle safety and ride comfort.

5. Fix or Replace Brake Calipers

• What to Do: If a brake caliper is sticking, it may need to be cleaned, lubricated, or replaced. Addressing this issue promptly can prevent uneven brake wear and reduce shaking.

• Cost Consideration: The cost will depend on whether the caliper can be repaired or needs replacement.

6. Avoid Overheating Your Brakes

• What to Do: To prevent your brakes from overheating, try to avoid continuous braking when driving downhill. Instead, use engine braking by shifting to a lower gear, which helps reduce the load on your brakes.

• Cost Consideration: This solution doesn’t involve direct costs, but it can save you money by preventing brake damage.

Preventative Measures to Keep Your Car from Shaking

Prevention is always better than cure. Here are some tips to keep your car from shaking when braking downhill in the future:

1. Regular Maintenance

• Action: Keep up with regular brake inspections and maintenance. This includes checking brake pads, rotors, and fluid levels.

• Benefit: Regular maintenance helps catch potential issues early before they develop into more serious problems.

2. Smooth Driving Habits

• Action: Avoid aggressive braking and try to drive smoothly, especially on downhill slopes. Use engine braking to reduce the strain on your brakes.

•Benefit: Smooth driving not only prevents shaking but also extends the lifespan of your braking system.

3. Tire Care

• Action: Regularly check your tire pressure, balance, and alignment. Rotate your tires as recommended to ensure even wear.

• Benefit: Proper tire care improves vehicle stability and reduces the risk of vibrations.

4. Address Issues Promptly

• Action: If you notice any shaking or vibrations, don’t ignore them. Address the issue as soon as possible to prevent further damage.

• Benefit: Early intervention can save you money on repairs and ensure your car remains safe to drive.

Final Thoughts: Ensuring a Smooth and Safe Ride

When your car shakes when braking downhill, it’s a clear sign that something is not right. While the issue can stem from various causes, ranging from brake problems to suspension issues, it’s essential to address it promptly to ensure your safety and that of others on the road.

By understanding the common causes and taking appropriate action, you can resolve the issue and enjoy a smoother, safer driving experience. Regular maintenance, careful driving habits, and timely repairs are key to preventing future problems and keeping your car in optimal condition.

If you're experiencing this issue, don’t hesitate to consult with a professional mechanic to get a precise diagnosis and the necessary repairs. Remember, the sooner you address the problem, the less likely it is to lead to more significant issues down the line. Safe driving!


Want more videos all about auto?
Subscribe to our YouTube channel👉Cartech Home

Whining Noise When Accelerating: Causes and Solutions

When your car makes a whining noise while accelerating, it's not only annoying but also a signal that something is amiss with your vehicle. Understanding the underlying causes of this sound is essential, as neglecting the issue can lead to bigger, more expensive problems down the road. This article delves into the possible reasons for the whining noise when accelerating, providing insights and solutions to help you keep your car running smoothly.

What Is a Whining Noise?

A whining noise is typically high-pitched and can come from different parts of the vehicle. It often occurs when a component is worn or malfunctioning, leading to friction or lack of lubrication. The sound is usually most noticeable during acceleration, as the engine and other moving parts work harder, increasing stress on these components.

Common Causes of a Whining Noise When Accelerating

Several mechanical issues can cause a whining noise when you press the accelerator. Here are the most common causes:

1. Transmission Issues

Transmission problems are one of the leading causes of whining noises when accelerating. The transmission is responsible for transferring power from the engine to the wheels. When it malfunctions, it can lead to various noises, including whining.

Signs of Transmission Issues:

• Difficulty shifting gears
Slipping gears
• Burning smell
• Transmission fluid leaks

Possible Transmission Problems:

• Low or Dirty Transmission Fluid: Low transmission fluid can cause the gears to grind, resulting in a whining noise. Dirty or contaminated fluid can also lead to increased friction in the transmission system.

• Worn Transmission Gears: Over time, the gears in the transmission can wear out, leading to a whining sound when accelerating. Worn gears create more friction, which produces a high-pitched noise.

• Faulty Torque Converter: The torque converter connects the engine to the transmission and is responsible for transmitting power. If the torque converter is damaged or malfunctioning, it can produce a whining noise, particularly when accelerating.

Solution:

• Check and refill transmission fluid if necessary.
• If the fluid is dirty, perform a transmission flush.
• Consult a mechanic to inspect the gears and torque converter.
2. Differential Problems

The differential helps manage the power that goes to the wheels, especially when turning. If there’s a problem with the differential, it can cause a whining sound, particularly when accelerating or making turns.

Signs of Differential Issues:

• Whining noise during acceleration and deceleration
• Vibration or clunking noise from the rear of the vehicle
• Uneven tire wear

Possible Differential Problems:

• Low Differential Fluid: Like the transmission, the differential requires lubrication to function properly. Low fluid levels can result in a whining noise due to increased friction.
• Worn Differential Gears: The gears inside the differential can wear down, especially if they aren’t properly lubricated. This can lead to a whining noise, which worsens when you accelerate.

Solution:

• Check the differential fluid and top it up if necessary.
• Have a professional inspect the differential gears for wear and replace them if needed.
3. Power Steering Pump Issues

A faulty power steering pump is another common cause of whining noise when accelerating, particularly if the sound becomes more noticeable when turning the steering wheel. The power steering system uses hydraulic fluid to help you steer the vehicle, and problems in this system can cause whining noises.

Signs of Power Steering Pump Problems:

• Difficulty steering, especially at low speeds
• Whining noise when turning the steering wheel
• Fluid leaks under the vehicle

Possible Power Steering Pump Problems:

• Low Power Steering Fluid: If the power steering fluid is low, the pump will have to work harder, leading to a whining sound. This can also cause damage to the pump if not addressed promptly.
• Worn Power Steering Pump: The power steering pump can wear out over time, especially if it has been under strain from low fluid levels. A worn-out pump can cause a high-pitched whining noise.

Solution:

• Refill the power steering fluid if it's low.
• Inspect the power steering pump for wear and replace it if necessary.
4. Serpentine Belt Issues

The serpentine belt, also known as the drive belt, is responsible for powering many of the car’s components, including the alternator, power steering pump, and air conditioning compressor. If the belt is worn or misaligned, it can cause a whining or squealing noise when accelerating.

Signs of Serpentine Belt Issues:

• Squealing or whining noise, especially during acceleration
• Cracks or visible wear on the belt
• Power steering or alternator issues

Possible Serpentine Belt Problems:

• Worn or Cracked Belt: Over time, the serpentine belt can become worn or cracked, leading to a whining sound as it moves over the pulleys.
• Loose or Misaligned Belt: A loose or misaligned belt can also cause the pulleys to make a whining noise as they try to compensate for the lack of tension.

Solution:

• Inspect the serpentine belt for wear or damage and replace it if necessary.
• Adjust the belt tension or realign it if it's loose or misaligned.
5. Vacuum Leaks

Vacuum leaks are another common cause of whining noise when accelerating. The engine relies on a precise air-to-fuel mixture for optimal performance, and a vacuum leak can disrupt this balance, leading to strange noises, including a high-pitched whine.

Signs of a Vacuum Leak:

• Whining or hissing noise from the engine
• Rough idling
• Decreased engine performance
• Check engine light

Possible Vacuum Leak Problems:

• Cracked or Broken Vacuum Hose: The vacuum hoses in the engine bay can become cracked or damaged over time, leading to air leaks that cause a whining noise.
• Faulty Intake Manifold Gasket: The intake manifold gasket seals the connection between the engine and the intake manifold. If this gasket is damaged, it can lead to a vacuum leak and a whining sound.

Solution:

• Inspect the vacuum hoses for cracks or damage and replace them if necessary.
• Check the intake manifold gasket and replace it if it’s faulty.
6. Alternator Problems

The alternator generates electricity to power the car’s electrical systems and recharge the battery. If the alternator is failing, it can produce a whining noise, particularly when the engine is under load (such as during acceleration).

Signs of Alternator Issues:

• Whining noise, especially during acceleration
• Dim or flickering headlights
• Battery warning light on the dashboard
• Difficulty starting the car

Possible Alternator Problems:

• Worn Alternator Bearings: The alternator has bearings that allow it to spin smoothly. If these bearings wear out, they can produce a whining sound when the engine is running.
• Faulty Voltage Regulator: The voltage regulator controls the amount of electricity produced by the alternator. If it malfunctions, it can cause the alternator to make a whining noise.

Solution:

• Have the alternator bearings inspected and replaced if they are worn.
• Check the voltage regulator and replace it if it's faulty.
7. Turbine Whine in Turbocharged Cars

In vehicles with turbochargers, a whining noise when accelerating can be attributed to the turbo system. Turbochargers are designed to force more air into the engine, increasing power. However, a failing turbocharger or issues within the system can cause a whining or whistling noise.

Signs of Turbocharger Issues:

• Whining noise that increases with acceleration
• Loss of power or performance
• Black smoke from the exhaust
• Check engine light

Possible Turbocharger Problems:

• Worn Turbo Bearings: The turbocharger spins at incredibly high speeds, and its bearings can wear out over time. This can lead to a whining noise that becomes more pronounced as the turbo spools up.
• Leaking Intercooler or Turbo Hoses: If there are leaks in the turbo or intercooler hoses, it can cause the system to lose pressure and make a whining sound.

Solution:

• Inspect the turbocharger and its bearings for wear.
• Check the intercooler and turbo hoses for leaks and replace them if necessary.
8. Wheel Bearings

While less common, wheel bearing problems can also cause a whining noise when accelerating. Wheel bearings allow the wheels to rotate smoothly. When they wear out, they can cause friction and a whining sound that varies with speed.

Signs of Worn Wheel Bearings:

• Whining or grinding noise that changes with vehicle speed
• Vibration in the steering wheel
• Uneven tire wear

Solution:

• Have the wheel bearings inspected and replaced if they are worn.

Diagnosing the Whining Noise When Accelerating

Properly diagnosing the source of the whining noise is crucial to fixing the problem. Here’s how you can go about diagnosing the issue:

1. Listen for the Noise

Pay close attention to when the noise occurs. Does it only happen when you accelerate? Does it get louder as you go faster? Understanding when the noise occurs can help narrow down the possible causes.

2. Check the Fluid Levels

Low fluid levels in systems like the transmission, power steering, or differential can cause whining noises. Check the fluid levels and top them off if necessary.

3. Inspect Belts and Hoses

Check the serpentine belt and vacuum hoses for signs of wear or damage. If they are cracked, loose, or misaligned, they may be causing the whining noise.

4. Consult a Mechanic

If you’re unable to diagnose the problem on your own, it’s best to take your car to a mechanic. They can perform a more thorough inspection and identify the root cause of the whining noise.

Preventing Whining Noises When Accelerating

To prevent whining noises from occurring in the future, regular maintenance is key. Here are a few tips to keep your car running smoothly and quietly:

• Regular Fluid Checks: Ensure that fluids like transmission fluid, power steering fluid, and differential fluid are at the correct levels and clean.
• Inspect Belts and Hoses: Check your serpentine belt, vacuum hoses, and other components for wear during routine maintenance.
• Timely Repairs: Address small problems early before they turn into bigger, more expensive issues.
• Regular Servicing: Keep up with your car’s maintenance schedule to ensure all systems are functioning properly.

Final Thoughts

Whining noise when accelerating can be caused by a range of mechanical issues, from low fluid levels to worn-out components. Identifying the source of the noise and addressing it early can save you time and money in the long run. If you're unsure about the cause, it's always best to consult a mechanic to ensure your vehicle remains in optimal condition.


Want more videos all about auto?
Subscribe to our YouTube channel ðŸ‘‰Cartech Home
Textual description of firstImageUrl

Gears Slipping on Car: Causes, Symptoms, and Solutions

Cartech image

When a car's gears begin to slip, it’s not only an inconvenience, but it can also signify serious transmission issues that need immediate attention. Understanding the causes, symptoms, and possible solutions for gears slipping in a car is vital for drivers to maintain the safety and performance of their vehicles.

This comprehensive guide covers everything you need to know about gears slipping on a car, including how to recognize the signs, the possible causes, and what you can do to fix it. Whether you drive a manual or automatic transmission vehicle, knowing how to address gear slippage can help you prevent further damage and costly repairs.

👉What Does It Mean When Gears Slip on a Car?

Gears slipping on a car refers to a situation where the vehicle shifts out of gear unexpectedly, often causing the engine to rev without the vehicle gaining speed. It can happen in both automatic and manual transmissions, but the underlying causes and solutions may differ depending on the type of transmission.

In an automatic transmission, gear slippage means that the car fails to stay in the correct gear ratio for the driving conditions. In manual transmissions, it can mean that the gear physically slips out of place, often falling back into neutral. In either case, gear slipping is a sign of a potential transmission problem that needs immediate attention to avoid more extensive damage.

👉Symptoms of Gears Slipping on a Car

The symptoms of gears slipping on a car can vary depending on the severity of the problem and the type of transmission system. However, some common warning signs may indicate your car is experiencing gear slippage:

1. Unexpected Gear Changes: If you notice your car shifting gears without any input from you, it’s a clear sign of a slipping transmission. For automatic vehicles, the transmission may jump from one gear to another, while in manual vehicles, the gear may slip out of place or even into neutral.

2. Engine Revving Without Acceleration: A common symptom of gears slipping is that the engine will rev higher than usual, but the car won’t accelerate accordingly. This mismatch between engine power and vehicle movement is often the first thing drivers notice when gears begin to slip.

3. Delayed or Hesitant Gear Engagement: When gears are slipping, there may be a delay or hesitation before the car shifts into gear. This can occur when shifting between drive and reverse in an automatic car or when manually changing gears in a manual vehicle.

4. Grinding or Strange Noises: Gear slippage can also be accompanied by unusual noises, such as grinding, clunking, or whining. These sounds often occur when the transmission is struggling to engage or stay in gear.

5. Burning Smell: If your car’s transmission is overheating due to slipping gears, you may notice a burning smell. This is often caused by overheating transmission fluid, which can lead to further transmission damage if left unchecked.

6. Transmission Warning Light: In many modern vehicles, a transmission warning light on the dashboard may illuminate when there’s an issue with the transmission. If this light comes on, it’s essential to have your vehicle inspected as soon as possible.

👉Causes of Gears Slipping on a Car

Several factors can cause gears to slip on a car, ranging from low transmission fluid to mechanical failures within the transmission system. Understanding the potential causes can help you diagnose the problem and determine the best course of action.

1. Low Transmission Fluid: One of the most common causes of gear slippage is low transmission fluid. Transmission fluid lubricates and cools the transmission components, allowing the system to function smoothly. When fluid levels are low, it can cause overheating and increased friction, leading to gear slippage.

2. Worn Clutch (Manual Transmission): In manual transmission vehicles, a worn clutch can cause gears to slip. The clutch is responsible for engaging and disengaging the transmission, and over time, it can wear down, causing the gears to slip or fail to engage properly.

3. Damaged or Worn Transmission Bands: In automatic transmissions, transmission bands help control the various gears. If these bands become worn or damaged, they may not be able to hold the gears in place, resulting in gear slippage.

4. Faulty Torque Converter: The torque converter in an automatic transmission helps transfer engine power to the transmission. If the torque converter is malfunctioning, it can lead to gear slippage, as the transmission may not receive the power it needs to operate correctly.

5. Worn Gears or Bearings: Over time, the gears and bearings within the transmission can wear out due to normal wear and tear or lack of maintenance. Worn gears can result in the transmission struggling to stay in the correct gear, causing it to slip.

6. Electronic Control Unit (ECU) Problems: In modern cars, the transmission is often controlled by an ECU, which monitors and regulates shifting. If there’s a problem with the ECU, such as a faulty sensor or software glitch, it can lead to improper shifting and gear slippage.

7. Overheating Transmission: Excessive heat can cause the transmission fluid to degrade, leading to friction and gear slippage. Overheating may be caused by driving conditions, such as towing heavy loads or driving in extreme temperatures, or by mechanical issues like a malfunctioning cooling system.

8. Misadjusted Transmission Linkage (Manual Transmission): If the linkage that connects the gear shifter to the transmission is misadjusted or damaged, it can prevent the gears from fully engaging, leading to slippage.

👉How to Fix Gears Slipping on a Car

Fixing gear slippage depends on the underlying cause. Some issues, such as low transmission fluid, can be easily addressed, while others may require more extensive repairs. Here are the steps you can take to resolve gears slipping on a car:

1. Check and Refill Transmission Fluid: If the cause of gear slippage is low transmission fluid, the solution may be as simple as topping off or replacing the fluid. Be sure to use the correct type of fluid recommended for your vehicle. If the fluid appears burnt or dirty, it’s a good idea to have it flushed and replaced.

2. Replace Worn Clutch (Manual Transmission): If the clutch is worn, it will need to be replaced. A slipping clutch can lead to significant transmission damage if not addressed promptly, so it’s important to have this issue repaired by a professional.

3. Adjust or Replace Transmission Bands (Automatic Transmission): If worn or damaged transmission bands are causing gear slippage, they may need to be adjusted or replaced. This is typically a job for a transmission specialist, as it involves opening up the transmission.

4. Repair or Replace the Torque Converter: If the torque converter is malfunctioning, it may need to be repaired or replaced. This is another job that should be handled by a professional, as it involves complex transmission components.

5. Inspect and Replace Worn Gears or Bearings: If the gears or bearings within the transmission are worn, they will need to be replaced. This is a more involved repair that requires disassembling the transmission, so it’s best to have this done by a qualified mechanic.

6. Reset or Reprogram the ECU: If the ECU is causing gear slippage due to faulty sensors or software issues, resetting or reprogramming the unit may resolve the problem. This can often be done by a dealership or transmission specialist.

7. Prevent Transmission Overheating: To prevent overheating, avoid driving conditions that put excessive strain on the transmission, such as towing heavy loads or driving in extreme heat for extended periods. You may also need to install an additional transmission cooler if you frequently drive under these conditions.

8. Adjust Transmission Linkage (Manual Transmission): If the transmission linkage is misadjusted or damaged, a mechanic can adjust or replace it to ensure the gears fully engage and prevent slippage.

👉Preventing Gears Slipping on a Car

While some transmission issues are unavoidable, there are steps you can take to reduce the risk of gears slipping on a car. Regular maintenance and careful driving habits can go a long way in extending the life of your transmission and preventing costly repairs.

1. Regular Transmission Fluid Checks: Checking your transmission fluid regularly and replacing it according to the manufacturer’s recommendations is one of the best ways to prevent gear slippage. Low or dirty transmission fluid is a leading cause of transmission problems, so staying on top of fluid maintenance is crucial.

2. Avoid Aggressive Driving: Aggressive driving, such as rapid acceleration, hard braking, and frequent stop-and-go traffic, can put unnecessary strain on your transmission. Driving more smoothly and avoiding excessive speeds can help prolong the life of your transmission.

3. Service Your Transmission: Regular transmission services, such as fluid changes and filter replacements, can help catch minor issues before they turn into major problems. Many transmission specialists recommend servicing your transmission every 30,000 to 60,000 miles, depending on your vehicle and driving habits.

4. Use the Correct Transmission Fluid: Always use the transmission fluid recommended by your vehicle’s manufacturer. Using the wrong type of fluid can lead to transmission damage and gear slippage.

5. Monitor for Warning Signs: Pay attention to any early warning signs of transmission problems, such as unusual noises, difficulty shifting, or slipping gears. Addressing these issues early can help prevent more serious damage and costly repairs.

💬Final Thoughts

Gears slipping on a car is a serious issue that requires immediate attention. Whether you drive a manual or automatic transmission, addressing the symptoms early can prevent further damage to your vehicle and save you from costly repairs. By understanding the causes, symptoms, and solutions for gear slippage, you can keep your car running smoothly and safely for years to come.

Proper maintenance and regular inspections are key to preventing gears from slipping on a car. Always stay alert to any changes in your vehicle’s performance and take action promptly if you suspect a problem with your transmission.


Want more videos all about auto?
Subscribe to our YouTube channel ðŸ‘‰Cartech Home
Textual description of firstImageUrl

Grinding Noise When in Reverse: Causes and Solutions

Cartech image

Experiencing a grinding noise when in reverse can be a cause for concern. It can indicate that something is wrong with your car’s transmission, brakes, or even wheel bearings. Understanding the potential causes, symptoms, and solutions for this issue is essential to maintaining your car's performance and safety. In this article, we'll dive deep into the common causes of a grinding noise when in reverse, how to identify the issue, and what steps to take to resolve the problem.

👉What is the Grinding Noise?

A grinding noise when your vehicle is in reverse is often described as a metallic or scraping sound. This noise can vary from light and intermittent to loud and constant. While the noise itself doesn’t tell you exactly what the issue is, it is a clear signal that something in your vehicle's reverse system needs attention. Ignoring this sound can lead to more significant problems and costly repairs.

👉Common Causes of Grinding Noise When in Reverse

There are several potential reasons your car makes a grinding noise when in reverse, ranging from minor to serious mechanical issues. Below are some of the most common causes.

1. Worn Brake Pads

Worn-out brake pads can cause a grinding noise, especially when you put your car in reverse. The brake pads are designed to wear down over time, and once they become too thin, the metal backing of the pads can make contact with the rotors, creating a grinding sound. This problem is not only noisy but also dangerous, as worn brake pads reduce your vehicle’s ability to stop effectively.

Cartech image

Symptoms:

• Grinding noise when reversing or braking.
• Longer stopping distances.
• A burning smell or squealing noise when braking.

Solution: Replacing the worn brake pads with new ones is the best course of action. Regular brake inspections can help prevent this issue from occurring in the first place.

2. Damaged or Worn Transmission Components

The transmission is responsible for changing the gears in your vehicle. If there are damaged or worn components inside the transmission, it can cause a grinding noise when the vehicle is in reverse. Manual transmissions are particularly susceptible to this issue, though automatic transmissions can also suffer from similar problems.

Cartech image

Symptoms:

• Difficulty shifting into reverse.
• Grinding noise when shifting into reverse.
• Hesitation or delay when shifting into reverse.

Solution: Transmission issues can be complex and expensive to repair. If you suspect your transmission is the cause of the grinding noise, consult a mechanic immediately. They may recommend a transmission fluid change or even a rebuild, depending on the severity of the damage.

3. Faulty Reverse Gear Teeth

In manual transmissions, the reverse gear's teeth can become worn or damaged over time. This can cause a grinding noise when the vehicle is placed in reverse. The reverse gear experiences less usage compared to forward gears, but it can still wear out, particularly in older vehicles.

Symptoms:

• Grinding noise only when in reverse.
• Difficulty or resistance when shifting into reverse.
• Clunking noise when shifting.

Solution: Repairing or replacing the reverse gear is often necessary in this situation. This is typically a job for a professional mechanic, as it involves taking apart the transmission to access the damaged parts.

4. Faulty Clutch (Manual Transmission)

If you have a manual transmission, a faulty clutch could be the reason for the grinding noise when in reverse. A worn-out or misadjusted clutch can fail to fully disengage the transmission from the engine, leading to a grinding sound when you try to shift into reverse.

Cartech image

Symptoms:

• Grinding noise when shifting into reverse.
• Difficulty engaging reverse gear.
• The clutch pedal feels loose or spongy.

Solution: Replacing or adjusting the clutch can eliminate this issue. If you're experiencing clutch-related problems, it's best to visit a mechanic to diagnose and fix the problem.

5. Low or Dirty Transmission Fluid

Transmission fluid is vital to the smooth operation of your vehicle’s transmission system. If the fluid is low or dirty, it can cause the gears to grind when shifting into reverse. Low transmission fluid can also lead to overheating, which can cause further damage to the transmission.

Catech image

Symptoms:

• Grinding noise when shifting into reverse.
• Delayed engagement when shifting into reverse.
• Transmission gears slipping or overheating.

Solution: Regularly check and change your transmission fluid as recommended by your vehicle's manufacturer. If the fluid is dirty or low, top it off or replace it as needed. This simple maintenance task can prevent serious transmission problems in the future.

6. Worn or Damaged CV Joints

Constant Velocity (CV) joints are essential components of the vehicle’s drivetrain, allowing the wheels to turn while maintaining power transmission from the engine. If the CV joints are damaged or worn, they can produce a grinding noise when the car is in reverse, particularly when turning the steering wheel.

Cartech image

Symptoms:

• Grinding noise when reversing, especially when turning.
• Clicking or popping sound when accelerating or turning.
• Vibrations in the steering wheel or floor of the car.

Solution: Replacing the damaged CV joints is necessary to resolve this issue. If left unchecked, a faulty CV joint can break completely, causing your car to lose power to the wheels.

7. Worn Wheel Bearings

Wheel bearings support the weight of the vehicle and enable the wheels to rotate smoothly. Over time, they can wear out, causing a grinding noise when the vehicle is moving in reverse. This noise is often more noticeable at lower speeds.

Cartech image
Cartech image

Symptoms:

• Grinding noise when reversing or driving at low speeds.
• Vibration in the steering wheel or floor.
• Uneven tire wear.

Solution: Worn wheel bearings should be replaced as soon as possible. Failing to address this issue can lead to wheel failure and other significant safety concerns.

8. Warped or Worn Brake Rotors

Brake rotors can become warped due to excessive heat or wear, which may cause a grinding noise when you reverse the car. This is especially common if the rotors are not replaced when the brake pads are changed.

Cartech image

Symptoms:

• Grinding or scraping noise when reversing or braking.
• Pulsing sensation when braking.
• Reduced braking efficiency.

Solution: The solution is to resurface or replace the warped brake rotors. Regular brake inspections and maintenance can help prevent this issue from developing.

👉Diagnosing the Grinding Noise When in Reverse

Diagnosing the cause of a grinding noise when in reverse can be challenging without the right knowledge and tools. Here are some steps to help identify the issue:

1. Listen Carefully: Try to pinpoint where the noise is coming from. Is it coming from the front or rear of the vehicle? Does it happen only when the car is in reverse, or does it also occur in other gears?

2. Check the Brake System: Inspect the brake pads and rotors for signs of wear. If they are thin or damaged, they could be the source of the grinding noise.

3. Check the Transmission Fluid: Ensure the transmission fluid is at the proper level and in good condition. If it’s dirty or low, this could be causing the grinding noise.

4. Inspect the CV Joints and Wheel Bearings: Look for signs of wear on the CV joints and wheel bearings. If they are damaged, they may need to be replaced.

5. Consult a Mechanic: If you're unsure of the cause, it’s best to consult a mechanic. They can diagnose the issue more accurately and suggest the appropriate repairs.

👉Preventing Grinding Noises When in Reverse

Preventing grinding noises in reverse is often a matter of regular maintenance and addressing issues early. Here are some tips to keep your vehicle in top shape and avoid hearing that dreaded grinding noise:

1. Regular Brake Inspections: Inspect your brake pads and rotors regularly. Replace worn components promptly to avoid damage and noise.

2. Check and Change Transmission Fluid: Keep your transmission fluid at the correct level and change it as needed. Dirty or low transmission fluid can cause grinding noises and damage to the transmission.

4. Address Transmission Problems Early: If you notice any issues with your transmission, such as difficulty shifting or grinding noises, address them as soon as possible to avoid further damage.

5. Inspect Wheel Bearings and CV Joints: Regularly inspect your wheel bearings and CV joints for signs of wear. Replacing them early can prevent more significant issues down the road.

💬Final Thoughts

A grinding noise when in reverse should never be ignored, as it can be an indication of a range of potential problems, from worn brake pads to serious transmission issues. By understanding the common causes and symptoms of this noise, you can take the necessary steps to address the problem and maintain the safety and performance of your vehicle.

Whether it’s a simple fix like replacing brake pads or a more complex issue like a faulty reverse gear, addressing the grinding noise when in reverse promptly can save you from costly repairs and ensure your vehicle remains in optimal condition. Regular maintenance and early diagnosis are the keys to preventing this issue from happening in the future.

By following the abovementioned guidelines, you can ensure that your vehicle operates smoothly and quietly, even when reversing.


Want more videos all about auto?
Subscribe to our YouTube channel ðŸ‘‰Cartech Home
Textual description of firstImageUrl

Brake Warning Light is On: What You Need to Know

All about auto

If you're driving and suddenly notice that your brake warning light is on, it's crucial not to ignore it. This light is an essential safety feature in your vehicle, alerting you to potential issues with your braking system. Whether the brake warning light is on continuously, blinking, or flashing intermittently, it's vital to understand what it means and how to address it. This article will explore the common reasons behind the brake warning light being on, what to do when you see it, and how to prevent it from occurring in the future.

👉Understanding the Brake Warning Light

The brake warning light is a red or amber symbol on your vehicle's dashboard. It usually appears as an exclamation mark inside a circle, often accompanied by parentheses. The brake warning light is designed to alert you to various potential issues within your vehicle's braking system, which could range from minor concerns to serious problems that require immediate attention.

👉Common Reasons for the Brake Warning Light Being On

1. Low Brake Fluid. One of the most common reasons for the brake warning light to turn on is low brake fluid levels. Brake fluid is essential for the proper functioning of your braking system. It creates the hydraulic pressure needed to engage the brakes. If the fluid level drops below the minimum required, the brake warning light will illuminate to alert you.

2. Worn Brake Pads. Over time, brake pads wear down and need replacement. Many vehicles have sensors that detect when the brake pads are too thin. When these sensors are triggered, the brake warning light will come on. Worn brake pads not only reduce braking efficiency but can also damage the rotors, leading to more expensive repairs.

3. Parking Brake Engaged. If the parking brake is engaged or not fully released, the brake warning light will remain on. This is a simple issue to fix—just ensure the parking brake is fully released. However, if the light stays on even after releasing the parking brake, there might be an issue with the parking brake system itself.

4. ABS (Anti-lock Braking System) Issues. Modern vehicles are equipped with an Anti-lock Braking System (ABS) that prevents the wheels from locking up during braking. If there's a problem with the ABS, it can trigger the brake warning light. This could be due to a faulty ABS sensor, damaged wiring, or issues with the ABS control module.

5. Brake Light Switch Fault. The brake light switch is responsible for turning on the brake lights when you press the brake pedal. If this switch malfunctions, it can cause the brake warning light to illuminate. This is often accompanied by the brake lights staying on even when the pedal isn't pressed.

6. Electrical Issues. Electrical problems within the braking system can also trigger the brake warning light. This might include issues with the vehicle's wiring, a blown fuse, or problems with the brake light bulbs themselves.

7. Brake Fluid Leak. A brake fluid leak is a serious issue that requires immediate attention. Leaks can occur in the brake lines, calipers, or master cylinder. If the brake fluid level drops rapidly and the warning light comes on, it's essential to stop driving and have your vehicle inspected by a professional.

8. Master Cylinder Failure. The master cylinder is a crucial component of your vehicle's braking system, responsible for generating the hydraulic pressure that engages the brakes. If the master cylinder fails or begins to malfunction, it can cause the brake warning light to come on. This is a serious issue that can lead to complete brake failure if not addressed promptly.

👉What to Do When the Brake Warning Light Is On

If you notice the brake warning light on your dashboard, follow these steps:

1. Check the Parking Brake. Ensure the parking brake is fully released. If the light remains on, move on to the next steps.

2. Inspect the Brake Fluid Level. Locate the brake fluid reservoir under the hood and check the fluid level. If it's low, top it up with the recommended type of brake fluid. Be sure to use the correct type, as specified in your vehicle's owner's manual.

3. Listen for Unusual Noises. Pay attention to any unusual noises when applying the brakes, such as squealing or grinding. These noises can indicate worn brake pads or other brake-related issues that need immediate attention.

4. Test the Brake Pedal. Gently press the brake pedal to see how it feels. If the pedal feels soft or spongy, there could be air in the brake lines or a problem with the master cylinder. A firm pedal that gradually sinks to the floor may indicate a brake fluid leak.

5. Drive Cautiously. If the brake warning light is on and you can't identify the issue, it's best to drive cautiously and head to the nearest mechanic or service center. Avoid sudden stops or driving at high speeds until the problem is diagnosed and fixed.

6. Seek Professional Help. If you're unable to determine the cause of the brake warning light or if you suspect a serious issue, it's crucial to seek professional assistance. A qualified mechanic can diagnose the problem and ensure your braking system is functioning properly.

👉Why Brake Lights Stay On

Sometimes, you might notice that your brake lights stay on even when the brake pedal isn't pressed. This can be a confusing and potentially dangerous issue. Here are some common reasons why brake lights stay on:

1. Faulty Brake Light Switch. As mentioned earlier, a faulty brake light switch can cause the brake lights to stay on continuously. This switch is typically located near the brake pedal and activates the brake lights when the pedal is pressed. If the switch is stuck or broken, the brake lights may stay on.

2. Stuck Brake Pedal. If the brake pedal doesn't fully return to its resting position after being pressed, it can cause the brake lights to stay on. This could be due to a mechanical issue or debris obstructing the pedal's movement.

3. Wiring Issues. Electrical problems, such as short circuits or damaged wiring, can cause the brake lights to remain on. This issue might be more challenging to diagnose and often requires professional inspection.

4. Faulty Brake Light Relay. The brake light relay is responsible for controlling the brake lights' electrical circuit. If the relay is malfunctioning, it can cause the brake lights to stay on even when the pedal isn't pressed.

5. Aftermarket Modifications. If your vehicle has been modified with aftermarket parts, such as an upgraded brake light system, these modifications might interfere with the normal operation of the brake lights. Ensure that any aftermarket parts are compatible with your vehicle's electrical system.

👉Brake Light Blinking or Flashing: What Does It Mean?

In some cases, you might notice that your brake light is blinking or flashing instead of staying on steadily. This can be particularly concerning, as it often indicates a more complex issue. Here’s what it could mean:

1. ABS Warning. A blinking brake light can indicate a problem with the ABS. The ABS system is designed to prevent wheel lockup during braking, and a malfunction can cause the brake light to flash. This is a serious issue that can compromise your vehicle's safety, so it's important to address it promptly.

2. Brake System Fault. A flashing brake light might indicate a fault within the braking system. This could be related to low brake fluid, a problem with the brake pads, or an issue with the master cylinder. The flashing light is a warning that something is wrong, and immediate attention is required.

3. Electronic Brake Distribution (EBD) Issue. Some vehicles are equipped with Electronic Brake Distribution (EBD), a system that balances braking force across all wheels. If there's an issue with the EBD, it can cause the brake light to blink. This is another serious problem that should be addressed by a professional mechanic.

4. Intermittent Electrical Problem. If the brake light flashes intermittently, it could be due to an electrical issue, such as a loose connection or a faulty sensor. These problems can be difficult to diagnose and might require a thorough inspection of the vehicle's electrical system.

👉Preventing Brake Warning Light Issues

To avoid the stress and danger associated with the brake warning light coming on, here are some preventive measures you can take:

1. Regular Brake Maintenance. Schedule regular brake inspections and maintenance. This includes checking the brake pads, rotors, and brake fluid levels. Regular maintenance can help identify and address potential issues before they become serious problems.

2. Monitor Brake Fluid Levels. Keep an eye on your brake fluid levels and top them up as needed. If you notice that the brake fluid is consistently low, it could indicate a leak that needs to be addressed.

3. Replace Worn Brake Pads. Don't wait until the brake warning light comes on to replace your brake pads. If you hear squealing or grinding noises when braking, it's time to replace the pads. Keeping your brake pads in good condition will help maintain the overall health of your braking system.

4. Avoid Overloading Your Vehicle. Overloading your vehicle can put extra strain on the braking system, leading to premature wear and tear. Be mindful of your vehicle's weight limits and avoid carrying more than the recommended load.

5. Avoid Overloading Your Vehicle. Overloading your vehicle can put extra strain on the braking system, leading to premature wear and tear. Be mindful of your vehicle's weight limits and avoid carrying more than the recommended load.

💬Final Thoughts

The brake warning light is a critical indicator of your vehicle's braking system's health. Whether the brake warning light is on, blinking, or flashing, it's essential to take it seriously. Understanding the common causes of brake warning light activation, such as low brake fluid, worn brake pads


Want more videos all about auto?
Subscribe to our YouTube channel👉Cartech Home
Textual description of firstImageUrl

Car Making Ticking Noise While Driving

Cartech image

When your car starts making a ticking noise while driving, it can be unsettling. While some ticking noises may be harmless, others could indicate serious issues that require immediate attention. Understanding the potential causes of this noise can help you take appropriate action and prevent further damage. In this article, we will explore the common reasons behind a car making a ticking noise while driving, how to diagnose the problem, and what steps you can take to resolve it.

👉 Common Causes of a Car Making Ticking Noise While Driving

1. Engine Components. The engine is a complex machine with many moving parts, and any one of these components could be responsible for a ticking noise. Common engine-related causes include:

• Low Oil Levels. Oil is essential for lubricating the engine's moving parts. If the oil level is low, parts like the valve lifters or camshaft can start to make a ticking sound due to lack of lubrication.

• Valvetrain Issues. The valvetrain controls the opening and closing of the engine's valves. If there’s excessive clearance in the valvetrain components, such as the rocker arms or pushrods, it can lead to a ticking noise.

• Faulty Fuel Injectors. Fuel injectors deliver fuel into the engine’s cylinders. A ticking noise may occur if an injector is failing or clogged, causing it to operate improperly.

2. Exhaust System. Problems within the exhaust system can also cause ticking noises. Some common exhaust-related issues include:

• Exhaust Leaks. A small crack or hole in the exhaust manifold, gasket, or pipe can produce a ticking sound. This noise is typically more noticeable when the engine is cold and may become quieter as the engine warms up.

• Loose Exhaust Components. Loose heat shields, brackets, or other exhaust system parts can create a ticking noise as they vibrate against the car's body.

3. Engine Timing Components. The timing components of the engine, such as the timing chain or belt, are crucial for synchronizing the movement of the engine's internal parts. A ticking noise could indicate:

• Worn Timing Chain/Belt. Over time, the timing chain or belt can become worn or stretched, causing a ticking noise. If not addressed, this can lead to serious engine damage.

• Faulty Timing Tensioner. The tensioner keeps the timing chain or belt tight. If it fails, the chain or belt can become loose, resulting in a ticking sound.

4. Wheel and Tire Issues. Not all ticking noises come from under the hood. Some may originate from the wheels or tires. For instance:

• Foreign Objects: A small stone or debris caught in the tire tread can create a ticking sound as it makes contact with the road.

• Wheel Bearing Problems: A worn or damaged wheel bearing can cause a rhythmic ticking noise that increases with vehicle speed.

• Loose Lug Nuts: If the lug nuts that secure the wheel to the hub are not tightened properly, they can cause the wheel to wobble slightly and produce a ticking noise.

5. Transmission and Drivetrain. The transmission and drivetrain components are also potential sources of ticking noises:

• Worn CV Joints. Constant velocity (CV) joints are part of the drive axles in front-wheel and all-wheel-drive vehicles. If they wear out, they can cause a ticking noise, especially during turns.

• Transmission Issues. A ticking noise could indicate low transmission fluid, worn gears, or other transmission problems that require attention.

6. Brake System. The braking system is another area where ticking noises can originate:

• Worn Brake Pads: As brake pads wear down, the metal wear indicators may start to make a ticking or squealing noise when the brakes are applied.

• Loose Brake Components: Loose or misaligned brake parts, such as calipers or rotor shields, can cause ticking sounds, particularly when braking.

👉 Diagnosing the Problem

When you hear a ticking noise while driving, it’s essential to identify the source as quickly as possible. Here are some steps you can take to diagnose the issue:

1. Listen Carefully. Pay attention to when the ticking noise occurs. Does it happen when the engine is cold, during acceleration, or when turning? The timing of the noise can give you clues about its source.

2. Inspect the Oil Level. Check the engine oil level and condition. If it’s low or dirty, consider an oil change or topping up the oil. Low oil can cause engine components to make a ticking noise.

3. Examine the Tires and Wheels. Check for any foreign objects lodged in the tire treads. Also, inspect the lug nuts to ensure they are tight.

4. Check the Exhaust System. Look for any visible damage or loose components in the exhaust system. You may need to have the car lifted to inspect the exhaust manifold and pipes properly.

5. Consult a Mechanic. If you’re unable to diagnose the problem or if the noise persists, it’s best to consult a professional mechanic. They can perform a more thorough inspection and identify the exact cause of the ticking noise.

👉 Potential Solutions for a Car Making Ticking Noise While Driving

Once you’ve identified the cause of the ticking noise, the next step is to address the problem. Here are some possible solutions based on the common causes mentioned earlier:

1. Engine Issues

• Low Oil Levels: Simply adding more oil or getting an oil change can resolve ticking noises caused by low oil. Make sure to use the correct type and grade of oil for your vehicle.

• Valvetrain Repairs: If the ticking noise is due to valvetrain issues, such as worn rocker arms or lifters, these parts may need to be adjusted or replaced.

• Fuel Injector Service: A professional fuel system cleaning or replacing a faulty injector can fix ticking noises caused by injector problems.

2. Exhaust System Repairs

• Fixing Exhaust Leaks. Repairing or replacing damaged exhaust components, such as the manifold or gaskets, can eliminate the ticking noise.

• Tightening Loose Components. Securing any loose exhaust parts can stop them from vibrating and making noise.

3. Timing Component Replacement

• Replacing the Timing Chain/Belt: If the timing chain or belt is worn, it should be replaced to prevent engine damage and eliminate the ticking noise.

• Tensioner Replacement: Replacing a faulty tensioner can restore proper tension to the timing chain or belt and stop the noise.

4. Wheel and Tire Maintenance

• Removing Debris: Removing any foreign objects from the tire tread will stop the ticking noise.

• Wheel Bearing Replacement: If a wheel bearing is worn, replacing it can eliminate the noise and prevent further damage to the wheel assembly.

• Tightening Lug Nuts: Ensuring that all lug nuts are properly tightened will stop any ticking noises caused by loose wheels.

5. Transmission and Drivetrain Repairs

• CV Joint Replacement. Replacing worn CV joints will stop the ticking noise during turns and improve the vehicle's handling.

• Transmission Service. If the transmission is the source of the ticking noise, a fluid change, or more extensive repairs may be necessary.

Brake System Repairs

• Replacing Brake Pads. If the ticking noise is due to worn brake pads, replacing them can restore proper braking performance and stop the noise.

• Securing Loose Components. Tightening or realigning loose brake parts will prevent them from making noise during braking.

💬 Final Thoughts

A car making a ticking noise while driving is not something you should ignore. While some causes are minor and easy to fix, others may indicate more serious issues that could lead to costly repairs if left unaddressed. By understanding the common causes of ticking noises and taking prompt action, you can keep your vehicle running smoothly and avoid potential breakdowns. If you're unsure of the cause or unable to fix the problem yourself, don't hesitate to seek professional help from a qualified mechanic.


Want more videos all about auto?
Subscribe to our YouTube channel👉Cartech Home
Textual description of firstImageUrl

Tire Pressure Sensor Light Flashing : Causes and Solutions

All about auto image

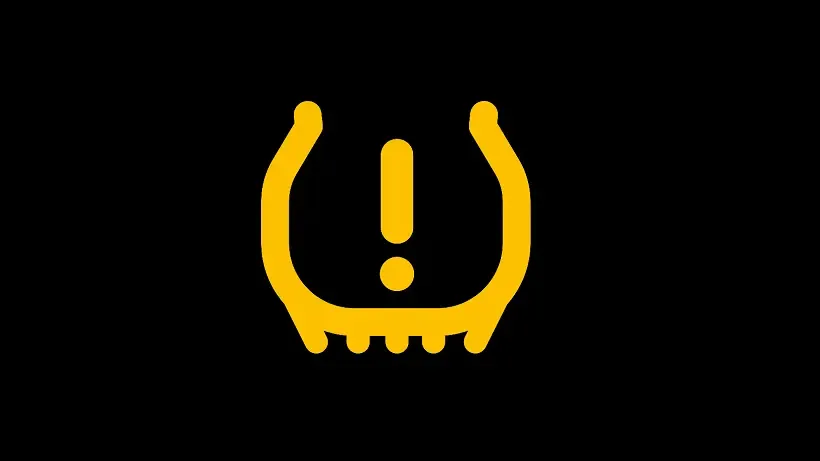
The tire pressure sensor light flashing on your dashboard is an indicator that often leaves drivers concerned. This small icon, resembling a horseshoe with an exclamation point, plays a critical role in vehicle safety. When it begins to flash, it signals that there might be an issue with your tire pressure monitoring system (TPMS). If you’ve ever wondered what this warning light means, why it flashes, and what you should do about it, this comprehensive guide is for you. We'll delve into everything from the basics of the tire pressure sensor system to troubleshooting tips and preventive measures.

What is the Tire Pressure Monitoring System (TPMS)?

Before diving into the specifics of the tire pressure sensor light flashing, it’s essential to understand the system behind it. The Tire Pressure Monitoring System (TPMS) is an electronic system designed to monitor the air pressure inside the tires of a vehicle. It provides real-time tire pressure information to the driver, usually through a gauge, a digital display, or a warning light.

There are two main types of TPMS:

Direct TPMS: This system uses sensors mounted inside the tires to directly measure the air pressure. These sensors then transmit the data to the vehicle's computer system.

Indirect TPMS: This system doesn't measure air pressure directly. Instead, it uses wheel speed sensors to detect differences in rotational speeds of the tires, which can indicate a tire is underinflated.

The TPMS helps prevent accidents caused by underinflated tires, which can lead to blowouts, poor handling, and increased braking distances.

Why is My Tire Pressure Sensor Light Flashing?

When the tire pressure sensor light is flashing, it typically indicates a malfunction within the TPMS. However, it can also signify other issues. Here’s a breakdown of the most common reasons why your tire pressure sensor light might be flashing:

1. Low Tire Pressure

The most straightforward reason for a tire pressure sensor light flashing is low tire pressure. This usually happens when one or more tires drop below the recommended pressure level. This can be due to:

Temperature Changes: Tire pressure can drop in colder weather as the air inside the tire contracts.

Small Leaks: Over time, tires naturally lose air, especially if there's a small puncture or if the valve stem is not sealed correctly.

Improper Inflation: If your tires were not inflated to the correct pressure, the light may flash as the pressure drops.

2. Faulty TPMS Sensor

Another common cause of a tire pressure sensor light flashing is a faulty sensor. Over time, these sensors can wear out or get damaged, leading to incorrect readings or communication errors with the vehicle's computer. This can happen due to:

• Battery Life: TPMS sensors are battery-powered, and their batteries typically last about 5-10 years. When the battery dies, the sensor stops working, and the light may start flashing.

• Physical Damage: Sensors can be damaged by rough road conditions, corrosion, or improper tire changes.

3. Interference or Signal Issues

The TPMS relies on wireless signals to communicate with the vehicle’s computer. If there’s interference or a problem with these signals, the tire pressure sensor light flashing could be the result. Potential causes include:

• Electromagnetic Interference: Strong electromagnetic fields from other electronic devices or power lines can disrupt the signal between the TPMS sensors and the vehicle’s computer.

• Signal Blockage: Metal objects or even certain types of tire sealants can block the sensor signals, leading to a flashing warning light.

4. Incorrect TPMS Calibration

After tire rotations, changes, or replacements, the TPMS needs to be recalibrated. If this step is skipped or done incorrectly, the system might malfunction, resulting in a tire pressure sensor light flashing. This is especially common when:

• New Tires are Installed: The sensors might need to be reset to recognize the new tires correctly.

• Tire Rotations: The system may need to be recalibrated after rotating the tires to ensure it correctly identifies each tire's position.

5. Software Glitches or Errors

Like any electronic system, the TPMS can be prone to software glitches. These glitches can cause the tire pressure sensor light flashing issue even if there’s nothing wrong with the tires. Software-related issues might arise from:

• Updates or Reprogramming: If the vehicle’s software is updated or reprogrammed, it could affect the TPMS settings.

•System Malfunction: An internal error within the TPMS could cause the light to flash.

What Should You Do When the Tire Pressure Sensor Light is Flashing?

If you notice the tire pressure sensor light flashing on your dashboard, it’s essential to take appropriate action to ensure your safety and the proper functioning of your vehicle. Here’s what you should do:

1. Check Tire Pressure

The first step is to manually check the air pressure in all your tires, including the spare if your vehicle has one. You can do this using a tire pressure gauge, which is an inexpensive tool available at most automotive stores. Compare the readings to the manufacturer’s recommended tire pressure, which is usually found in the owner’s manual or on a sticker inside the driver’s side door.

If any tire is underinflated, inflate it to the recommended pressure. If the light stops flashing after this, it was likely a simple low-pressure issue.

2. Inspect for Tire Damage

While checking the tire pressure, inspect each tire for visible signs of damage, such as:

• Punctures or Cuts: Small nails, screws, or sharp objects can puncture the tire, causing slow leaks.

• Cracks or Bulges: These could indicate structural damage to the tire, which might not be repairable. If you find any damage, it’s crucial to have the tire repaired or replaced by a professional.

3. Reset the TPMS

If the tire pressure sensor light flashing persists after correcting the tire pressure, you may need to reset the TPMS. The process for resetting the TPMS can vary depending on the vehicle make and model. Generally, you can reset the system by:

•Consulting the Owner’s Manual: The manual usually provides specific instructions for your vehicle.

•Using a TPMS Reset Tool: Some vehicles require a special tool to reset the TPMS. These tools are available at auto parts stores or can be used by a professional mechanic.

•Driving for a Short Distance: In some cases, driving the vehicle for a short distance at a steady speed can reset the TPMS automatically.

4. Visit a Professional Mechanic

If the tire pressure sensor light flashing continues despite your efforts, it’s time to visit a professional mechanic. They can:

• Diagnose Sensor Issues: A mechanic can use specialized diagnostic tools to check if any of the TPMS sensors are faulty or if there’s a problem with the system’s wiring or computer.

• Replace Faulty Sensors: If a sensor is determined to be faulty, the mechanic can replace it and ensure it’s correctly programmed.

• Update or Reprogram the System: If the issue is software-related, the mechanic can update or reprogram the TPMS to resolve the flashing light.

Preventing Future Tire Pressure Sensor Light Issues

To avoid the tire pressure sensor light flashing in the future, it’s essential to maintain your tires and TPMS. Here are some preventive measures you can take:

1. Regular Tire Maintenance. Regularly check your tire pressure at least once a month and before long trips. Keeping your tires inflated to the correct pressure not only prevents the TPMS light from flashing but also:

• Improves Fuel Efficiency: Properly inflated tires reduce rolling resistance, which can improve your vehicle’s fuel economy.

• Extends Tire Life: Correct tire pressure reduces uneven wear, helping your tires last longer.

• Enhances Safety: Well-maintained tires provide better handling and braking performance.

2. Routine TPMS Checkups. During regular vehicle maintenance, ask your mechanic to check the TPMS. They can:

Test Sensor Batteries: Since TPMS sensors have batteries that can wear out, it’s good practice to have them tested regularly. Inspect for Sensor Damage: Mechanics can check the sensors for signs of physical damage, corrosion, or other issues that could lead to malfunctions.

3. Be Cautious with Tire Sealants. While tire sealants can be a quick fix for small punctures, they can sometimes interfere with the TPMS sensors. If you use a sealant, make sure it’s TPMS-safe. If in doubt, have the tire professionally repaired instead.

4. Follow Proper Tire Rotation and Replacement Procedures. When rotating or replacing tires, ensure the TPMS is correctly reset or recalibrated. If you’re unsure how to do this, ask your mechanic to handle it.

5. Update Vehicle Software. If your vehicle manufacturer releases software updates for the TPMS or other related systems, make sure to have them installed. These updates can fix bugs and improve the system’s performance.

Final Thoughts

The tire pressure sensor light flashing on your dashboard should not be ignored. It serves as a critical warning system designed to keep you safe on the road. Understanding why the light might flash, knowing how to address it, and taking steps to prevent it from happening again are essential aspects of vehicle maintenance.

By keeping your tires properly inflated, regularly checking the TPMS, and seeking professional help when necessary, you can ensure that your vehicle remains in optimal condition. Not only will this help prevent unexpected tire-related issues, but it will also contribute to a smoother, safer driving experience. Remember, when it comes to tire pressure and safety, staying proactive is always the best approach.


Want more videos all about auto?
Subscribe to our YouTube channel ðŸ‘‰Cartech Home