Cartech - All About Auto

Textual description of firstImageUrl

Why Your Car Won't Start After Replacing Battery: Causes & Fixes

cartech image

It's a frustrating experience when you've just replaced your car's battery only to find that your car still won't start. Many car owners assume that a new battery will instantly solve their starting issues, but sometimes, there are other underlying problems that prevent the engine from firing up. This article will explore the potential reasons why your car won't start after replacing the battery, along with practical solutions. By understanding these issues, you can take the right steps to get your car back on the road as soon as possible.

When a car won’t start after replacing the battery, it's essential to understand that several components in the car’s electrical and ignition system work together to get the engine going. A new battery might provide the necessary power, but if other components are faulty, your car may still fail to start.

Replacing a battery can occasionally result in issues such as loose connections, misplaced wires, or even tripped safety features. In this article, we’ll go through the various reasons that could cause your car to not start, even with a brand-new battery, and provide insights into how you can resolve these issues.

Common Reasons for Car Not Starting After Battery Replacement

Let's explore some of the most common reasons that could cause your car to refuse to start, even after you've replaced the battery:
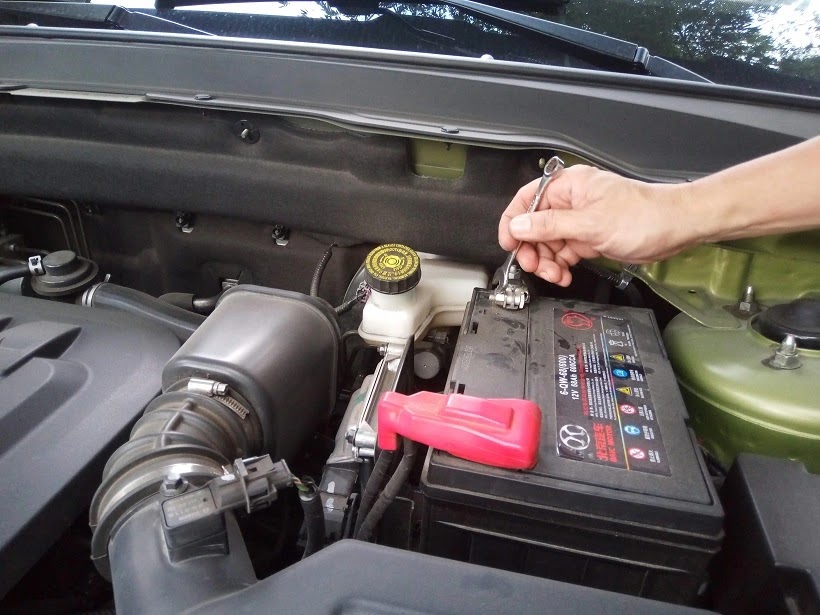
Faulty Battery Connections

The most common issue is a simple one: loose or improper battery connections. If the battery terminals aren't properly connected, the power can't flow to the engine's electrical system.

• Loose Terminals: After replacing a battery, you need to ensure the terminals are tight and secure.

• Dirty Terminals: Even with a new battery, dirt, and corrosion on the terminals can prevent a proper connection.

Blown Fuses or Relays

Blown fuses and relays are another potential culprit. These components are responsible for transmitting electrical power to various parts of your car, including the ignition system.

• Main Fuse: A blown main fuse can cut off the power supply to the starter.

• Starter Relay: This relay sends power to the starter motor; if it's blown, your car won’t start.

Ignition Switch Issues

The ignition switch activates your car’s electrical system and, in turn, the engine. If the ignition switch is faulty, it may not engage the system properly, leaving you with a car that won't start.

• Worn Contacts: The switch contacts may wear out over time, making it difficult to start the car.

• Electrical Issues: The ignition switch wiring can become damaged, preventing it from sending the proper signal.

Bad Starter Motor

The starter motor is a key component in the ignition process. If it's not functioning correctly, your car won’t start, no matter how powerful the battery is.

• Worn Out Starter: Over time, the starter can wear out, leading to failure.

• Starter Solenoid Issues: The solenoid is responsible for engaging the starter; if it's faulty, your car may not start.

Malfunctioning Alternator

The alternator is responsible for charging the battery while the car is running. If it’s malfunctioning or the alternator is bad, the battery may not hold a charge, even if it’s new.

• Charging Issues: A malfunctioning alternator won't charge the battery, leading to a dead battery even after replacement.

• Voltage Regulation Problems: The alternator regulates the voltage going to the battery; if this fails, it may cause electrical issues.

Anti-Theft System Activation

Many modern vehicles come with anti-theft systems that can prevent the car from starting if triggered. Replacing the battery may reset or engage these systems unintentionally.

• Key Fob Issues: Some anti-theft systems rely on a signal from the key fob; if it's out of sync, the car won't start.

• System Reset: Some vehicles require a reset after battery replacement to disable the anti-theft mode.

Corroded or Damaged Wires

Over time, the wires connecting various components in your car can become corroded or damaged. This can prevent the necessary current from reaching the starter or ignition system.

• Battery Cables: If the cables are corroded, they may prevent proper power flow.

• Wiring Harness: Wires leading to the starter or ignition may be damaged, interrupting the current flow.

Faulty Neutral Safety Switch

For automatic cars, the neutral safety switch prevents the car from starting in any gear other than park or neutral. If this switch is faulty, the car won't recognize that it's safe to start.

Computer or ECU Issues

Modern vehicles rely on a computer, or ECU (Engine Control Unit), to manage engine functions. If there's a software issue or the ECU needs to be reset, it can prevent your car from starting.

Troubleshooting Steps for When Your Car Won’t Start

If your car won't start after replacing the battery, here are some practical steps you can take to identify and possibly resolve the problem:

Step 1: Check Battery Connections. Start by ensuring that the battery terminals are securely connected and free of corrosion. Clean them if necessary.

Step 2: Inspect Fuses and Relays. Check the fuses and relays related to the starter and ignition system. Replace any that are blown.

Step 3: Test the Starter Motor. If you hear a clicking noise when you turn the key, it might be the starter motor. Testing or replacing the starter may be necessary if it’s not working correctly.

Step 4: Examine the Ignition Switch. Turn the key to the ON position and see if the dashboard lights up. If it doesn’t, you may need to replace the ignition switch.

Step 5: Check for Anti-Theft Activation. If you suspect the anti-theft system is the issue, try using the key fob to lock and unlock the car, which may reset the system.

Step 6: Inspect Wiring and Battery Cables. Look for visible signs of wear or corrosion on the battery cables and wires. Replace or repair any damaged components.

Step 7: Test the Alternator. Use a multimeter to check the voltage output of the alternator. If it’s not within the manufacturer’s recommended range, you may need to replace it.

Step 8: Check the Neutral Safety Switch. Try shifting the car into neutral and then starting it. If this works, the neutral safety switch may need to be replaced.

Step 9: Reset the ECU. Sometimes, disconnecting and reconnecting the battery can reset the car's ECU, which may resolve any software issues. Leave the battery disconnected for about 15 minutes before reconnecting it.

Preventative Measures for Battery and Starting Issues

• Regular Battery Maintenance: Clean the battery terminals periodically to prevent corrosion.

• Monitor Battery Health: Use a multimeter to check your battery’s charge level every few months.

• Drive Regularly: Driving your car regularly helps maintain the charge and prevent the battery from dying.

• Check Electrical Components: Regularly inspect wiring, fuses, and relays, especially if you live in an area with extreme weather.

• Test the Alternator: Have your alternator checked during routine maintenance to ensure it’s functioning correctly.

When to Seek Professional Help

If you’ve gone through the troubleshooting steps and your car still won’t start, it may be time to consult a professional mechanic. Some issues, like a faulty alternator or ignition switch, require specialized tools and expertise to diagnose and repair. A professional can also perform a more thorough inspection and use advanced diagnostic equipment to pinpoint the exact issue.

Final Thoughts

A car that won’t start after replacing the battery can be a frustrating experience. However, by understanding the potential causes and following the troubleshooting steps outlined in this guide, you can often resolve the issue yourself. Remember, regular maintenance and periodic checks on your car’s electrical system can help prevent many starting issues. If the problem persists, don't hesitate to seek professional help to ensure a proper diagnosis and timely repair.


Want more videos all about auto?
Subscribe to our YouTube channel👉Cartech Home
Textual description of firstImageUrl

Transmission Jump Out of 2nd Gear: Causes, Symptoms, and Fixes

Cartech image

If you're driving a vehicle with a manual transmission and suddenly notice that it jumps out of 2nd gear, you're likely dealing with a frustrating and potentially unsafe situation. A vehicle jumping out of gear can lead to driving issues, compromised vehicle performance, and even damage to the transmission over time. Understanding why your transmission jumps out of 2nd gear, the symptoms associated with this issue, and how to fix it can help you maintain a safer, more reliable driving experience.

In this article, we'll explore the reasons behind transmission jump out of 2nd gear, the common signs that indicate you're facing this issue, and the various solutions available to fix it. Whether you're a seasoned car enthusiast or just an everyday driver, this guide will break everything down in a way that's easy to understand.

What Does It Mean When a Transmission Jumps Out of Gear?

A transmission jump out of 2nd gear occurs when your vehicle's manual transmission disengages from the selected gear, causing it to return to neutral without any input from the driver. This issue can happen suddenly, often during acceleration, and can make it difficult to maintain smooth control over your vehicle.

When a transmission jumps out of 2nd gear, it can occur at any speed, but it’s most commonly experienced when shifting between gears, especially in lower gears like 1st, 2nd, or 3rd. This problem may not only affect gear selection but could also lead to transmission wear or other mechanical issues if left unresolved.

Symptoms of Transmission Jumping Out of 2nd Gear

To identify whether your vehicle's transmission is jumping out of 2nd gear, watch for the following signs:

1. Sudden Neutral Position: When driving in 2nd gear, you might notice that your gearstick suddenly slips back into neutral, often accompanied by a jerking motion. This loss of gear engagement can be abrupt and may catch you off guard.

2. Difficulty in Engaging 2nd Gear: You may find it challenging to shift into 2nd gear properly. The gear may feel resistant or not fully engage, causing it to slip back to neutral after a short period of driving.

3. Grinding Noise: A grinding noise when attempting to shift into or hold 2nd gear could indicate that the transmission is having trouble maintaining a steady position. This sound is typically a sign of worn-out components inside the transmission.

4. Shifter Vibration: Excessive vibration or movement in the gearstick while you're in 2nd gear may suggest that the gear is not fully engaged, increasing the likelihood of it jumping out.

5. Reduced Vehicle Performance: If your vehicle consistently jumps out of 2nd gear, you'll notice decreased overall performance, especially when accelerating or driving in lower gears.

Common Causes of Transmission Jumping Out of 2nd Gear

Several factors can contribute to a manual transmission jumping out of 2nd gear. Below are some of the most common causes:

1. Worn Synchros

Synchros (or synchronizers) are essential components inside the transmission that help match the speed of the gears to make shifting smoother. If the synchro for 2nd gear is worn or damaged, it may not allow the gear to engage properly, leading to the transmission jumping out of 2nd gear.

2. Worn or Damaged Gear Teeth

Over time, the teeth on the gears inside the transmission can wear down or become damaged due to wear and tear, poor lubrication, or improper shifting techniques. If the teeth on 2nd gear are worn out, the gear may not stay engaged, causing it to slip back into neutral.

3. Loose or Misaligned Shift Linkage

The shift linkage is responsible for connecting the gearstick to the transmission. If the shift linkage is loose, misaligned, or worn out, it may prevent the transmission from fully engaging in 2nd gear, leading to it slipping out.

4. Faulty Shift Fork

The shift fork is another important component inside the transmission that helps move the gears into place. A bent, worn, or damaged shift fork can prevent the proper engagement of 2nd gear, causing the transmission to jump out.

5. Weak Detent Springs

Detent springs are responsible for holding the transmission in place once a gear is selected. If the detent springs for 2nd gear are weak or broken, they may not provide enough force to keep the gear engaged, leading to the transmission slipping back to neutral.

6. Excessive Wear on Bearings or Shafts

Bearings and shafts inside the transmission are subject to wear over time, particularly in high-mileage vehicles. If the bearings or shafts that support 2nd gear are worn out, it can lead to improper alignment and cause the transmission to jump out of gear.

7. Improper Shifting Technique

Drivers who frequently "ride" the clutch or shift gears without fully depressing the clutch pedal can put undue stress on the transmission. Over time, improper shifting can wear out internal components, causing the transmission to jump out of 2nd gear.

8. Transmission Fluid Issues

Transmission fluid plays a critical role in keeping the gears lubricated and reducing wear. Low fluid levels or using the wrong type of transmission fluid can lead to increased friction and damage to the gears, causing issues with gear engagement.

How to Diagnose Transmission Jumping Out of 2nd Gear

Diagnosing why your transmission is jumping out of 2nd gear requires a systematic approach. Below are the steps that a mechanic would typically follow to identify the root cause:

1. Visual Inspection of Linkage and Shift Fork

The first step in diagnosing this issue is to visually inspect the shift linkage and shift fork. A mechanic will check for loose, bent, or misaligned parts that may prevent the transmission from engaging properly.

2. Check Transmission Fluid

Low or dirty transmission fluid can contribute to gear engagement issues. A mechanic will check the fluid level and condition, making sure that it's at the correct level and that the fluid is not contaminated.

3. Inspect Synchros and Gear Teeth

If the fluid and linkage are in good condition, the mechanic may need to disassemble the transmission to inspect the internal components, such as the synchros and gear teeth, for signs of wear or damage.

4. Test Detent Springs

The detent springs play a crucial role in holding the gears in place. A mechanic may check the tension and condition of the detent springs to see if they are providing enough force to keep 2nd gear engaged.

5. Road Test

To get a better sense of how the transmission behaves, a mechanic may take the vehicle for a road test. This allows them to observe the issue in real-world driving conditions, which can provide important clues about the cause of the problem.

How to Fix Transmission Jumping Out of 2nd Gear

Once you've identified the cause of the problem, it's time to consider the appropriate fix. Below are some common solutions for fixing a transmission that jumps out of 2nd gear:

1. Replace Worn Synchros

If worn-out synchros are causing your transmission to jump out of 2nd gear, replacing them is often the most effective solution. This will ensure smoother shifting and better gear engagement.

2. Repair or Replace Gear Teeth

Damaged or worn gear teeth may need to be repaired or replaced. This involves disassembling the transmission to access the affected gears and replacing the damaged components.

3. Adjust or Replace Shift Linkage

If the issue is related to loose or misaligned shift linkage, adjusting or replacing the linkage may solve the problem. This is a relatively simple fix that can improve gear engagement.

4. Replace Shift Fork

If the shift fork is bent or damaged, replacing it can help restore proper gear engagement and prevent the transmission from jumping out of 2nd gear.

5. Replace Detent Springs

If weak detent springs are the cause of the problem, replacing them can provide the necessary force to keep 2nd gear engaged.

6. Rebuild or Replace Transmission

In severe cases where multiple components inside the transmission are damaged or worn out, a full transmission rebuild or replacement may be required. While this is a more costly repair, it may be necessary to restore reliable gear operation.

Preventing Transmission from Jumping Out of Gear

To prevent your vehicle's transmission from jumping out of gear in the future, follow these tips:

• Proper Shifting Technique: Always fully depress the clutch when shifting gears and avoid "riding" the clutch. This will reduce wear on the transmission components.

• Regular Maintenance: Keep up with regular transmission maintenance, including fluid changes and inspections, to ensure the internal components are properly lubricated and functioning correctly.

• Monitor Transmission Fluid Levels: Make sure your transmission fluid is always at the correct level and in good condition. Low or dirty fluid can lead to premature wear on the transmission.

• Address Issues Early: If you notice any symptoms of transmission problems, such as grinding or difficulty engaging gears, have your vehicle inspected by a mechanic right away. Early intervention can prevent more serious issues down the road.

Conclusion

A transmission that jumps out of 2nd gear can be an inconvenient and potentially dangerous problem. By understanding the symptoms and causes of this issue, you can take the necessary steps to diagnose and fix it before it leads to more significant damage. Whether it's a worn synchro, a damaged gear, or a misaligned shift linkage, addressing the problem early will help maintain your vehicle's performance and reliability.

If you're experiencing transmission jump out of 2nd gear, it's essential to have your vehicle inspected by a qualified mechanic. With the right diagnosis and repairs

Textual description of firstImageUrl

Car Battery Draining Fast: Top Causes and Prevention Tips

cartech image

When your car battery starts draining fast, it can leave you stranded unexpectedly. Dealing with a drained battery can be inconvenient, but understanding the potential causes and solutions can help you prevent this issue. This article covers the common reasons for a car battery draining fast, tips for diagnosing the problem, and effective ways to avoid a drained battery in the future.

Introduction to Car Battery Draining Fast

A car battery is designed to last for several years under normal conditions, but sometimes it starts draining faster than usual. A rapidly draining battery can indicate various issues, from faulty components to human error. When your car battery keeps draining, you may experience difficulties starting the vehicle, dim lights, or even complete power loss.

Understanding the main reasons for fast battery drainage will enable you to take the necessary steps to maintain your vehicle and extend the life of your battery.

Common Causes of a Fast-Draining Car Battery

1. Parasitic Drain. A parasitic drain occurs when your car’s electrical components continue to draw power even after the vehicle is turned off. Some components, such as the clock and security system, constantly use small amounts of power. However, other components or systems may be using too much power, causing the battery to drain faster than normal.

Common causes of parasitic drain include:

• Faulty alternator diodes
• Malfunctioning electrical relays
• Defective electrical components, such as interior lights, glove box lights, or trunk lights

2. Human Error. Human error is one of the most frequent causes of battery drainage. Forgetting to turn off headlights, interior lights, or even leaving the radio on can drain your car battery overnight. Many modern vehicles have systems to alert you if you've left something on, but older models might not.

3. Faulty Alternator. The alternator charges your battery while the engine is running. If your alternator is faulty, it may not fully charge the battery, leaving it undercharged. An alternator with bad diodes can also cause a parasitic drain, slowly draining your battery even when the car is off.

4. Extreme Weather Conditions. Both extremely hot and extremely cold temperatures can drain a car battery faster than usual. Cold weather slows down the chemical reaction inside the battery, which reduces its ability to hold a charge. Hot weather can cause the battery fluid to evaporate, damaging the internal components and leading to faster drainage.

5. Old or Worn-Out Battery. A car battery generally lasts between 3-5 years. Over time, batteries lose their ability to hold a charge effectively. If your battery is old or worn out, it may be draining fast simply because it can no longer hold a full charge.

6. Frequent Short Trips. Frequent short trips can prevent your car's battery from getting fully charged. The alternator may not have enough time to recharge the battery, leading to gradual drainage over time.

7. Corroded or Loose Battery Connections. Corroded or loose battery terminals can cause charging issues. If the battery cables are not firmly connected, or if they are corroded, the alternator may not effectively recharge the battery, causing it to drain faster.

How to Diagnose a Fast-Draining Car Battery

Diagnosing a fast-draining car battery can help you determine the root cause and address the problem efficiently. Here are a few steps to identify the issue:

1. Visual Inspection. Start by visually inspecting the battery for any signs of corrosion, damage, or leakage. Check the terminals for a white or bluish residue, which can indicate corrosion. Clean any corrosion using a wire brush and a solution of baking soda and water.

2. Check for Parasitic Drain. To check for a parasitic drain, follow these steps:

1. Turn off all car components and ensure that the ignition is off.
2. Disconnect the negative battery terminal.
3. Set a multimeter to the “amperage” setting and connect one lead to the negative terminal and the other lead to the battery cable.
4. If the reading is above 50 milliamps, there may be a parasitic drain.

3. Test the Alternator. If the alternator is not working properly, the battery may not charge efficiently. Use a multimeter to test the alternator's voltage output. With the engine running, measure the voltage at the battery terminals. A properly functioning alternator should produce around 13.5 to 14.5 volts. If the reading is below this range, the alternator may need repair or replacement.

4. Battery Load Test. A load test measures the battery's ability to hold a charge under load. You can perform a load test using a multimeter or take the battery to a professional for testing. A healthy battery should maintain a steady voltage while under load.

Preventing Car Battery Drain

To prevent your car battery from draining quickly, consider the following maintenance tips:

1. Turn Off Electrical Components. Always ensure that you turn off headlights, interior lights, and other electrical components when you leave your car. Many modern vehicles have reminders or automatic shut-off features, but it's a good habit to check manually.

2. Limit Short Trips. If possible, try to limit short trips. Give your car enough time to recharge the battery, especially if you drive less than a few miles per trip. Taking longer trips will allow the alternator to charge the battery fully.

3. Clean the Battery Terminals. Corrosion can reduce your battery's ability to hold a charge. Regularly inspect and clean the battery terminals to ensure a good connection. Use a wire brush and a mixture of baking soda and water to clean any corrosion.

4. Monitor Battery Health. Most auto parts stores offer free battery testing services. Regular testing can help you keep track of your battery's condition and let you know when it's time for a replacement.

5. Use a Battery Maintainer. If you don’t use your vehicle often or store it for extended periods, a battery maintainer can help prevent battery drainage. Battery maintainers keep the battery at an optimal charge, avoiding issues related to long-term storage.

6. Replace Faulty Components Promptly. If you suspect an issue with the alternator, lights, or other electrical components, address it immediately. Replacing faulty components can prevent further drainage and extend the lifespan of your battery.

When to Replace Your Car Battery

Even with proper maintenance, all batteries eventually wear out. Knowing when to replace your car battery can save you from unexpected breakdowns. Consider replacing your battery if you notice any of the following signs:

• Frequent Jump Starts: If you need to jump-start your car often, it's likely time for a new battery.
• Age of the Battery: Batteries older than 3-5 years may struggle to hold a charge.
• Slow Engine Crank: If the engine cranks slowly or struggles to start, the battery may be weak.
• Battery Warning Light: Many vehicles have a dashboard light that illuminates when there's an issue with the battery or charging system.

Final Thoughts

A fast-draining car battery is a common issue that can have several causes. From parasitic drains to human error, understanding the underlying reasons can help you diagnose and resolve the problem effectively. Regular maintenance, such as cleaning the battery terminals, turning off electrical components, and testing the battery’s health, can prevent rapid drainage and extend your battery’s life.

If your car battery keeps draining fast despite following these tips, it may be time to replace it or consult a professional mechanic for further diagnosis. By taking proactive steps, you can ensure that your battery remains in good condition and provides reliable power when you need it most.


Want more videos all about auto?
Subscribe to our YouTube channel👉Cartech Home
Textual description of firstImageUrl

Steering Wheel Shaking While Driving: Causes and Solutions

Steering wheel shaking while driving can be a disconcerting and potentially dangerous experience for any driver. When the steering wheel starts vibrating or shaking, it’s a sign that something in your vehicle’s system is off balance or worn out. Understanding the causes behind this issue and knowing how to address it can help you avoid serious problems down the road. In this comprehensive guide, we will explore the various reasons behind steering wheel shaking while driving, discuss the solutions for each cause, and provide helpful preventive tips to maintain the smooth operation of your car.

Common Causes of Steering Wheel Shaking While Driving

Several factors can cause the steering wheel to shake or vibrate while driving, each linked to different parts of the vehicle’s mechanics. Below are the most common causes:

1. Unbalanced Tires

One of the primary reasons for steering wheel shaking while driving is unbalanced tires. When tires are not balanced properly, they can cause uneven rotation, leading to vibrations that are transmitted to the steering wheel. This is most noticeable at certain speeds, typically between 50 to 70 miles per hour.

Symptoms of Unbalanced Tires:

• Steering wheel shakes at high speeds.
• Vibration comes and goes depending on the speed.
• Uneven tire wear.

Solution:

Visit a mechanic or tire specialist to have your tires balanced. This procedure involves adding small weights to the wheel to evenly distribute the weight around the tire.

2. Misaligned Wheels

Wheel alignment refers to the angle and direction your tires are set in, relative to the road and each other. When the wheels are misaligned, it can cause uneven tire wear and make the steering wheel shake, especially when you’re driving at higher speeds.

Symptoms of Misaligned Wheels:

• The vehicle pulls to one side while driving.
• Uneven tire wear.
• Steering wheel shaking or vibration.

Solution:

Get a wheel alignment service from a professional. This will adjust the angles of the tires to meet the manufacturer's specifications, ensuring they meet the road evenly.

3. Worn Brake Rotors

Worn or warped brake rotors can cause the steering wheel to shake when you apply the brakes. Brake rotors are essential components of your car’s braking system. Over time, the surface of the rotors can become uneven due to heat and wear, leading to vibrations during braking.

Symptoms of Worn Brake Rotors:

• Steering wheel shakes when you apply the brakes.
• Pulsating or jerking sensation when braking.
• Squealing or grinding noises when braking.

Solution:

Have the brake rotors inspected and, if necessary, replaced or resurfaced by a qualified mechanic. This will restore smooth braking and eliminate the shaking.

4. Worn Suspension Components

Your vehicle’s suspension system helps provide a smooth ride by absorbing shocks and maintaining tire contact with the road. If parts of the suspension, such as ball joints, tie rods, or control arms, are worn or damaged, they can cause the steering wheel to shake, especially over bumps or uneven terrain.

Symptoms of Worn Suspension Components:

• Steering wheel shakes when driving over bumps.
• The vehicle feels loose or unstable when turning.
• Clunking or rattling noises from the suspension area.

Solution:

Have a professional inspect the suspension system and replace any worn components, such as ball joints, tie rods, or control arms, to ensure proper handling and steering stability.

5. Tire or Wheel Damage

Damaged tires or wheels can also lead to steering wheel shaking while driving. A bent or damaged wheel can cause imbalance, leading to vibrations in the steering wheel. Similarly, a tire with a bulge, flat spot, or other damage can cause uneven tire rotation, resulting in vibrations.

Symptoms of Tire or Wheel Damage:

• Visible damage to the tire or wheel (e.g., bulges, dents, cracks).
• Steering wheel shakes at certain speeds.
• Vehicle pulls to one side.

Solution:

Inspect the tires and wheels for any visible damage. If a tire is damaged, replace it immediately. If a wheel is bent or damaged, have it repaired or replaced by a professional.

6. Worn Wheel Bearings

Wheel bearings allow your car's wheels to rotate smoothly. If these bearings wear out or become damaged, they can create friction, leading to vibrations that you’ll feel through the steering wheel. Typically, this occurs while turning or driving at high speeds.

Symptoms of Worn Wheel Bearings:

• Steering wheel shakes, especially when turning.
• Growling or grinding noise from the wheel area.
• The vehicle feels unstable at high speeds.

Solution:

Have a mechanic inspect and, if needed, replace the worn wheel bearings. Replacing wheel bearings ensures smooth wheel rotation and eliminates steering wheel vibrations.

7. Brake Caliper Issues

If a brake caliper sticks or fails to retract properly, it can cause the brake pads to remain in contact with the rotor, generating heat and leading to vibrations. This issue typically causes the steering wheel to shake when braking at high speeds.

Symptoms of Brake Caliper Issues:

• Steering wheel shakes while braking at high speeds.
• A burning smell near the wheels.
• The vehicle pulls to one side during braking.

Solution:

Have a mechanic inspect the brake system and repair or replace the faulty brake caliper. Proper brake caliper function is crucial for safe and smooth braking performance.

8. Axle Problems

A damaged or bent axle can cause the steering wheel to shake while driving. This issue typically occurs after a significant impact, such as hitting a large pothole or being involved in an accident. If the axle is bent, the wheels won’t rotate smoothly, leading to vibrations in the steering wheel.

Symptoms of Axle Problems:

• Steering wheel shakes at any speed.
• Noticeable wobble or vibration in the vehicle.
• Clunking noises from the axle area.

Solution:

If the axle is bent or damaged, it will need to be replaced by a professional mechanic. Continuing to drive with a damaged axle can lead to further complications and costly repairs.

9. Tire Pressure Issues

Low or uneven tire pressure can cause the steering wheel to shake, as underinflated or overinflated tires do not make even contact with the road. Inconsistent tire pressure can lead to poor vehicle handling and increased tire wear.

Symptoms of Tire Pressure Issues:

• Steering wheel shakes while driving.
• Vehicle feels unstable or bounces on the road.
• The tire pressure warning light is illuminated.

Solution:

Check and adjust your tire pressure according to the manufacturer’s recommended levels. Ensure all tires are inflated to the same pressure to promote even tire wear and smooth driving.

Preventive Maintenance to Avoid Steering Wheel Shaking

Preventing steering wheel shaking while driving can save you from costly repairs and ensure your safety on the road. Here are some preventive measures to keep in mind:

1. Regular Tire Maintenance

• Tire Rotation: Rotate your tires regularly to ensure even wear and extend their lifespan. This can also prevent vibrations caused by uneven tire wear.

• Tire Balancing: Have your tires balanced every time you change them or notice vibrations at certain speeds.

• Wheel Alignment: Get a wheel alignment whenever you notice the vehicle pulling to one side, or after hitting a curb or pothole.

2. Brake System Inspections

• Regularly check your brake pads, rotors, and calipers to ensure they are in good condition. Replace worn components as needed to prevent shaking while braking.

3. Suspension and Steering Checks

• Have your suspension and steering systems inspected regularly, especially if you notice clunking noises, uneven tire wear, or a loose steering feel. Addressing worn or damaged components early can prevent steering wheel vibrations.

4. Monitor Tire Pressure

• Check your tire pressure at least once a month and before long trips. Keeping your tires inflated to the correct pressure improves vehicle handling and prevents uneven wear that can cause steering wheel shaking.

5. Inspect Wheels and Axles After Impacts

• If you hit a pothole or curb, have your wheels and axles inspected for damage. Addressing issues like bent wheels or axles early can prevent more severe problems down the road.

When to Seek Professional Help

If your steering wheel is shaking while driving and you are unable to pinpoint the cause, it’s essential to seek help from a professional mechanic. Ignoring the issue can lead to more severe problems, affecting your vehicle’s performance and safety. A trained mechanic will be able to diagnose the underlying cause and recommend the appropriate repair to resolve the issue.

Final Thoughts

Steering wheel shaking while driving is not only uncomfortable but can also indicate serious problems with your vehicle’s tires, brakes, suspension, or other components. By understanding the various causes—such as unbalanced tires, misaligned wheels, or worn brake rotors—you can take the necessary steps to address the issue and restore a smooth, safe driving experience. Regular maintenance, timely repairs, and preventive care are key to avoiding steering wheel vibrations and ensuring your vehicle remains in optimal condition.


Want more videos all about auto?
Subscribe to our YouTube channel👉Cartech Home

Rattling Noise in Engine: Causes, Symptoms, and How to Fix It

When it comes to car problems, one of the most unnerving sounds you can hear is a rattling noise coming from your engine. Not only is it alarming, but it can also be a sign of underlying issues that need immediate attention. Ignoring the noise could lead to more significant problems, including expensive repairs and potential engine failure.

In this article, we will discuss in detail everything you need to know about rattling noise in the engine. We’ll cover the common causes, symptoms, and the possible solutions. This comprehensive guide will also help you understand why the rattling noise in the engine should never be taken lightly and how to resolve it before it leads to serious damage.

What is a Rattling Noise in an Engine?

A rattling noise in an engine can range from a subtle, barely noticeable sound to a loud, alarming clatter. It often occurs when certain components in the engine are loose, worn out, or misaligned. These noises may occur during startup, while idling, or when accelerating.

In most cases, rattling noises are an indicator of something going wrong internally in your engine or with components surrounding the engine. Since the engine is made up of many moving parts that work together, even a minor issue with one component can result in a rattling sound.

Common Causes of Rattling Noise in Engine

Understanding what might cause a rattling noise in your engine is key to diagnosing and fixing the problem. Below are some of the most common causes of rattling noises in an engine:

1. Loose Heat Shields

The heat shield is a metal barrier that protects other parts of the engine from excessive heat. Over time, these shields can rust, become loose, or even fall off. When this happens, they can rattle, particularly when the car is idling or when driving at lower speeds. A loose heat shield is a common cause of engine rattling and can be easily fixed by securing or replacing the shield.

2. Worn Timing Chain or Timing Belt

The timing chain or belt is essential for synchronizing the rotation of the crankshaft and camshaft. A rattling noise could indicate that the timing chain or belt has become loose or is beginning to wear out. If left unchecked, this could lead to severe engine damage. The timing chain can stretch over time, and when it becomes too loose, it can create a distinct rattling noise, especially during startup.

3. Low Oil Pressure

If the oil level in the engine is too low or if the oil pressure drops, it can cause insufficient lubrication of engine parts, leading to rattling noises. Metal components rubbing against each other without proper lubrication can result in a rattling sound. Additionally, low oil levels or poor oil circulation can damage crucial engine components, such as the crankshaft or camshaft.

4. Valve Train Problems

The valve train consists of the valves, rocker arms, and pushrods that control the opening and closing of engine valves. If any part of this system becomes worn, misaligned, or loose, it can lead to a rattling noise. Often, valve lifters can become noisy if they’re not properly adjusted, causing a rattling sound when the engine is running.

5. Piston Slap

Piston slap occurs when the piston inside the cylinder wall becomes loose or misaligned. This causes the piston to “slap” against the cylinder walls, creating a distinctive rattling or knocking noise. Piston slap typically happens when the engine is cold and may subside as the engine warms up. However, persistent piston slap may indicate severe engine wear, especially in older engines.

6. Faulty Exhaust System

A damaged or misaligned exhaust system can also cause rattling sounds. The exhaust system includes pipes, mufflers, and catalytic converters, all of which are vulnerable to rust and damage. If any part of the exhaust system becomes loose or develops a crack, it can cause a rattling noise, especially when accelerating or driving over rough terrain.

7. Worn Engine Mounts

Engine mounts are designed to hold the engine in place and reduce vibrations. Over time, these mounts can wear out or become damaged. When this happens, the engine may shift slightly, causing a rattling or clunking sound, especially when the car is accelerating or decelerating.

8. Detonation or Pre-Ignition

Detonation, also known as engine knock or pre-ignition, happens when the air-fuel mixture in the cylinder ignites prematurely. This causes a rattling or knocking sound, often referred to as "pinging." Detonation can lead to engine damage if not addressed. This condition can be caused by using lower-octane fuel than required or incorrect timing settings.

9. Loose or Worn Serpentine Belt

The serpentine belt drives many of the engine’s accessories, including the alternator, air conditioning compressor, and power steering pump. If this belt becomes loose, worn, or damaged, it can produce a rattling noise. A worn belt tensioner can also cause the belt to become loose, leading to a rattling sound.

10. Catalytic Converter Issues

The catalytic converter helps reduce harmful emissions from the exhaust. If it becomes damaged or clogged, it can cause rattling noises, particularly when idling or driving at lower speeds. A rattling catalytic converter usually indicates that the internal honeycomb structure is breaking apart, which can eventually lead to complete failure of the converter.

Symptoms of Rattling Noise in Engine

Recognizing the symptoms of rattling noise in your engine can help you identify the problem early on. Some common symptoms associated with engine rattling include:

• Rattling sound at startup: This may indicate a problem with the timing chain or belt, especially if the noise is more pronounced when the engine is cold.

• Rattling noise when accelerating: A rattling noise that gets louder when you accelerate may point to issues with the exhaust system, serpentine belt, or engine mounts.

• Noise while idling: If the rattling occurs while the car is idling, it could be related to a loose heat shield, low oil pressure, or a faulty valve train.

• Engine performance issues: In some cases, a rattling noise may be accompanied by a decrease in engine performance, poor acceleration, or rough idling. This may indicate more serious issues like detonation, a worn timing chain, or engine mount failure.

How to Diagnose a Rattling Noise in Engine

Diagnosing the source of a rattling noise in an engine can be challenging, but following these steps can help pinpoint the problem:

1. Listen Carefully

The first step in diagnosing an engine rattle is to listen carefully to when and where the noise occurs. Does the rattling happen when the engine is cold or warm? Does it get louder when you accelerate? These clues can help you narrow down potential causes.

2. Inspect Engine Components

Check for visible signs of wear or damage on parts such as the serpentine belt, timing chain, exhaust system, and engine mounts. Loose or rusted components can often be the cause of rattling noises.

3. Check the Oil Level

Since low oil levels can lead to rattling noises, ensure that your engine has the proper amount of oil. If the oil is low or appears dirty, change the oil and monitor the engine for further noise.

4. Use a Diagnostic Tool

If you're unable to identify the source of the noise, using an OBD-II scanner can help detect any trouble codes that may indicate an issue with the engine or other related systems.

5. Consult a Professional

If you're unable to diagnose or fix the problem yourself, it's best to consult a professional mechanic. They will have the tools and expertise to diagnose the source of the rattling and recommend a solution.

How to Fix Rattling Noise in Engine

Once you’ve diagnosed the cause of the rattling noise, the next step is to address the issue. Here are some potential solutions for fixing a rattling engine:

1. Tighten or Replace Loose Parts

If the rattling is due to a loose heat shield, exhaust system, or engine component, tightening or replacing the part should resolve the issue.

2. Replace Worn Timing Chain or Belt

If the timing chain or belt is causing the rattle, it will need to be replaced. Timing chain or belt replacement is a more complex job and should be done by a professional mechanic.

3. Add or Change Engine Oil

If the rattling noise is due to low oil pressure, check the oil level and add oil if necessary. If the oil appears dirty or degraded, an oil change may be required.

4. Repair or Replace Exhaust System

For a rattling exhaust system, repairs may involve tightening loose components, replacing damaged pipes, or installing a new catalytic converter.

5. Replace Engine Mounts

If worn engine mounts are the cause, they will need to be replaced to prevent the engine from shifting and causing rattling or clunking noises.

6. Fix Valve Train Issues

Valve train issues may require adjusting the valve lifters or replacing worn rocker arms and pushrods.

7. Address Detonation or Pre-Ignition

To fix detonation issues, ensure you're using the correct octane fuel for your vehicle and check the engine timing to ensure it's properly adjusted.

Preventing Rattling Noise in Engine

Preventative maintenance is the best way to avoid rattling noises in your engine. Here are some tips to keep your engine running smoothly:

• Regular oil changes: Maintaining proper oil levels and changing the oil regularly will ensure that all engine parts are properly lubricated, reducing the likelihood of rattling noises.

• Routine inspections: Regularly inspect the engine’s components, including the exhaust system, belts, and mounts, to ensure they are in good condition.

• Use the correct fuel: Always use the recommended octane fuel for your vehicle to avoid detonation or pre-ignition issues.

• Address issues early: If you hear any unusual noises, including rattling, address the issue as soon as possible to prevent more serious damage.

Final Thoughts

A rattling noise in the engine should never be ignored, as it can be a sign of minor issues that can escalate into major engine damage if left unresolved. From loose components to serious issues like timing chain problems or detonation, identifying the cause of the noise and addressing it quickly is essential to keeping your engine running smoothly.

By understanding the common causes, symptoms, and solutions for rattling noises in the engine, you can take the necessary steps to diagnose and fix the problem. Regular maintenance, timely repairs, and paying attention to unusual sounds will help prevent costly repairs and ensure your car remains in good working order.

Whether you're dealing with a loose heat shield or a worn timing chain, addressing the rattling noise early will save you time, money, and the frustration of dealing with a potential engine failure down the road.

Want more videos all about auto?
Subscribe to our YouTube channel👉Cartech Home

Textual description of firstImageUrl

What Causes Tires to Wear in the Middle

All About Auto Image

What Causes Tires to Wear in the Middle?

Tire wear is a crucial aspect of vehicle maintenance, as it can directly impact a vehicle's performance, fuel efficiency, and overall safety. When it comes to tire wear, one common issue many drivers face is uneven tire wear—specifically, when tires wear out more in the middle than on the edges. Understanding what causes tires to wear in the middle is essential, not only to prolong the life of your tires but also to ensure a safer driving experience.

In this article, we’ll explore the primary reasons for middle tire wear, the potential risks associated with it, and how to prevent it in the future.

1. Overinflation of Tires

One of the most common causes of tires wearing in the middle is overinflation. When you put too much air into a tire, it increases the pressure inside, causing the tire to expand. This expansion makes the central part of the tire bulge out more than the edges, which leads to excessive wear in the middle of the tire.

How Overinflation Affects Tire Wear

• Concentration of Pressure: With overinflated tires, the vehicle's weight isn’t distributed evenly. Instead, it becomes concentrated in the middle section, accelerating wear in this area.

• Reduced Traction: Overinflated tires have a smaller contact area with the road surface, reducing traction, which can also lead to unsafe driving conditions, especially on wet or slippery roads.

Preventing Overinflation

The best way to avoid overinflation is to check your tire pressure regularly. Use a reliable tire pressure gauge and make sure your tires are inflated to the recommended pressure specified in your vehicle’s owner’s manual or on the sticker located on the driver’s side door frame.


2. High-Speed Driving Habits

Another factor that contributes to tires wearing in the middle is consistent high-speed driving. When you drive at high speeds, your tires are exposed to greater centrifugal force, which causes the center of the tire to expand and, in turn, makes it wear faster than the edges.

How High Speeds Cause Middle Wear

• Increased Heat and Friction: Driving at high speeds generates more heat and friction on the tires. This excess heat can make the tires expand slightly, which often causes them to wear more in the middle.

• Impact on Fuel Efficiency: Beyond just tire wear, high-speed driving is also known to reduce fuel efficiency. When your tires wear out in the middle due to high-speed driving, it affects the way your vehicle interacts with the road, which can decrease fuel economy.

Reducing Middle Wear from High Speeds

While high-speed driving can be thrilling, keeping your speed within recommended limits will reduce middle tire wear. Try to drive at a moderate speed, especially on highways, to protect your tires and maintain better control over your vehicle.

3. Incorrect Tire Size for the Vehicle

Using tires that are too narrow or too wide for your vehicle can lead to uneven tire wear. When the tire doesn’t fit the wheel correctly, it causes irregular contact with the road, often resulting in more wear in the center of the tire.

How Tire Size Affects Wear Patterns

• Mismatched Tire to Wheel: If a narrow tire is fitted onto a wider wheel, the tire will stretch, increasing the chance of wear in the middle. Similarly, an oversized tire on a smaller wheel can also cause abnormal wear.

• Impact on Handling: Improperly sized tires can compromise handling and safety. Over time, this can lead to uneven tire wear, including excess wear in the middle.

Choosing the Correct Tire Size

Always consult your vehicle's manual or speak to a tire professional to determine the right tire size for your car. Using the appropriate tire size not only helps with even tire wear but also ensures that your vehicle handles as intended by the manufacturer.

4. Underloaded Tires and Overloaded Vehicles

The weight your vehicle carries plays a role in how your tires wear. If your vehicle is consistently overloaded, it puts excess pressure on the tires, leading to abnormal wear patterns, including middle wear.

How Overloading Leads to Middle Tire Wear

• Excessive Pressure: When the vehicle is overloaded, the tires experience greater stress. This stress causes the tire to compress unevenly, often resulting in a bulging effect that concentrates wear in the middle.

• Reduced Tire Lifespan: An overloaded vehicle not only puts more pressure on the tires but also wears out suspension components faster. This can further impact tire wear, reducing the overall lifespan of your tires.

Maintaining Proper Vehicle Load

Avoid exceeding the maximum load rating specified by your vehicle's manufacturer. The tire pressure recommended in your manual is based on a typical load, so if you frequently carry heavy loads, consider getting tires designed for heavier loads, or adjusting the tire pressure accordingly—but always within safe limits.

5. Driving Habits and Road Conditions

The way you drive and the roads you drive on can also affect your tire wear. Quick accelerations, sharp turns, and sudden stops increase tire wear and, depending on driving habits, can concentrate this wear in certain areas, such as the middle.

How Driving Habits Influence Wear Patterns

• Abrupt Braking and Accelerating: Abrupt stops or quick starts can cause a lot of stress on the tire’s center, leading to more wear in that area.

• Consistent Highway Driving: Long stretches of highway driving at a constant high speed can also cause middle tire wear due to sustained contact and pressure in the tire’s central area.

Adapting Driving Habits to Reduce Tire Wear

Driving at moderate speeds, avoiding sudden stops and starts, and taking turns gradually can help prevent excessive tire wear. Additionally, avoid rough roads whenever possible to prolong the life of your tires.

6. Misalignment and Suspension Issues

Though less common than other factors, misalignment or suspension problems can also lead to tires wearing in the middle. Misalignment typically causes uneven wear on the edges, but in some cases, it may result in central wear, especially if paired with overinflation or poor driving habits.


How Misalignment and Suspension Problems Contribute to Tire Wear

• Increased Pressure on Middle Tread: When alignment or suspension is off, it can place unusual stress on certain parts of the tire. While edge wear is common, middle wear can occur if the tires are already compromised by overinflation or other factors.

• Reduced Vehicle Control: Misalignment and suspension issues not only affect tire wear but also compromise handling. This makes it more difficult to control your vehicle, especially during turns and at high speeds.

Addressing Misalignment and Suspension Problems

Routine maintenance checks on alignment and suspension will help prevent these issues. If you notice unusual tire wear or your vehicle pulling to one side, it’s time to have a professional inspect the alignment and suspension.

7. Inconsistent Tire Rotation and Maintenance

Regular tire rotation is an essential part of tire maintenance. Failure to rotate tires as recommended by the manufacturer can lead to uneven tire wear, including excessive wear in the middle.

How Tire Rotation Affects Wear Patterns

• Distribution of Wear: Tire rotation helps distribute wear evenly across all tires, maximizing their lifespan. By rotating your tires, you avoid concentrating wear on one particular section, such as the middle.

• Enhanced Vehicle Performance: Rotating tires not only reduces the chance of uneven wear but also ensures that your vehicle performs optimally, as it maintains balanced traction and handling.

Regular Tire Rotation

To avoid middle tire wear, rotate your tires every 5,000 to 7,500 miles or as recommended by your vehicle’s manufacturer. This practice will help you achieve more even wear, saving you money on replacement tires in the long run.

8. Tire Quality and Age

Finally, the quality and age of your tires can also influence wear patterns. Older tires or low-quality tires may wear down faster and more unevenly, with the middle tread often being the first to go.

How Tire Quality Affects Wear

• Compromised Materials: Cheap or worn-out tires may not withstand road conditions as well as higher-quality options. They might lack the necessary structure to handle normal driving loads, leading to premature wear in the middle.

• Safety Risks: Old, worn-out tires not only wear unevenly but also pose a risk to safety. Worn tread can lead to reduced traction, making it harder to stop or control your vehicle in adverse conditions.

Choosing the Right Tires

Investing in high-quality tires and replacing them once the tread wears down to a safe limit (usually 2/32 of an inch) can help prevent uneven wear. Additionally, ensure that you store your vehicle and tires in a cool, dry place, as excessive heat and sunlight can accelerate tire aging.

Final Thoughts

Tires wearing in the middle is a common issue that can be caused by overinflation, high-speed driving, incorrect tire size, overloading, poor driving habits, misalignment, lack of maintenance, and low tire quality. Each of these factors can contribute to the middle tread wearing out faster than the edges, ultimately reducing the lifespan of your tires and compromising your vehicle’s performance and safety.

To avoid premature tire wear, practice regular tire maintenance, including checking tire pressure, rotating tires, and ensuring proper alignment. Adapting your driving habits and maintaining your vehicle’s load within recommended limits can also help prolong the life of your tires.

Understanding what causes tires to wear in the middle is the first step to taking better care of your tires. By following these simple preventive measures, you can enjoy a smoother, safer ride and get the most out of your tires.


Want more videos all about auto?
Subscribe to our YouTube channel👉Cartech Home
Textual description of firstImageUrl

From a Stop I Can't Shift Into First Gear: Causes & Fixes

All About Auto Image

When you're ready to start driving, not being able to shift into first gear can be frustrating and concerning. Whether it’s a manual or automatic transmission, shifting issues can stem from various underlying problems. This article is designed to help you understand why your car might struggle to engage first gear from a stop, what common causes are, and how you can troubleshoot and fix the problem. We’ll explore both the technical aspects of what might be causing this issue and practical steps to resolve it.

Understanding the Role of First Gear

First gear is essential for starting your car from a stop because it provides the most torque, allowing you to gradually accelerate. When you’re unable to shift into this gear, it can prevent you from moving at all, which may result in an inconvenient or potentially dangerous situation. For this reason, it’s crucial to know the root causes and how to address them.

Common Causes of Not Being Able to Shift Into First Gear

Several reasons might explain why you’re unable to shift into first gear from a stop. Here are the most common causes:

1. Clutch Issues

• Clutch Not Fully Engaging or Disengaging: If the clutch isn’t engaging or disengaging fully, it can prevent you from shifting into first gear. This might be due to worn clutch components, such as the clutch plate, pressure plate, or release bearing.

• Air in the Clutch Line: For vehicles with a hydraulic clutch system, air bubbles in the clutch line can disrupt the system’s ability to fully disengage, causing difficulty in shifting into gear.

• Worn Clutch Components: Over time, the clutch plate, pressure plate, and other clutch components wear out. This can make it harder to engage first gear, especially when you’re starting from a stop.

2. Low or Contaminated Transmission Fluid

• Low Fluid Levels: Transmission fluid is essential for proper gear function. If the fluid is too low, the system may not have enough lubrication, which can result in rough or difficult shifting.

• Contaminated Fluid: Old, dirty, or contaminated transmission fluid can cause the components to stick, making it harder to shift into first gear.

3. Shift Linkage Problems

• Damaged or Misaligned Shift Linkage: The shift linkage is responsible for transferring your shift movement to the transmission. If it’s damaged or misaligned, it can prevent you from shifting into first gear.

• Loose Cables: Over time, the shift cables may become loose or detached, leading to difficulty in engaging first gear from a stop.

4. Transmission Synchronizer Wear (Manual Transmissions)

• Worn Synchronizers: In manual transmissions, synchronizers are responsible for matching the speeds of the gears before they engage. If the first-gear synchronizer is worn, it can cause problems when trying to shift from a stop.

5. Faulty Transmission Solenoids (Automatic Transmissions)

• Malfunctioning Solenoids: Transmission solenoids control the flow of fluid within the transmission. If one of these solenoids is malfunctioning, it may make it difficult to shift into first gear, particularly in an automatic transmission.

Troubleshooting Steps: How to Diagnose and Fix the Issue

To determine the exact cause of why you can’t shift into first gear, there are several troubleshooting steps you can take. Here’s a step-by-step guide to help you identify the root problem and address it:

Step 1: Check the Clutch System

1. Test the Clutch Pedal: Press the clutch pedal down fully and then attempt to shift into first gear. If the clutch feels soft or fails to engage, you might have air in the hydraulic system or worn-out clutch components.

2. Inspect the Clutch Fluid: Check the clutch fluid reservoir (for hydraulic clutches) to ensure there is enough fluid. If the fluid is low, fill it up and check for leaks.

3. Examine the Clutch Components: If you’re comfortable, examine the clutch components, including the clutch plate, release bearing, and pressure plate, for signs of wear. A mechanic might need to do a deeper inspection.

Step 2: Check Transmission Fluid Levels

1. Locate the Dipstick: In vehicles with a dipstick for transmission fluid, you can check the fluid level while the engine is warm and running.

2. Assess the Fluid Quality: If the fluid appears dark, dirty, or has a burnt smell, it’s likely contaminated and should be replaced.

3. Top Up if Necessary: If the transmission fluid is low, add the recommended fluid type to your vehicle. Check the owner’s manual for specific instructions.

Step 3: Inspect the Shift Linkage

1. Examine the Linkage Connection: Look at the shift linkage under the vehicle or in the engine bay. If you notice any broken or damaged parts, this could be the reason for your shifting issue.

2. Adjust or Replace Linkage Components: If the linkage appears loose or misaligned, adjusting it may solve the problem. You may need a mechanic to replace any worn or damaged parts.

Step 4: Test the Transmission Synchronizer (Manual Only)

1. Perform a Road Test: Take your vehicle for a short drive and attempt to shift into first gear from a stop repeatedly. If it continues to resist, the synchronizer for first gear might be worn.

2. Consult a Transmission Specialist: Replacing or repairing a synchronizer typically requires the assistance of a transmission specialist, as it involves opening up the transmission.

Step 5: Check Transmission Solenoids (Automatic Only)

1. Monitor Shifting Patterns: If you’re experiencing issues shifting into first gear, pay attention to other gears. Consistent problems can point to a faulty solenoid.

2. Use a Diagnostic Scanner: A scanner can read the transmission codes to identify solenoid issues. If one is faulty, it may need to be replaced by a professional.

Common Fixes for "From a Stop I Can’t Shift Into First Gear"

Once you’ve identified the cause, there are several fixes you can consider:

1. Clutch System Repairs

• Bleed the Clutch Line: For hydraulic clutches, bleeding the line will remove air and restore proper function.

• Replace Worn Components: Replace any worn-out clutch components, including the clutch plate and release bearing, to improve shifting.

2. Transmission Fluid Change

• Flush and Replace Fluid: If your transmission fluid is old or contaminated, a fluid change can improve shifting. Be sure to use the fluid specified for your vehicle.

3. Adjust or Replace Shift Linkage

• Tighten or Realign the Linkage: If your shift linkage is loose or misaligned, tightening it may resolve the problem.

• Replace Damaged Components: For severely worn or broken linkage components, replacements might be necessary.

4. Synchronizer Replacement (Manual Transmission)

• Replace the First-Gear Synchronizer: This will likely require professional assistance but will restore smooth shifting into first gear.

5. Transmission Solenoid Replacement (Automatic Transmission)

• Replace Malfunctioning Solenoids: If your diagnostic scanner reveals a solenoid issue, have it replaced by a mechanic. This fix can resolve shifting problems.

Preventing Issues with First Gear Shifting

Regular maintenance can help prevent issues with first gear shifting. Here are some tips to ensure that your car’s transmission remains in good condition:

1. Regularly Check and Replace Transmission Fluid

• Monitor fluid levels and change the fluid according to the manufacturer’s recommendations to keep your transmission operating smoothly.

2. Inspect and Maintain the Clutch System

• If you have a manual transmission, keep an eye on clutch wear and replace components as needed. Hydraulic systems should be inspected for leaks and topped off as necessary.

3. Be Gentle on the Transmission

• Avoid aggressive driving habits, such as slamming into gear, as these can accelerate wear on the transmission and clutch components.

When to See a Professional Mechanic

If you’re unable to determine the cause of your shifting issue, or if the problem persists after trying the fixes mentioned above, it’s time to consult a professional mechanic. Some transmission issues, such as synchronizer wear and solenoid failure, require specialized tools and expertise to repair.

Final Thoughts

Experiencing difficulty shifting into first gear from a stop can be inconvenient, but it’s often a sign of underlying issues that can be addressed. By understanding the common causes and following these troubleshooting steps, you can identify and resolve the problem. Whether it’s a simple adjustment, a fluid replacement, or a more extensive repair, addressing this issue promptly will help keep your car running smoothly. Regular maintenance is key to preventing future transmission issues, so be sure to keep an eye on your fluid levels and clutch system to ensure optimal performance.

Car Making a Clicking Noise: What You Need to Know

If your car is making a clicking noise, you’re not alone. This is a common issue that can signal a variety of problems. From something as simple as a loose part to more serious issues like engine damage, clicking noises should never be ignored. They can happen when starting the car, while driving, or even when turning. This article will explore the potential causes of a car making a clicking noise, how to diagnose the problem, and what to do about it.

Common Causes of a Car Making a Clicking Noise

There are several reasons why your car might be making a clicking noise. Some of these are harmless, while others require immediate attention. Below are the most common causes:

1. Faulty CV Joints

One of the most frequent reasons for a car making a clicking noise, especially when turning, is a faulty CV (constant velocity) joint. The CV joint is responsible for transferring power from the transmission to the wheels. Over time, the joint can wear out due to constant movement and exposure to dirt and moisture.

Signs of a Faulty CV Joint:
• Clicking noise when turning, especially sharp turns.
• Grease on the inner edge of the tires.
• Vibrations when accelerating.

If you suspect that your CV joint is the problem, it’s important to have it repaired as soon as possible. Ignoring the issue can lead to more severe damage to your car's drivetrain.

2. Loose or Worn Out Engine Components

Your car’s engine is made up of many moving parts. Over time, some of these parts can become loose or worn out, causing a clicking noise. Loose valves, connecting rods, or even an issue with the crankshaft can cause this type of sound.

Signs of Engine Component Issues:
• Clicking noise increases with engine RPMs.
• Poor engine performance.
• Check engine light may come on.

If the clicking noise is coming from the engine, it’s essential to have a mechanic inspect it as soon as possible. Engine problems, if left untreated, can lead to costly repairs or even engine failure.

3. Battery or Starter Problems

If your car is making a clicking noise when you try to start it, but it won’t turn over, the problem is likely with the battery or starter motor. A weak battery doesn’t have enough power to start the engine, and the clicking sound comes from the starter motor attempting to engage.

Signs of Battery or Starter Problems:
• Clicking noise when turning the key.
• Dim lights or electrical accessories not working.
• Car won’t start at all.

In most cases, the solution is as simple as charging the battery or replacing it if it's old. However, if the starter is faulty, you may need a replacement.

4. Low Oil Level

A car making a clicking noise can sometimes be caused by low engine oil. The engine relies on oil to lubricate its moving parts. If the oil level is low, the parts can grind against each other, producing a clicking or ticking noise.

Signs of Low Oil Level:
• Clicking noise from the engine, especially at idle.
• Oil warning light on the dashboard.
• Poor engine performance.

Checking the oil level is a simple process that you can do yourself. If the oil is low, adding the recommended type of oil should resolve the noise. However, if the noise persists, there may be an internal engine problem that requires professional attention.

5. Exhaust Leaks

An exhaust leak can also cause a clicking noise, especially if the leak is near the engine. Exhaust leaks can create a ticking sound as gases escape through a crack or hole in the exhaust system.

Signs of an Exhaust Leak:
• Clicking or ticking noise from under the car.
• Exhaust smell inside the car.
• Reduced fuel efficiency.

Exhaust leaks should be repaired as soon as possible, not only to stop the noise but also because they can release harmful gases like carbon monoxide into the cabin.

6. Damaged Wheel Bearings

A damaged or worn-out wheel bearing can make a clicking or popping noise, particularly when the car is in motion. Wheel bearings are essential for smooth rotation of the wheels, and when they wear out, they can make all kinds of noises, including clicking.

Signs of a Bad Wheel Bearing:
• Clicking noise while driving.
• Grinding or growling noise from the wheels.
• Excessive play in the steering wheel.

Ignoring a damaged wheel bearing can lead to more significant problems, such as the wheel seizing up, so it’s important to have it checked and replaced if necessary.

7. Brake Issues

Your car’s braking system can also be a source of clicking noises. This can happen if the brake pads are worn out or if there’s debris lodged between the brake rotor and pads. Clicking sounds when braking can also indicate that the brake caliper is loose or damaged.

Signs of Brake Problems:
• Clicking noise when applying the brakes.
• Reduced braking efficiency.
• Pulsation in the brake pedal.

Brake issues should always be addressed immediately to ensure your safety on the road.

8. Loose or Worn Belts

Belts play a critical role in your car’s engine, and a worn-out or loose belt can cause a clicking or ticking noise. Over time, belts can stretch, crack, or slip, which can lead to various engine noises, including clicking.

Signs of Belt Issues:
• Clicking noise from the front of the engine.
• Squealing or chirping noise.
• Visible wear or cracks on the belts.

If you suspect a belt issue, it’s best to have it inspected and replaced if necessary.

Diagnosing a Clicking Noise in Your Car

When diagnosing a car making a clicking noise, it’s essential to pay attention to when and where the sound occurs. This can help pinpoint the cause of the problem. Below are some steps you can take to diagnose the issue:

Step 1: Determine When the Noise Occurs

• When starting the car: If the clicking noise happens when you try to start the car, the problem is likely related to the battery, starter, or alternator.

• While turning: A clicking noise when turning is often a sign of a faulty CV joint or wheel bearing.

• While driving: If the noise occurs while driving, it could be related to the engine, exhaust system, or belts.

• When braking: Clicking when applying the brakes is typically a brake system issue.

Step 2: Check for Warning Lights

• Check your dashboard for any warning lights, such as the oil light, check engine light, or battery light. These can provide clues as to what might be causing the clicking noise.

Step 3: Inspect Under the Hood

• Visually inspect your engine bay for any loose or damaged components. Check the oil level and look for any visible signs of wear on belts and hoses.

Step 4: Listen Carefully

• Try to determine the exact location of the noise. Is it coming from the engine, wheels, or brakes? Identifying the location of the noise can help narrow down the potential causes.

Step 5: Take It for a Test Drive

• Drive the car and pay attention to how the noise behaves. Does it get louder with speed or when turning? Does it stop when you accelerate or brake?

How to Fix a Car Making a Clicking Noise

Once you’ve diagnosed the cause of the clicking noise, it’s time to fix it. Below are some common solutions based on the type of problem:

1. CV Joint Replacement. If the CV joint is worn or damaged, it will need to be replaced. This is a job that’s best left to a professional mechanic, as it involves removing the axle and disassembling the joint.

2. Battery Replacement. If the clicking noise occurs when starting the car, you may need to replace the battery. Batteries typically last 3-5 years, so if yours is older than that, it’s a good idea to replace it.

3. Oil Change. If the noise is due to low oil levels, an oil change should fix the problem. Be sure to use the correct type and amount of oil for your car.

4. Exhaust System Repair. If you have an exhaust leak, the damaged section of the exhaust will need to be repaired or replaced. This can be done by a mechanic or at a muffler shop.

5. Brake Pad Replacement. Worn brake pads can cause a clicking noise, and replacing them should resolve the issue. It’s also a good time to check the brake rotors and calipers for any signs of wear.

6. Wheel Bearing Replacement. If the noise is coming from a damaged wheel bearing, it will need to be replaced. This is a job for a professional mechanic.

Preventing Clicking Noises in Your Car

Preventative maintenance is key to avoiding clicking noises in your car. Here are some tips to keep your car running smoothly:

• Regular Oil Changes: Keeping your engine well-lubricated can prevent many issues that cause clicking noises.

• Inspect Belts and Hoses: Regularly check your engine’s belts and hoses for signs of wear or damage.

• Brake Inspections: Have your brakes inspected regularly to ensure that the pads and rotors are in good condition.

• Check Your Battery: Keep your battery terminals clean and ensure that the battery is in good working order.

• Listen for Unusual Noises: If you notice any new noises, address them right away to prevent further damage.

Final Thoughts

A car making a clicking noise can be caused by a variety of issues, from simple fixes like low oil to more serious problems like engine or drivetrain damage. Diagnosing the problem early and addressing it promptly can prevent costly repairs down the line. By understanding the common causes and knowing what to look for, you can keep your car running smoothly and safely. If you’re ever in doubt, it’s always a good idea to consult with a professional mechanic.

Want more videos all about auto?
Subscribe to our YouTube channel👉Cartech Home